Introduction to Git
Git is the distributed version control system. It allows us to have “versions” of a project and tracks the changes made to the code over the time. Also, we can compare two versions and undo the changes if necessary. Git plays a vital role on larger projects in which more than one developers are working on the same project.
For Further exploration, refer: https://git-scm.com/videos
Steps to Install Tortoise
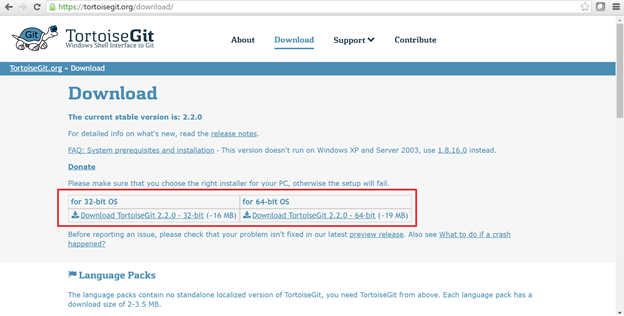
- Go to link https://tortoisegit.org/
- Click Download.
- Choose the download link that suits for your system (either for 32-bit OS or for 64-bit OS)
4.Once the download is completed, follow the below steps to Install tortoise:
- Open Set up Wizard.
- Click Next [Symbol] Next [Symbol]Install.
- Select Yes to install.
- Click Finish.
Steps to Create Account in GitHub
- Go to the link https://github.com/
- Fill in the following fields: Username, Email Address and Password for the GitHub Account.
- Click Sign up for GitHub Button.
- Choose Unlimited public repositories for free as personal plan.
- Click Continue Button.
- Provide the general information, if necessary. Otherwise skip this step.
- Click Submit Button.
To Create a Repository in GitHub
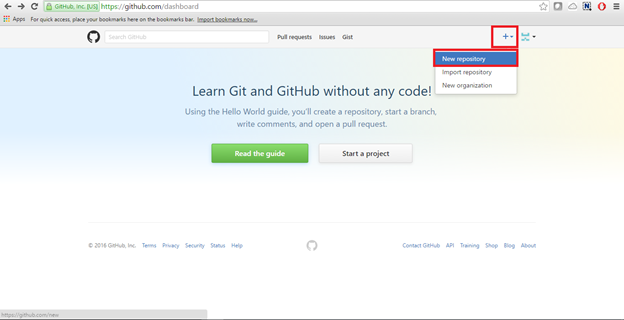
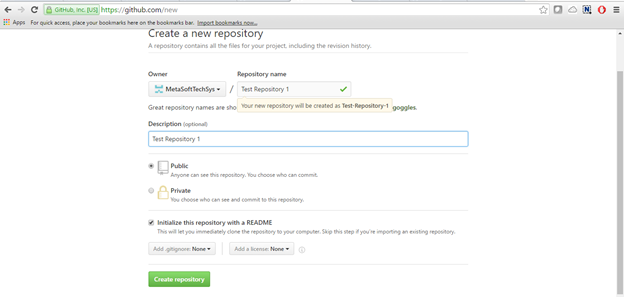
- Click the plus on the top right corner. Choose New Repository.
- Enter the name and Description (Optional) of the repository.
- Select Initialize this repository with a README.
- Click Create Repository Button.
Steps to Create Branch
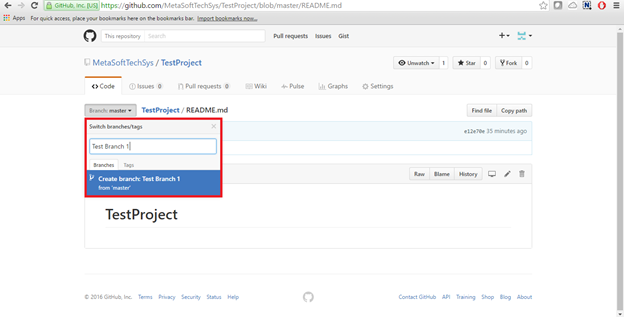
- Go to the Repository.
- Click the Branch: Master drop down.
- Give name for the Branch and Click Create Branch
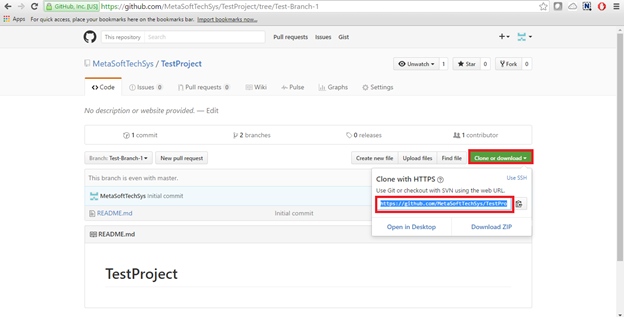
To Clone the Git to local System
- Go to the repository. Click Clone or Download Button
- Copy the URL from the drop down.
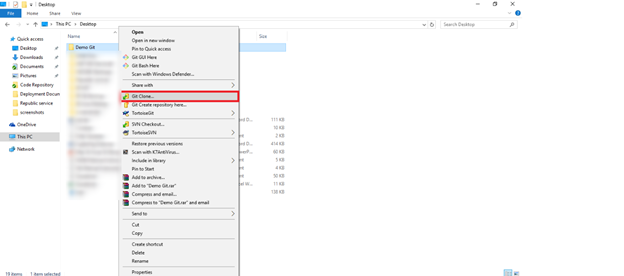
- Create a New Folder in your System.
- Right Click on the folder. Choose Git Clone.
- In the dialog box, paste the above copied URL in URL field.
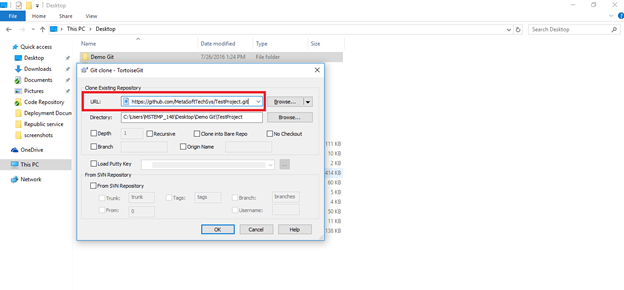
- Click OK Button.
Command to clone Repository,
Git clone https://github.com/your-username/repository-name
e.g.: Git clone https://github.com/MetaSoftTechSys/TestProject
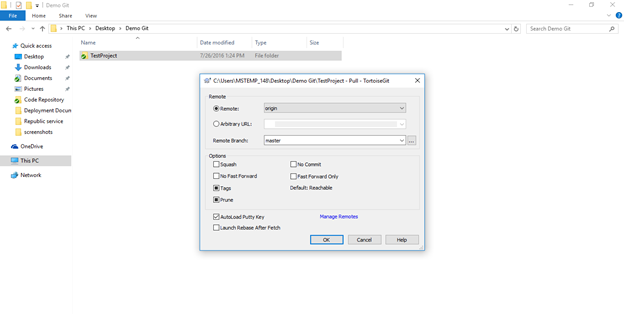
To Pull code from GitHub
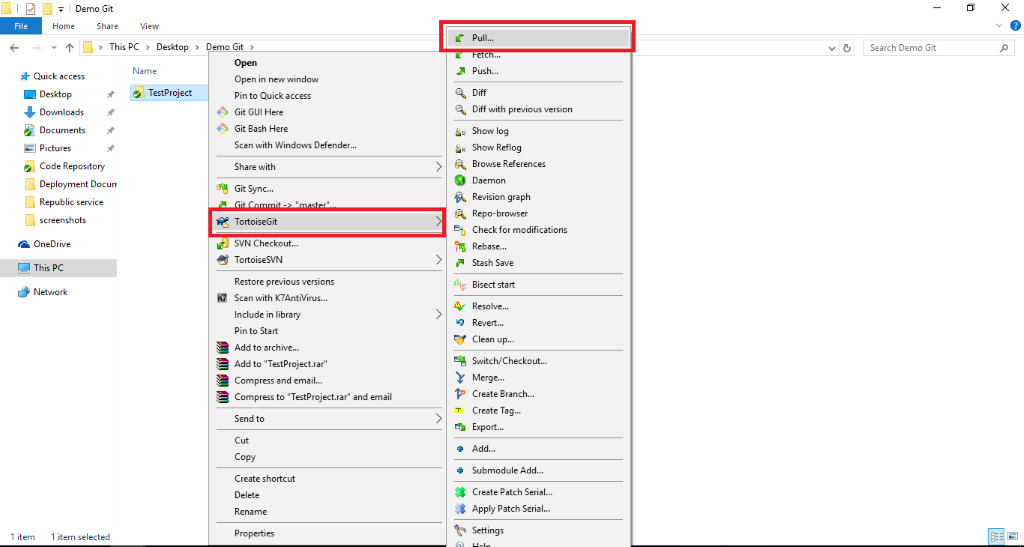
- Right Click on the folder (That is cloned in the above step)
- Choose TortoiseGit [Symbol] Pull [Symbol] Click Ok.
- To view the difference, Click Pulled Diff.
Command to pull:
Git pull
To Commit code to GitHub
- Place the code in the folder to which want to commit.
- Right Click on the root folder. Choose “Git Commit [Symbol] …”.
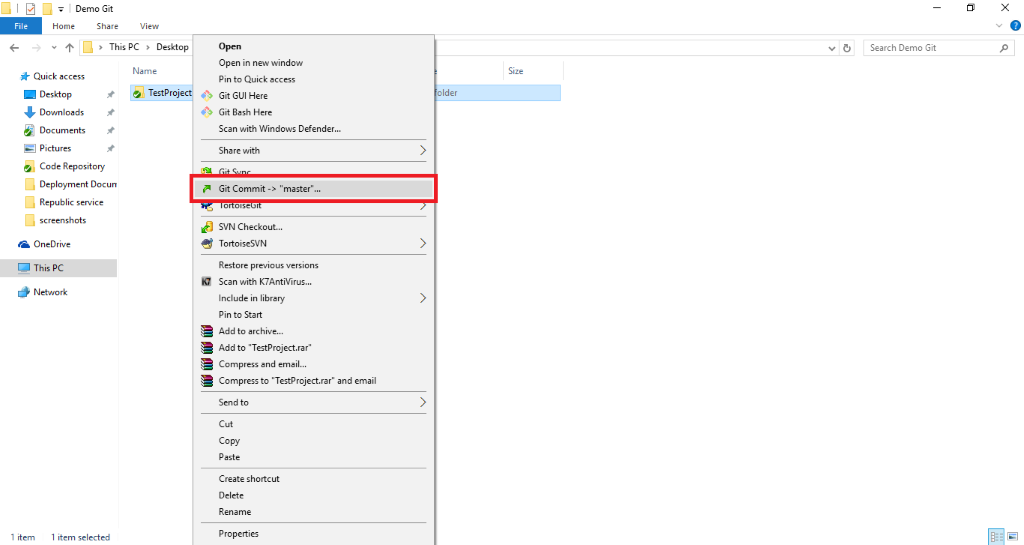
- Provide the Message for Commit.
- Select the files which you want to commit.
- Click Ok Button.
Command to Commit:
Git Commit –all
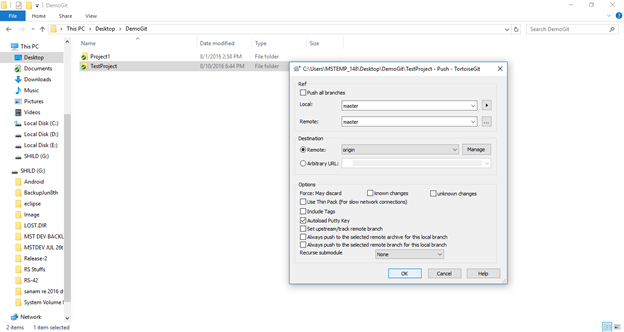
To Push Code to GitHub
- Right click on the Folder. Choose TortoiseGit [Symbol] Push.
- Select the branch to which you want to push.
- Click Ok Button.

Command to Push:
Git Push
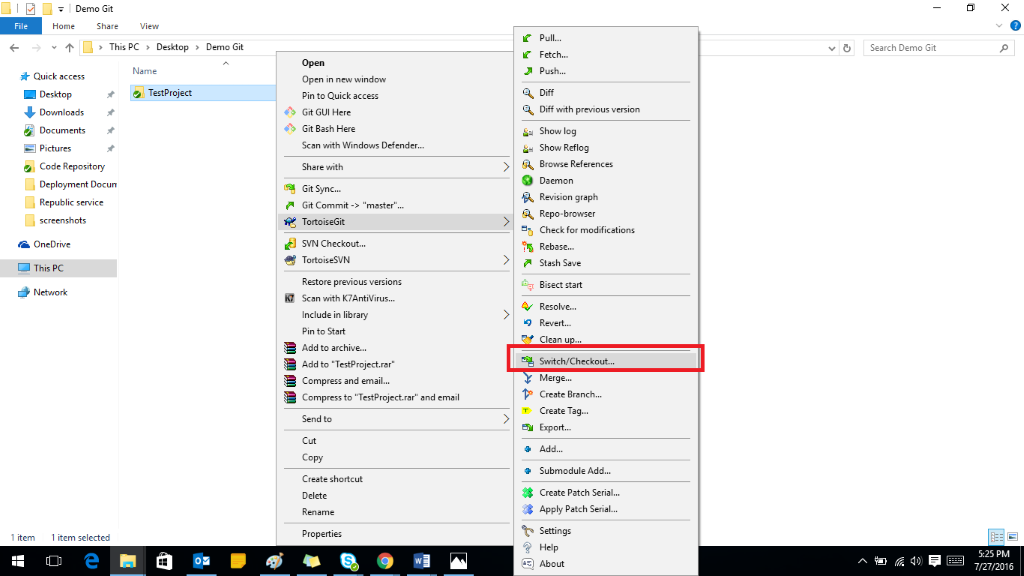
To Change the Branch
- Right Click on the Folder. Choose TortoiseGit [Symbol] “Switch/Checkout…”.
- Select the branch from the list.
- Click Ok.
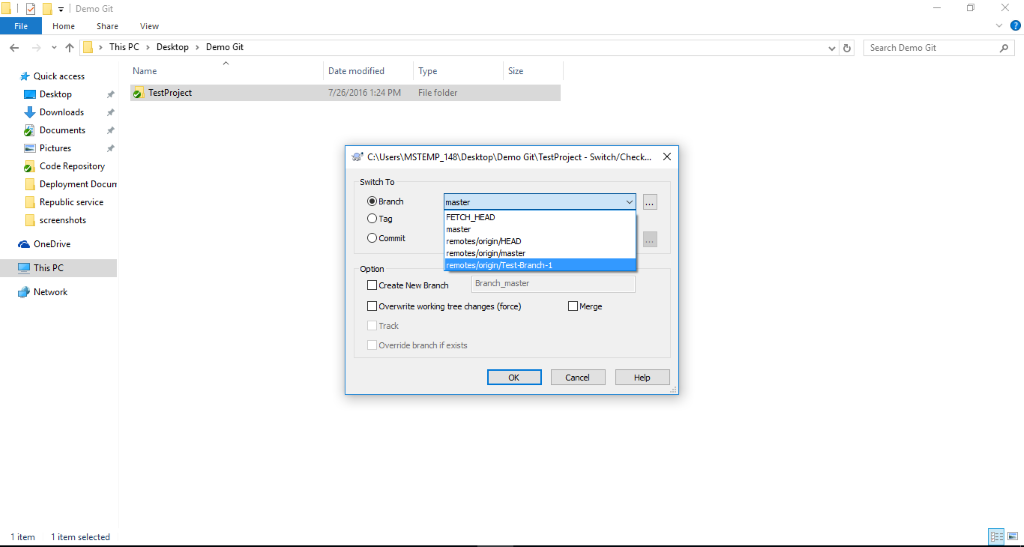
Command to change branch:
Git checkout branch-Name.
e.g.: Git checkout test-branch –1
Jenkins – Continuous Integration (IC)
1. Introduction
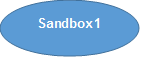
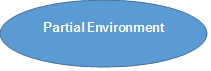
Jenkins is a tool to perform continuous integration and build automation. We can trigger the execution based on time or event. For example, every 20 minutes or after a new commit in a Git repository. It can be integrated with several testing environments (Sandboxes)–which means whenever a new commit is made in Git repository, integration with several sandboxes can be initiated at the same time.
Workflow:


Commit the changes to Git.

Jenkins automatically kickoff


Changes deployed to multiple environments.

2. Code Delivery Process
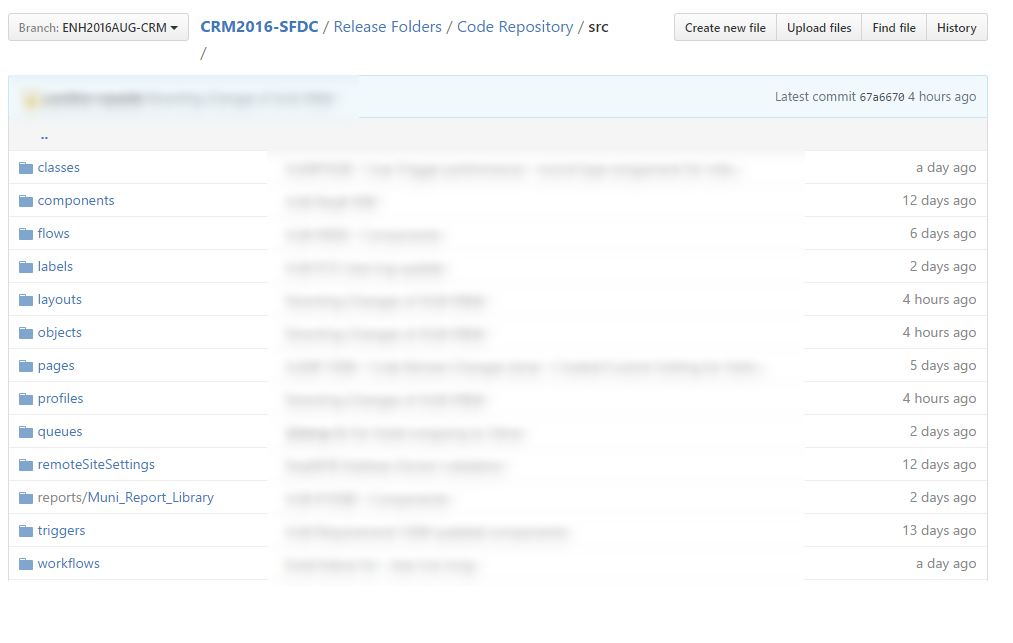
a) Develop and Commit changes to the Git.
Developers can develop and validate their code in the sandbox. Once the development is complete, the code shall be committed and pushed to Git. The below image shows the Code committed to GitHub.
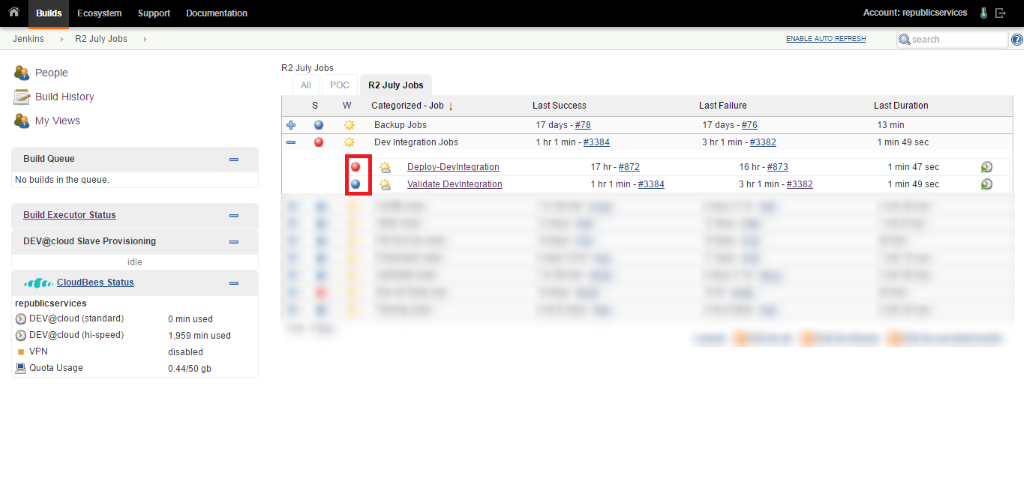
b) Jenkins validation.
Whenever the codes are pushed to Git, Jenkins automatically starts validation to the Connected Environment (QA Sandbox, Full Copy Sandbox, etc.).
c) Notification about the build success or failure.
If the ball near the job is red color, it indicates that the validation failed. The blue color indicates that the validation is success. The User is notified about error if the validation fails.
If the validation fails, we must fix the error and again commit the changes to Git.
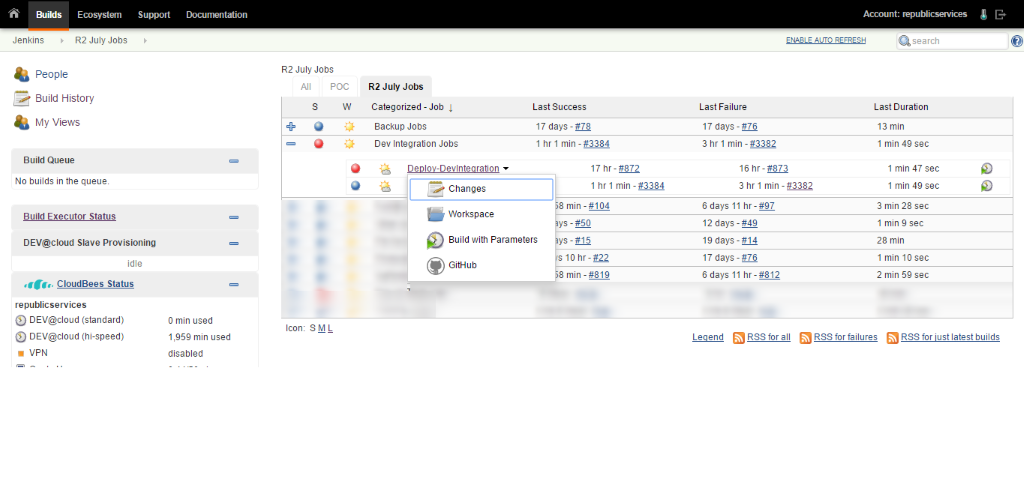
d) Deploy Changes
Once the validation is successful, deploy the changes to the environment manually.
To deploy Changes,
1.Click Deploy Job Name [Symbol] Build with Parameters and [Symbol] Build.
Conclusion:
Using Jenkins, we can discover deployment issues earlier and automate build to multiple environment on each commit to the repository.
Reference Link
