Agile Accelerator is a Manged Application available free in the App Exchange. It is used for managing the agile product development in Salesforce. An entire team can track their project details like user stories, bugs, reports, and more from within Salesforce.
The Agile Accelerator App secures our information safely and is fully integrated with other Salesforce apps such as Sales Cloud and Service Cloud. We can connect user stories & bugs to CRM cases and accounts.
Agile Accelerator can support in the Salesforce1 platform and integrate with other system.
Create and Manage team
The first step is to create a team to use agile. The Agile team can have members such as, software engineers, architects, programmers, analysts, QA experts, testers, and UI designers etc. Once the team is created, assign the roles and responsibilities to the team members.
Steps to create and edit the team:

- Select the “Team” from the tab and Click the “All Team” link at top of the page.
- Enter the name for “Team name” and “Department” fields.
- Enter the name, roles and Allocation of the team members.
Note: Roles and Allocation are not required fields but knowing their Allocations is good for Sprint planning.
- Enter the Product tag and it is required for creating bugs and stories for the team. Click “Save”.
Create Product Tags
Product tags are used for organizing the team work in the Logical categories. We can use product tag from the “team tab” and the “product tag” tab.
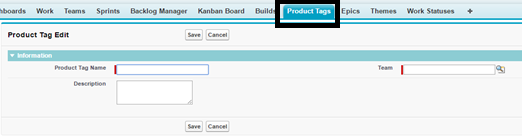
Steps to Create a product tag:
Select the “Product tag” tab and enter the Name of the Product tag and select the “Team” and click “Save”.
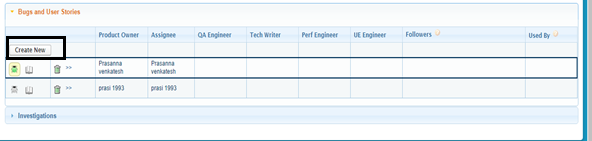
1.Click the “Create New” button to create an assignment rule.
2.Select the bug or user stories icon to select the type of work.

Note: If we don’t select any of this icon, validation will fire
3. Enter the details of product Owner and assignee as they are required fields.
4.Save the product tag.
Let’s create our first sprint
Once we have created the team. we must create the Sprint to organize the project work in an effective manner. We can create any duration up to one month.
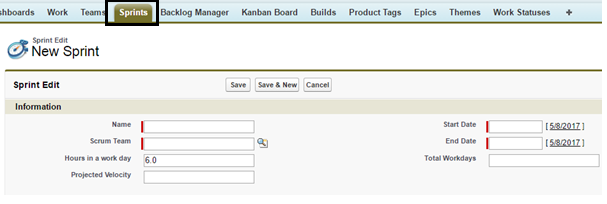
Steps to create a Sprint
1.Click the sprint tab. Then, click the new button.
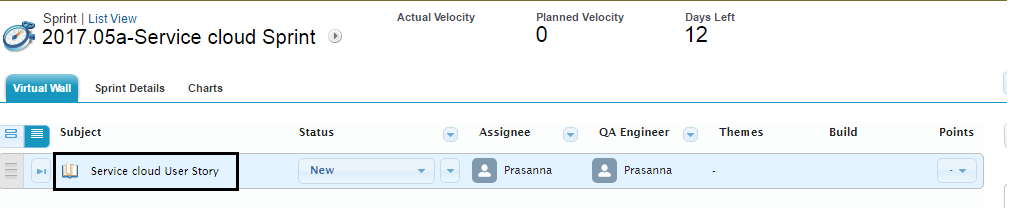
2.Enter the name of the Sprint. The suggested format is yyyy.mm.sprint number(a-f).team name.
Ex: If the sprint cover 2 weeks. then 1st week would be 2017.05a-Service cloud Sprint.
and the 2nd week will be 2017.05b-Service cloud Sprint.
Note: The sprint naming convention has a validation rule on the Sprint object. We can change or deactivate the validation rule.
3. Enter the mandatory fields like scrum team, start date, and end date.

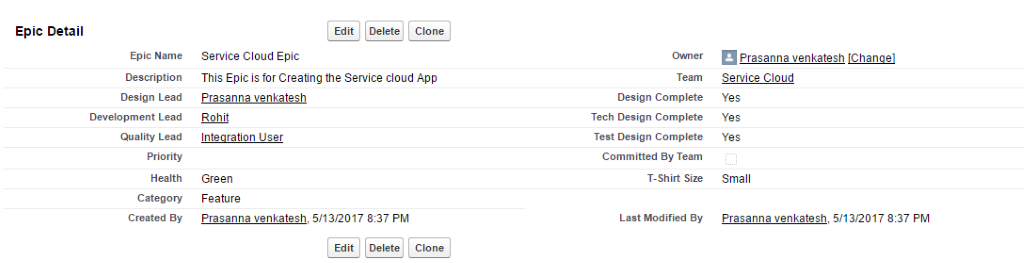
Salesforce Epic:
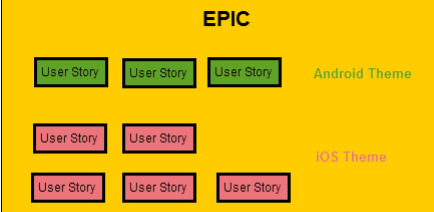
An Epic is a larger user Story that can’t be finished within a single sprint; even its takes more than a Sprint to complete. Because Epics is for large projects, Agile team split them down into smaller, manageable User Stories.
Epics is useful to judge the scope of the development work. As we split the Epics into smaller stories, we can group the similar stories together by using themes.
Ex: If we create a mobile Application, we can organize the user stories with an iOS theme and android theme.
There are two options for Creating the Epic Record:
1.In the Epic tab, click the “New work”.
2.In the user story, Enter the epic name in the Epic box detail page.
The Following screenshot shows the sample Epic details.
Salesforce Themes
By using themes, we can easily group the similar user stories together. Some people refer to them as tags. All the user stories assigned to the theme and we can find the related stories.
By using “Add work to theme” button, we can search and assign the work to theme.

Create a work records
Once we have created the sprints, we can start adding work records. Three types of work records are there for Users stories, bugs and Investigation. Using the work tab or “New work” button, we can create the user stories and bugs on the sprint virtual wall
Let’s create our first user story:
1.click the “Work” tab. Then click the “new” button. (or) click the “Sprint” tab. Select the “New Work.”
2.There are 3 three types available: Users stories, bugs and Investigation. Select any one of them.
3. Let’s select the “Users stories” and click “continue”.
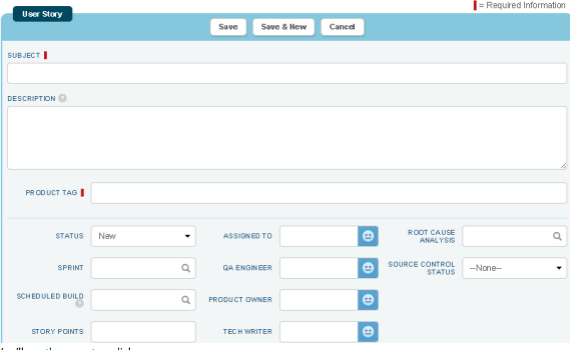
4.Enter the value for Subject name and the product tag field. Both are required fields
Note: once we start typing in the product tag field, a list of product tags will appear and select one of them.
5. When you start typing the Sprint field, a list of Sprints will appear and select one of them and click “Save”.
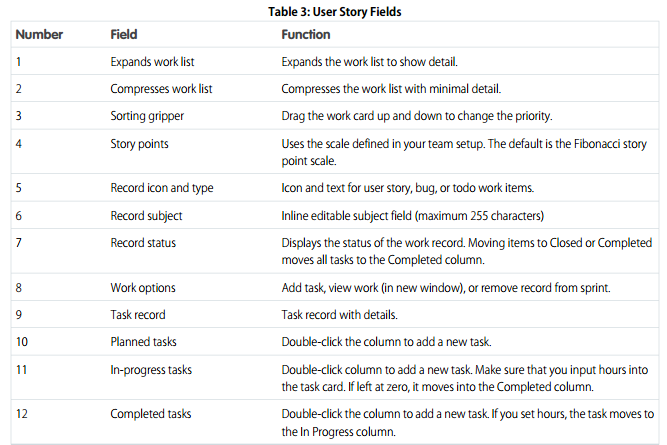
The following diagram shows the fields and functions of the User story.

Relate a case to the Work record
We can add the custom case field called “work” to Case page layout. By adding the field in the Case object, we can link the cases & work records and able to see the case information while viewing the work record. There is no need to open the cases separately.
The following steps are related to case and work records together.
- In the Case object, go to the page layout. Click “Edit” to open the page layout.
- Find the work field and place in the desired location on the page layout.


- Click “Save”.
- Then create a new case or edit an existing case and select the lookup in the work field.
- In Work record, we can see the case associated with the work record in the Additional field section.

Create a Task
Whenever we create a user story, we can create a task and assign to individual team members. It helps to track the progress for each story, especially when more than one person is working on a user story.
- From the “Sprint” tab click the drop-down arrow within a user story and then select “Add task”.

- Once the task is selected, enter the task description and hours that it takes to complete the task.
- The task is automatically assigned to the person who creates it. Once the task is saved, we can click
to bring up a list of team members and reassign the task.
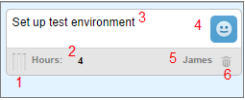
The Task fields are given below


View your Backlog Manger
The Backlog Manager is useful for managing all your team work. We can use individual panels to monitor specific types of work. We can add multiple panels that help backlog manager to prioritize and plan. In a single place, we can see all team’s work records.
This provides better visibility across the organization. The Backlog Manager gives better visibility of a team’s work to other teams who might want to see if there are potential dependencies.
- Click the “Backlog Manger” tab.
Note: If you’re on more than a team, you might get a prompt to pick a team.
Ex: if you’re team’s “sales” and “service”. You are shown two panels by default. The backburner represents open user stories that haven’t been prioritized by your team.
- Drag the user story that you just created from the backburner to the backlog.
Note: we can edit the user subject.

- Open the new panel by clicking “Add panel” from top left corner.
- Select by Sprint (or) Epic (or) Theme.
- Enter the name of sprint that has high priority.
The following are the additional features of Agile Accelerator
Custom picklist values for work record
- We can customize the picklist values of “Status” field on work records.
Note: Don’t remove the “Closed” value as it will affect Sprint Velocity calculation.
Custom fields for work records
- We can also modify or add fields in Additional Field section on the work records.
Custom fields for Product tags
- We can modify or add fields to product tags that are unique to specific team or product tag.
- If the field is required for a few Product tags, then add it in “product tag” level.
- If the field is required for the entire org, then add it in “Work Object” level.
Configure Communities
- We can use the Agile Accelerator with Communities to create work items.
- We must contact Salesforce for provide information about adding Communities license to your Organization.
Configure Email Volume
- The user can choose which type of Email notification the user can receive when work record changes. The following are notification levels
- Bread & Butter – This notification will send if the user added as an Assignee and other users added Comments.
- Meat & Potatoes – This notification will cover everything additionally if any changes in the status field of work item in the default level.
- The Whole Enchilada – This notification includes everything in Meat & Potatoes,
additionally, if any changes in major field.
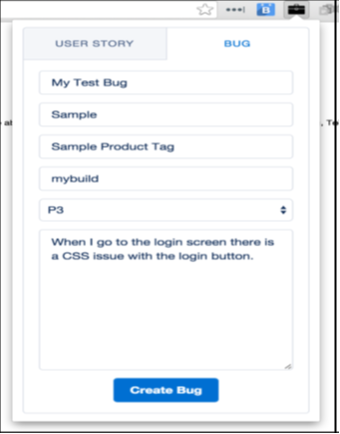
Create quick work record using Google chrome Extension
- We can create bugs and User stories quickly using free Google chrome extension called “Quick Create Work Record”.
- Note: This extension will support only in the Google chrome browser.
- Once the extension is installed in the browser. configure the extension for your domain.
- In your company. If “My Domain” is enabled then the domain field will be required. Ex (“. salesforce.com”).
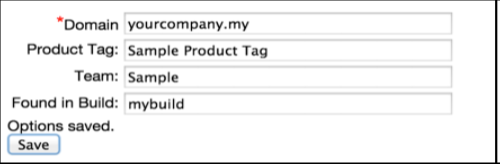
- If we don’t have a custom domain, then enter your org’s instance name in the field.
Ex: “https://na17.salesforce.com” and then enter na17 in the Domain text field.
Conclusion
The Agile Accelerator is a manged application available free in the app-exchange. This Application helps that the entire team manage & monitor the project status easily and it is fully secured because the entire project flow and data are maintained within salesforce Organization.
Reference Link:
User guide: https://appexchange.salesforce.com/servlet/servlet.FileDownload?file=00P3A00000RrREfUAN
App Link:
https://appexchange.salesforce.com/listingDetail?listingId=a0N30000000ps3jEAA
