Custom components can be used to add some additional functionalities like collecting the data from end user or displaying customized information in our store front in B2B. These components can be included in the Custom Navigation Widget to the existing standard components by appending this to a specific page or to the header and the footer sections.
There are some limitations with including these custom components. It cannot be used in the store front menu, and we cannot control display order with the custom components. It will be only placed after the standard component.
Component order placement can be overridden by overriding the standard page.
Including the component into specific page in the store front
Here, we will see how to include the component to the product detail page as a new section
Step 1: Create a Visual force page with your custom functionalities
Step 2: Go to CC Admin Tab
Step 3: Click on Default Store
Step 4: Click on Configuration Settings
Step 5: Click the New button
Step 6: Create a new module to enable the custom functionality
- Module Name
- Configuration Type
- Name of the B2B Page
- Module Status
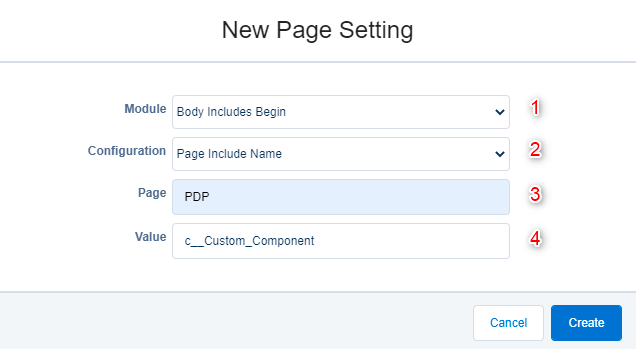
Step 7: Create a new module for the created visual force page.
- Module Name
- Configuration Type
- Name of the B2B Page
- Custom VF page name which we created by copying the source code.
Note: Only one module with the same type can be placed in the same page.
Step 8: Go to CC Admin Tab and click on Configuration Cache Management. To see the modified content on the Product Detail Page, create a New Build.
Step 9: Give a name to the new Build and Activate it. Your changes should be reflected now in the Store Front.