Cong Courier is used to schedule and deliver Salesforce reports. We can send reports to Users, Contacts, Roles and Groups. Same reports can be scheduled with different data by passing dynamic parameters. Reports can be sent as an attachment in these formats: CSV, Excel and Printable View.
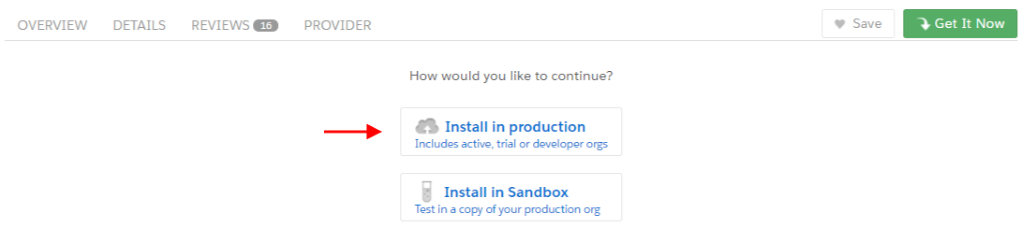
Step 1: Install Conga Courier from AppExchange
1. Search for Conga Courier from Salesforce AppExchange and click on Get It Now.
2. Choose the type of Or and Install it in your Salesforce Org.
Page Break
3.Choose the type of users whom you want to install it for
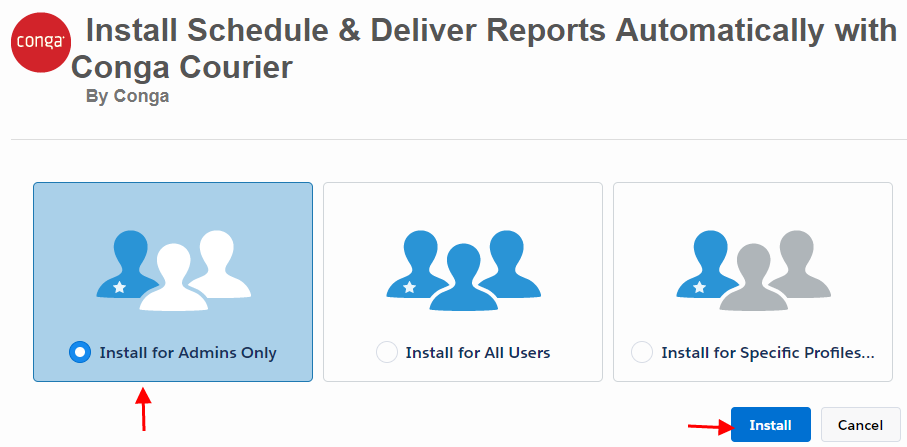
4.Confirm and Install. You will receive an email once it gets installed.

Step 2: Configure Conga Courier
1.Navigate to Conga Courier App. Goto Setup > App Dropdown > Conga Courier
2.Click the Courier Setup Tab.
3.Enter your Salesforce Username, Password and Security token and click on Save.

Step 3: Schedule Conga Courier
1.Goto Courier Schedule Tab and click on New.
- Enter Schedule Title.
- Report: Enter parameter and Export Type.
- Export Type: Choose an export type for the report (CSV, Excel, Printable View).
- Trigger: Choose schedule timing.
- Email Content: Enter the email subject, email body, and attachment extension. If Don’t Send if Report Has No Data option is checked, reports will not be delivered if there is no data.
Step 3: Create Report
Create a report with lead status as blank. The lead Status parameter can be passed in the report scheduler.
Step 4.1: Select Report
Click the Select Report Custom Link. It would redirect to report selection page. Choose the report by searching it.

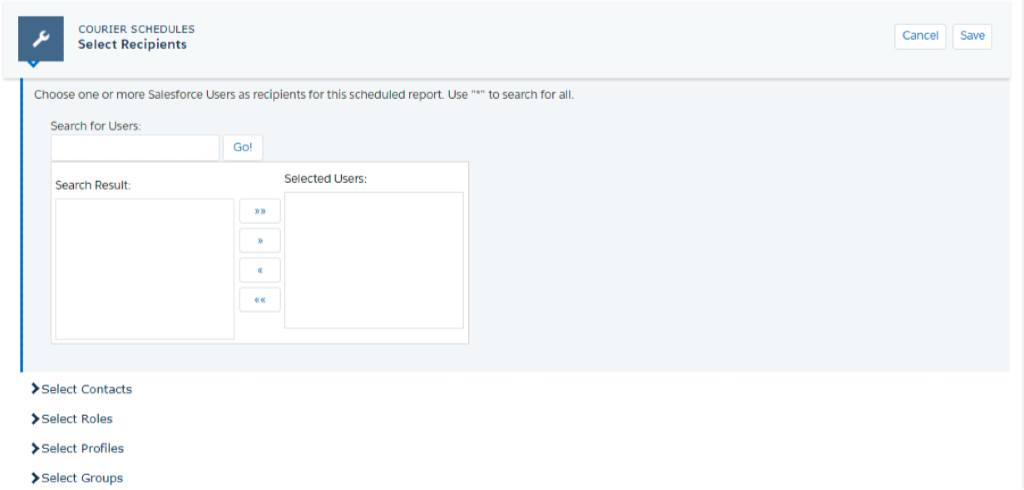
Step 4.2: Select Recipients
Click the Select Recipients Custom Link. It would redirect to user selection page. Choose the recipient type.
Step 5: Enable Schedule
Once the recipients and the reports are added to the schedule, enable the Enabled check box on the schedule page.
Step 6: Report Export
Step 7: Limitations
| Maximum file attachment size | 5MB |
| Maximum file attachment size for Report-Based Recipients | 1MB |
| Maximum number of Contacts as Report-Based Recipients | 500 |
| Maximum Contacts per Schedule | 25 |
| Maximum Users per Schedule | No Limit |
Reference: