Lightning app builder is a point and click tool to create a single page application for Salesforce1 and Lightning Experience. Simply drag and drop the components into the builder layout to build the application. We can build single page applications using Visualforce pages and global actions to make app more interactive. App builder also provides the capability to build dashboard style applications.
Basic component:
It builds responsive application that automatically work on multiple devices. The template defines the layout behavior by rearranging the regions.
Example layout:
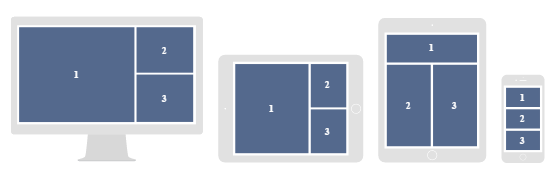
This is a 3-section layout. 1 section is Main column and sections 2 and 3 are side bars. The sections are getting rearranged automatically based on the device that is used to view the page.
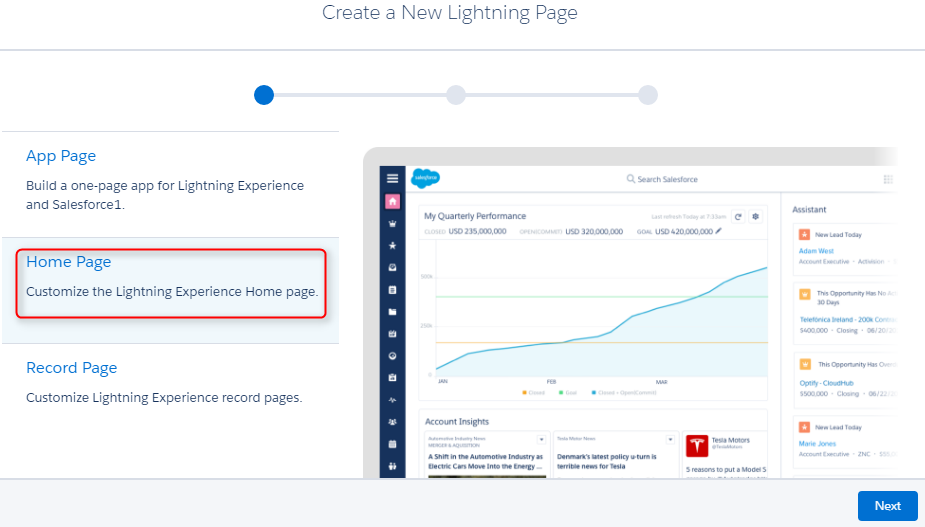
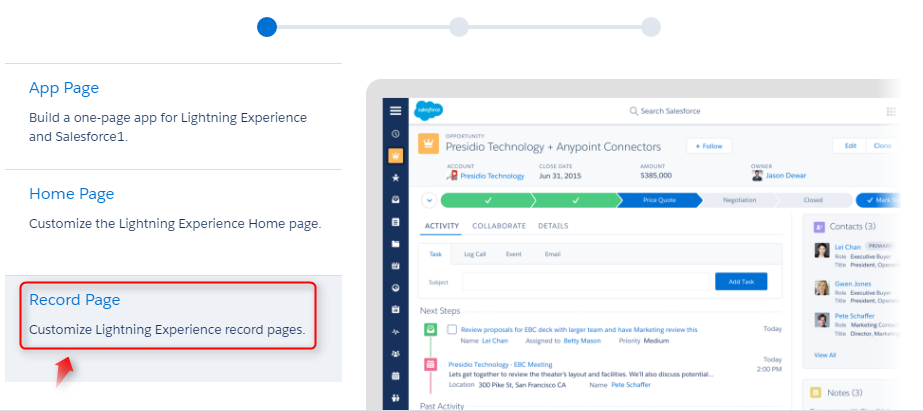
There are 3 types of pages can be created using Lightning App Builder. They are,
➔ App Page.
➔ Home Page.
➔ Record Page.
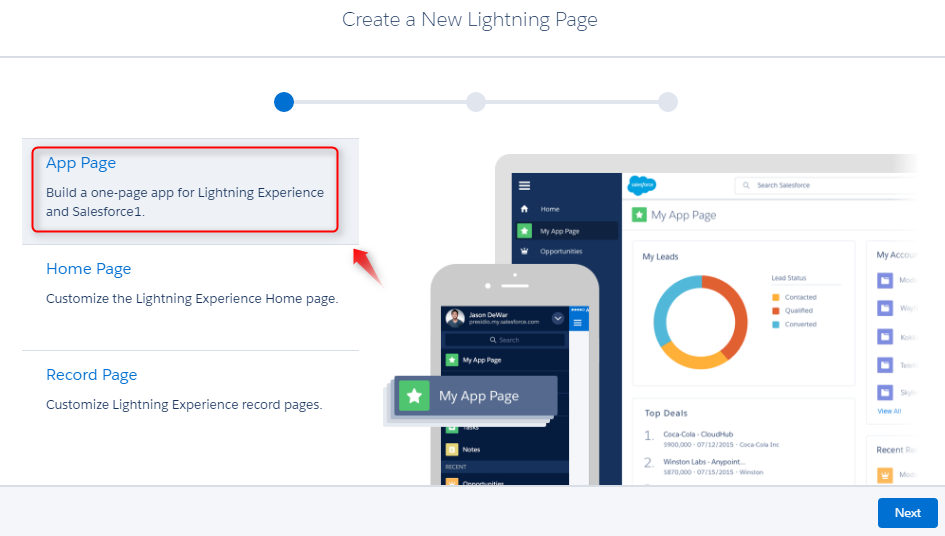
App Page:
Building a one-page app for lightning and Salesforce1 app.
- Navigate to Setup Home ➔ User Interface ➔ Lightning App Builder.
- Click New and then choose App Page to create one-page app, then click next.
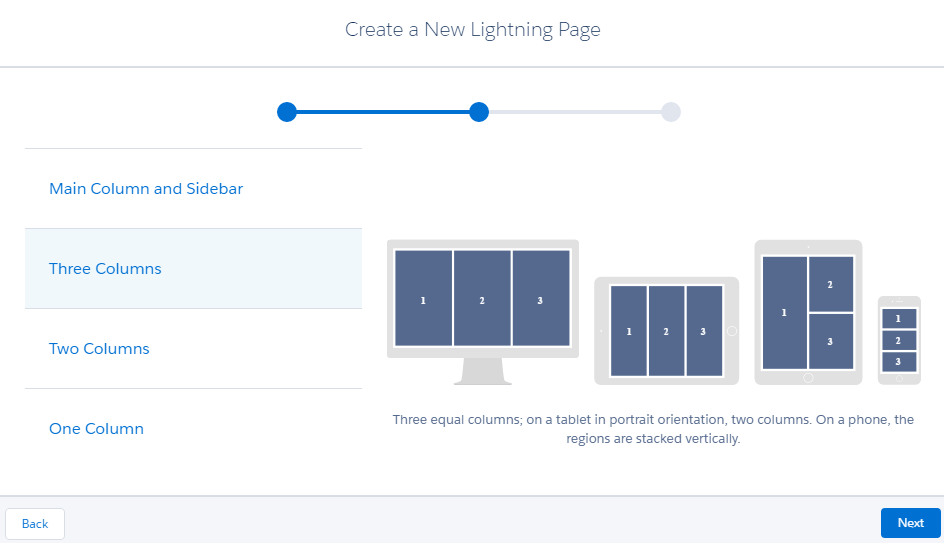
- Choose layout from the available 4 options. These are the layout arrangements that can be visible in different devices.
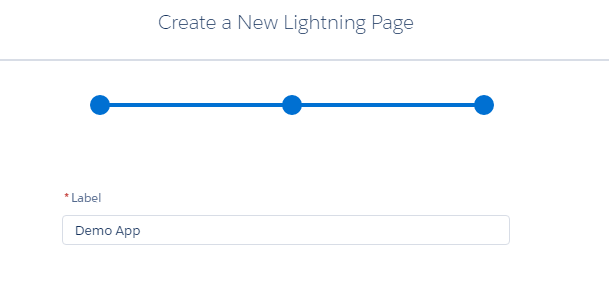
- Name the app in the text box with the name Label and click finish.
There are 3 components that can be dragged and dropped into the layout. They are standard component which are prebuilt components. Custom component will display the managed and unmanaged package components.
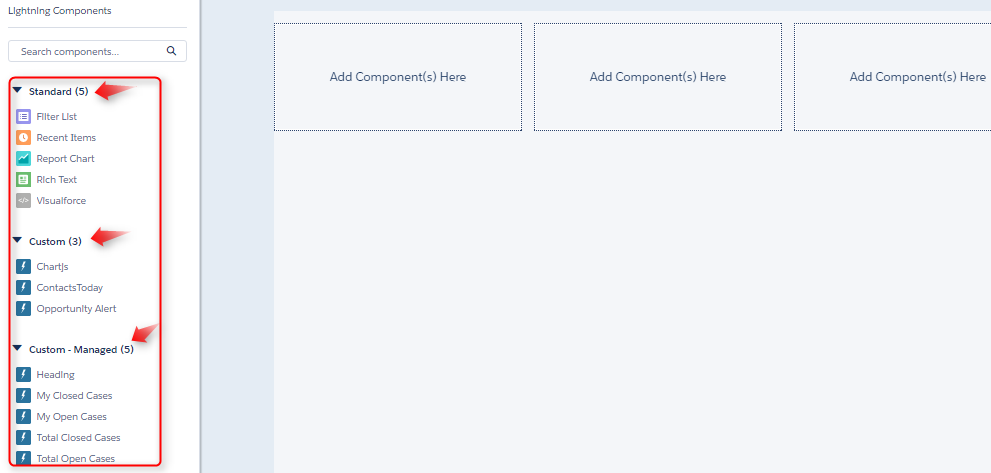
Visualforce page in the Standard component has the accessibility to Visualforce pages that are enabled for ‘Available for Salesforce mobile apps and Lightning Pages’.

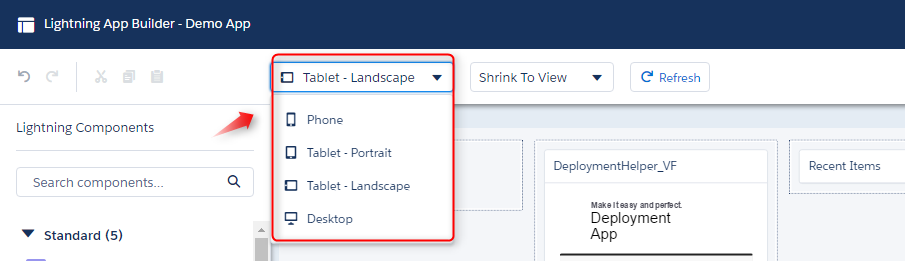
The application can be previewed in various devices by switching the device name as shown below,
Once designed the app, click save and click Activation to activate the application.
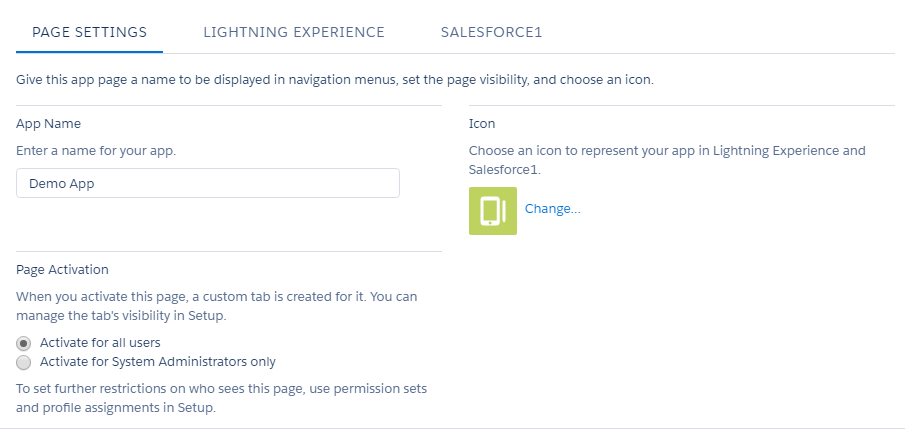
- Page settings Tab: Modify the app name if necessary and change the icon of the app. Page activation option is to change the app visibility to either for all users or administrator only.
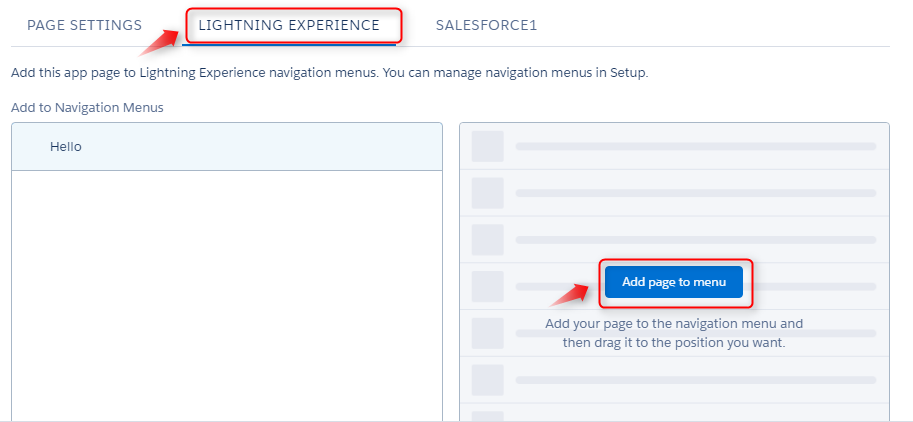
- To add the new app in the lightning menu, click Lightning experience tab and then click add page to menu.
Switch the location of the app if necessary.
- To add the created app in the Salesforce1 app menu, click salesforce1 tab and then click Add page to menu.
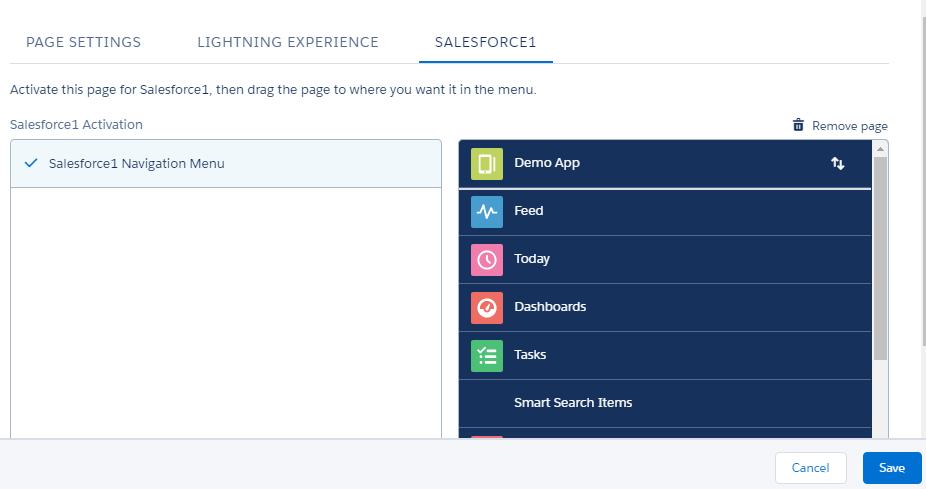
- Move the app in any order and click save.
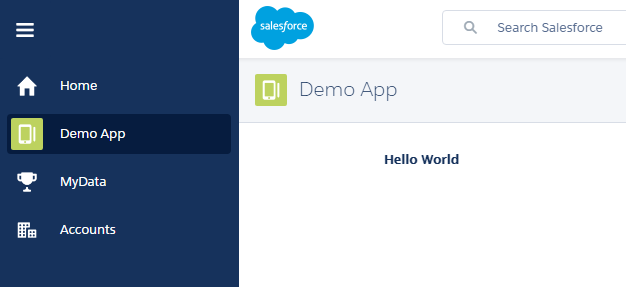
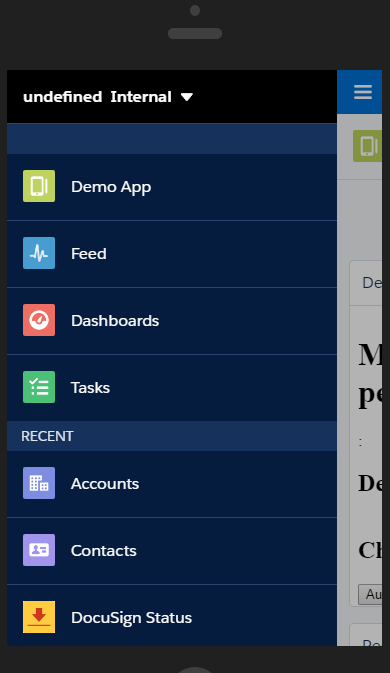
Lightning App is successfully created and added to menu and the screenshot for the same is as follows.
Lightning Menu:
Salesforce1 Menu:
Home Page:
Home page customization is for lightning experience home page customization.
- Navigate to Setup Home ➔ User Interface ➔ Lightning App Builder.
- Choose Home Page and click next.
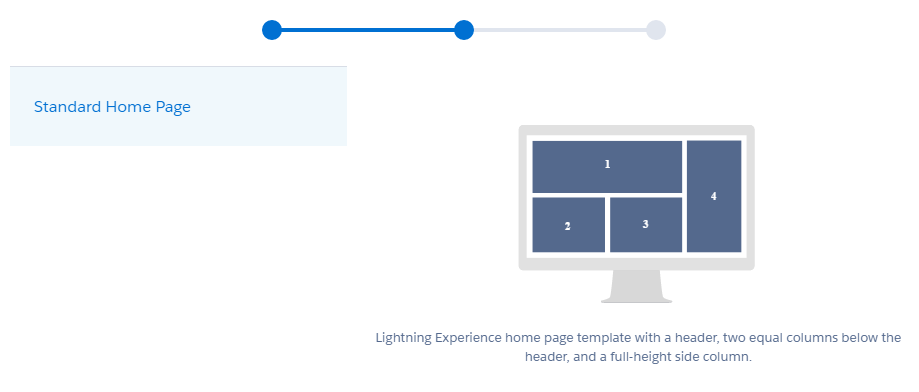
- Unlike App Page, Home Page has a single layout with 4 sections. Choose it and name the page.
- Like App Page, Home page has 3 components that can be dragged and dropped into the layouts. Design it and click Activation.
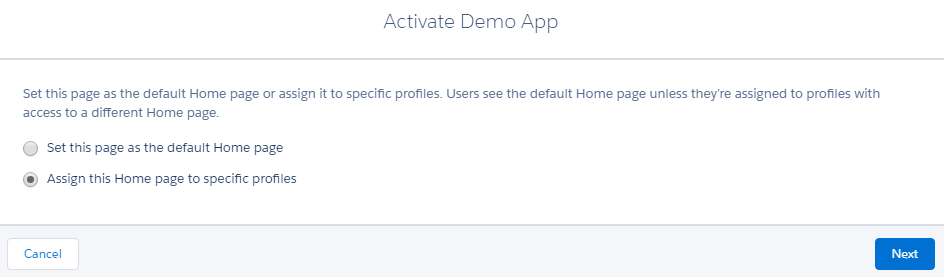
- Select the visibility of the home page. Whether it needs to be default home page for all or it needs to visible for a specific profile.
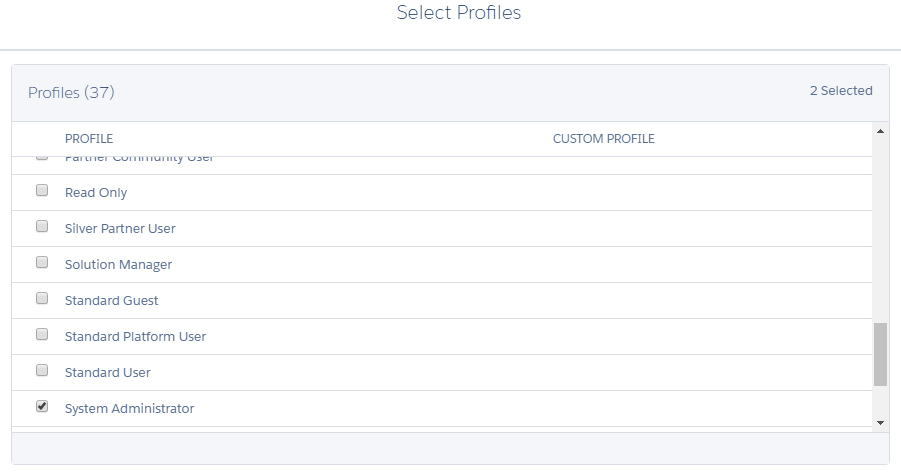
- Choose the profiles in the next step.
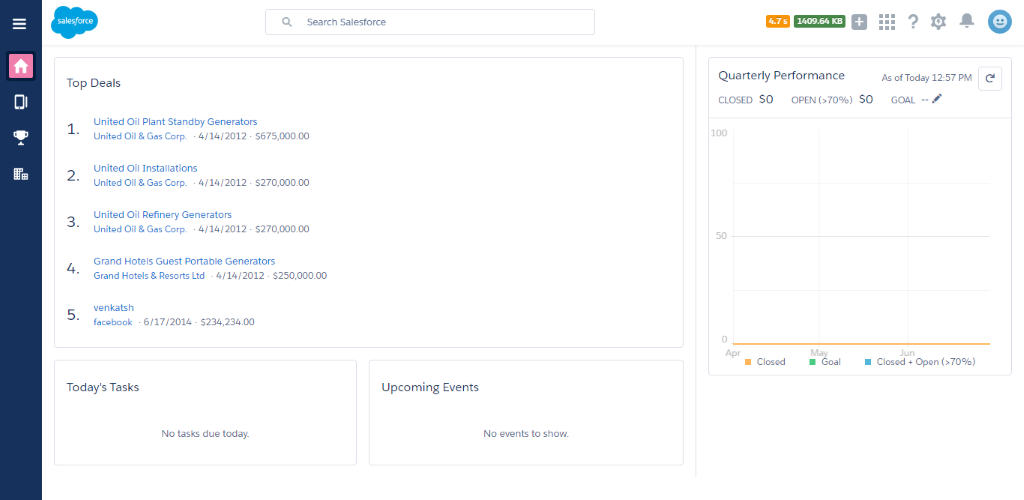
- Preview the scope of the page and click activate. And the home page will be as shown below,
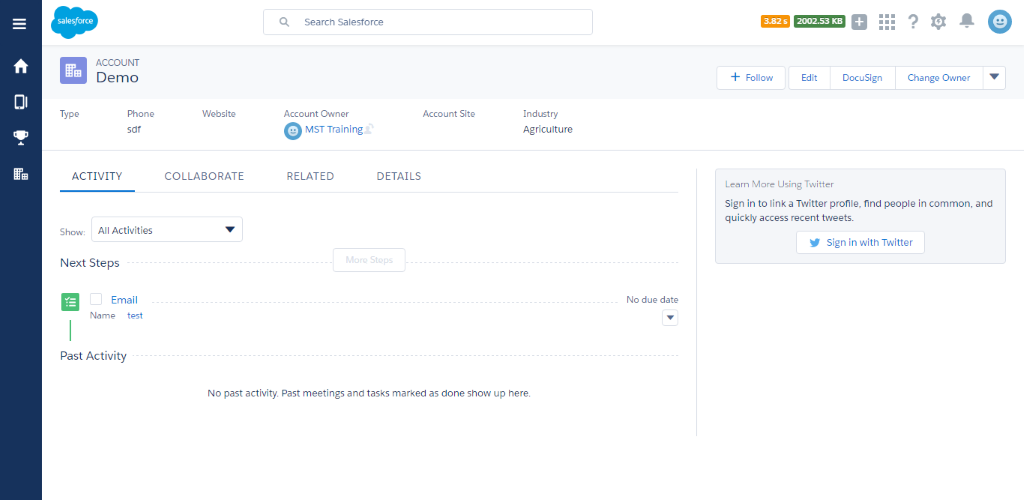
Record Page:
To design the record page of lightning experience.
- Navigate to Setup Home ➔ User Interface ➔ Lightning App Builder.
- Choose Record page and click next.
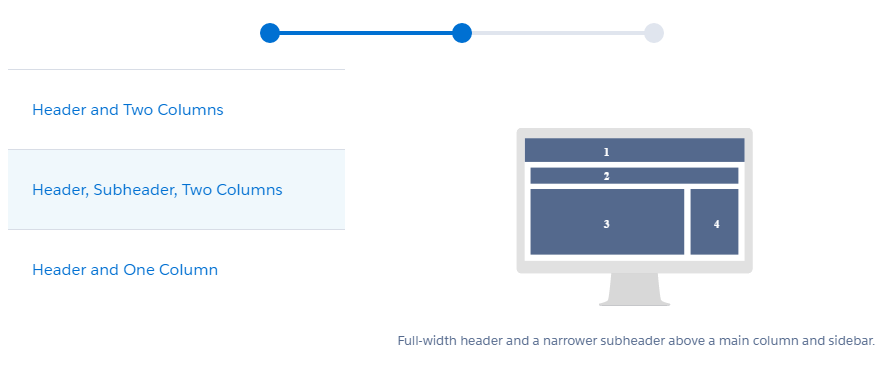
- Record page offers 3 Layouts and is shown below. Choose one and click next.
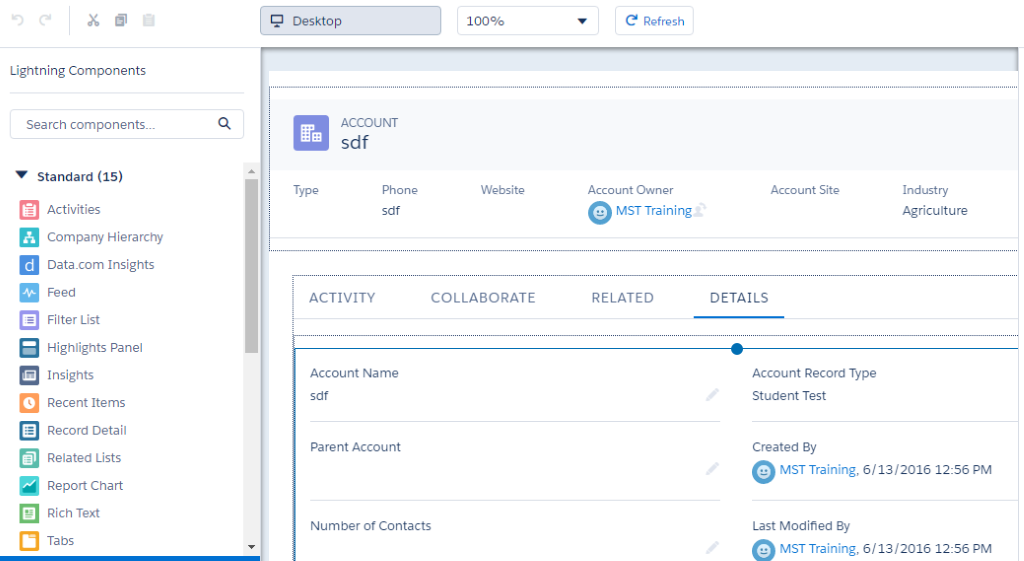
- Standard components offer effective way of displaying records such as Tab, and highlight component. Tab component is dropped in the layout and added 4 tabs and it is shown below.
- After designing and previewing, click save and Activation.
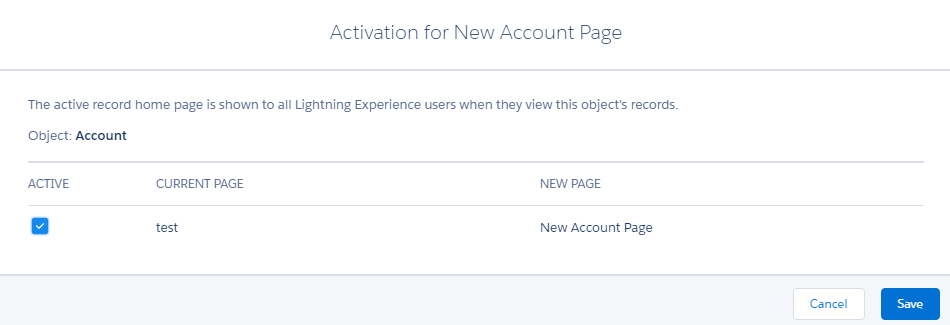
If there is a record page already created for the object, then the old page is replaced with the new page.
Record page is successfully created and the record page is shown below.
Reference Links: https://developer.salesforce.com/page/Lightning_App_Builder
