Introduction:
DKIM (Domain Keys Identified Mail) is a feature used in Salesforce to sign outbound emails sent on your organization’s behalf. A valid signature in email gives recipients confidence that it was handled by a third party like Salesforce in an authorized way by respective organization.
How does it Work?
Sending Servers:
There are some steps for signing an email with DKIM:
- The domain owner generates a public and private key pair to be used for signing outgoing messages.
- The public key is published in a DNS TXT record, and the private key is made available to the DKIM-enabled outbound email server.
- When an email is sent by an authorized user of the email server, the server uses the stored private key to generate a digital signature of the message, which is inserted in the message as a header, and the email is sent as normal.
Receiving Servers:
Sequence of steps happen while receiving emails:
- The DKIM-enabled receiving email server extracts the signature from the email headers.
- The public key is retrieved from the DNS system where we stored the key.
- The public key is used by the receiving mail system to verify that the signature was generated by the matching private key.
- A match effectively proves that the email was truly sent from, and with the permission of the claimed domain and that the message headers and content have not been altered during transit.
- The receiving email system applies local policies based on the results of the signature test. For example, the message might be deleted if the signature does not match.
How to Create DKIM Key in Salesforce:
To create DKIM Key Go to-> Setup-> DKIM Keys. There would be two options:
Create a New Key:
- Give unique name for the new key which distinguishes it from other keys in you org.
- Give domain name on behalf of which domain you are going to send out emails.
- Choose appropriate domain match,
- Exact domains only – cannot send emails on behalf the its sub domains.
- Subdomains only – can send emails on behalf of its sub domains but not on behalf of parent domain.
- Exact and Subdomain – can send emails on behalf of both parent and subdomains.
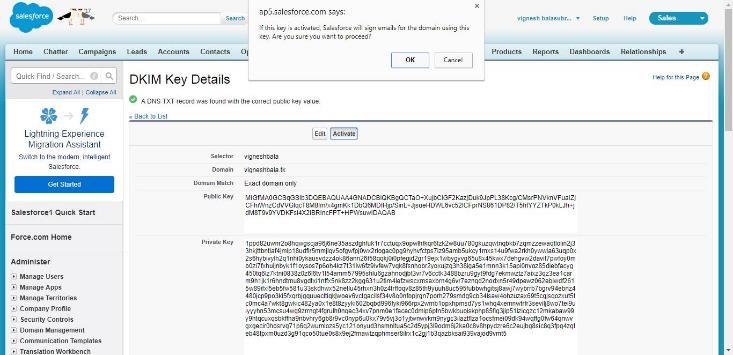
- Once we create DKIM key it generates public key and private key.
Import a Key:
- This option is used to make use of the existing key in some other org in our org.
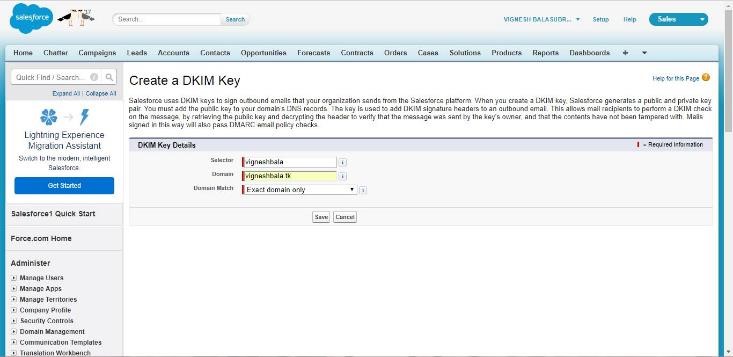
Create DKIM Key:
Public Key and Private Key has generated:

How to Create DNS Record in Respective Domain:
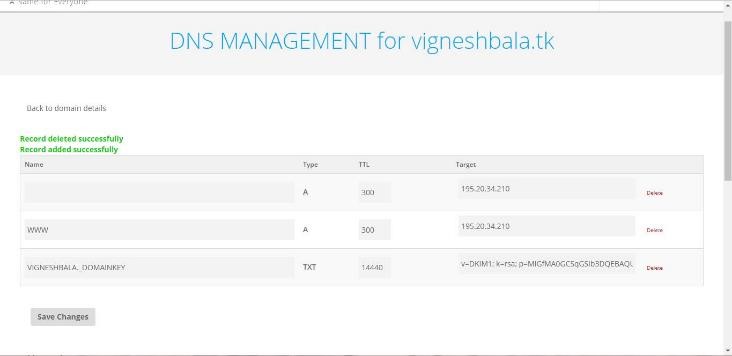
To create DNS record, go to your domain management area, link on manage domain and follow the below steps,
- Create new record by giving following values,
- Name – unique name with suffix._domainkey
- Type – type must be TXT.
- Target – (v=DKM1; k=rsa; p=your public key generated in salesforce).
Note: v- Version; k- Key Type; p-Public Key
- Click the Save button to create the DNS record.
- To validate your DNS record, go to this (http://tools.wordtothewise.com/dkim/check) site, paste your record details and check.
- Finally, activate the DKIM Key in Salesforce.
Create DNS record:
Test the Key using online tool:
Activate DKIM Key in Salesforce:
Here after, whenever we send emails from DKIM Key activated Salesforce Org, those emails will be checked for DKIM signature and do all the steps mentioned under Receiving Server section above.
Reference: https://success.salesforce.com/ideaView?id=08730000000BrGUAA0
