CRM :
Salesforce is one of the cloud-based software solutions for businesses and the world’s most well-known Customer Relationship Management (CRM) software. It helps us improve relationship and understanding with our customers.
CMS :
WordPress is software solution based on Internet for businesses known as WordPress Content Management System. CMS helps manage websites, online portals for organizations.
Drupal is a free, open source software that can be used by individuals or groups of users. The application includes a Content Management System and a development framework.

Benefits of integrating WordPress with Salesforce
1.User management is easy
2.Convert form submissions into Leads
3.Track ‘logged-In’ user activity
4.Build a product catalog or ecommerce store
5.Tack campaign IDs to WordPress actions
6.Custom object integration
Steps for Connecting WordPress Contact form to Salesforce Leads
1.Download the Wordpress-4.7.5 package from wordpress.org
2.Run the Package and Install in localhost
3.Install the necessary Plugins
Installed Plugins :
- Brilliant Web-to-Lead for Salesforce.
Plugin Settings:
- Go to the settings.
- Enter the salesforce.com Organization ID : 00D28000000bCnG
- In order to get the Salesforce.com Organization ID, Log into the salesforce.com
- Setup -> Company Profile -> Company Information.
- Search for Salesforce.com Organization ID and place the id in the WordPress setting.

WordPress Settings:
Go to Settings -> Salesforce
The WordPress to lead for Salesforce CRM Configuration:
- Forms
- Settings
- Styling
- Form Editor
- Import
Salesforce.com Settings in WordPress:

Form:
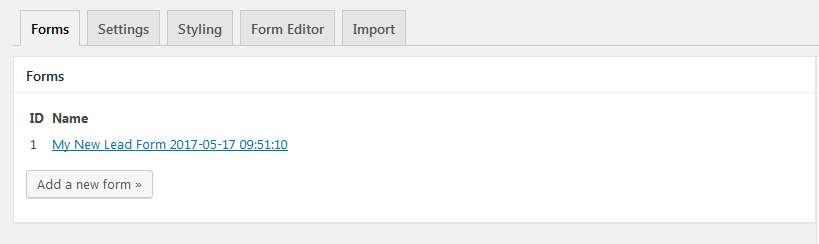
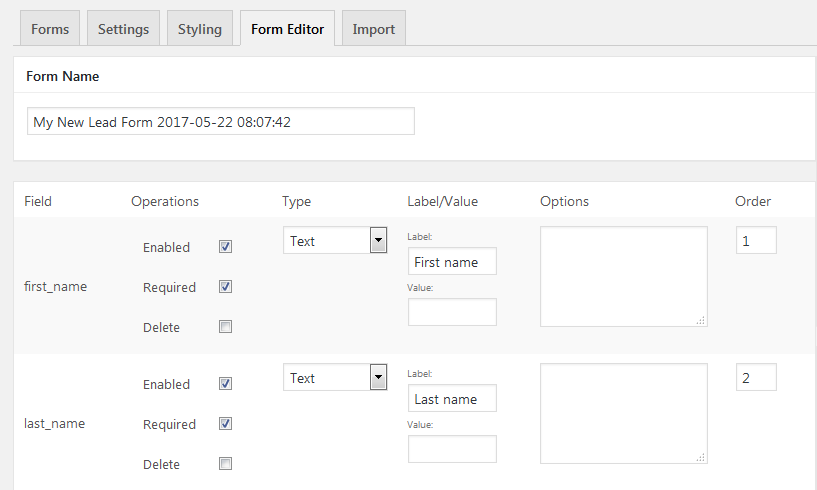
Create a New Form from Form Editor:
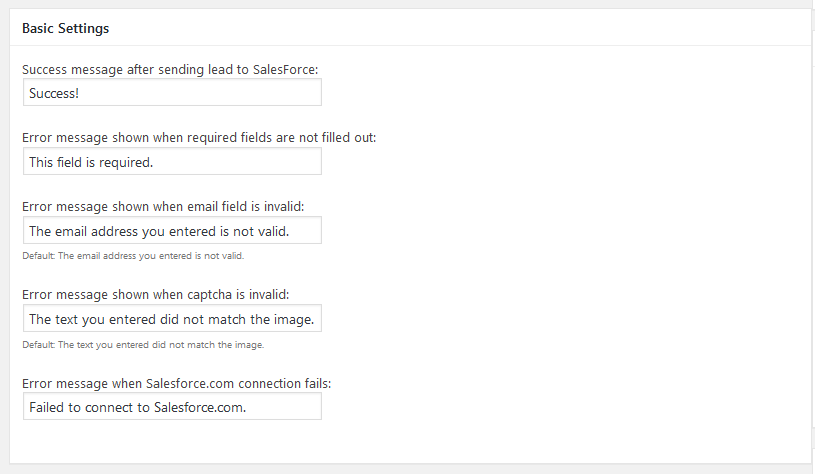
Basic Email Settings:
WordPress Contact Form:
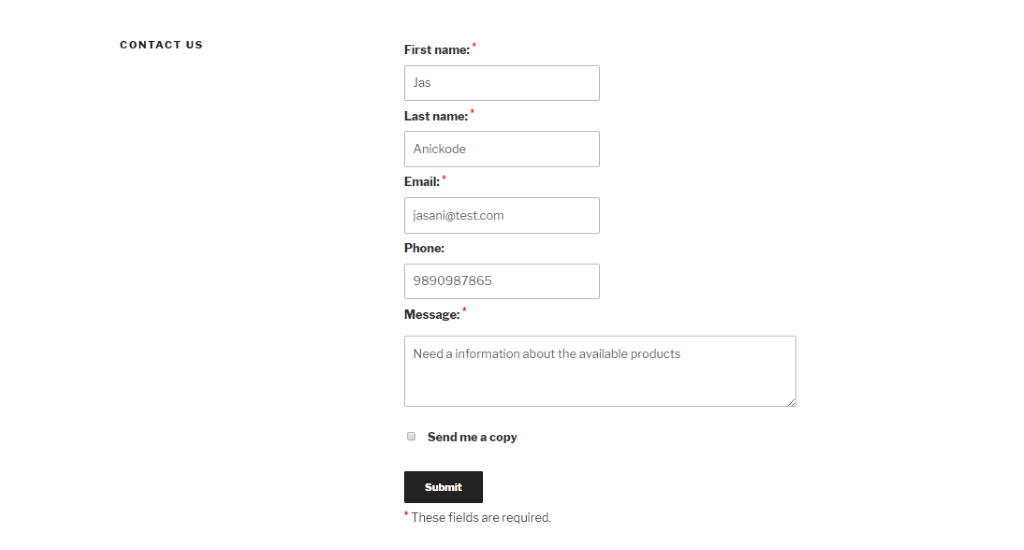
Success Message once form has been submitted

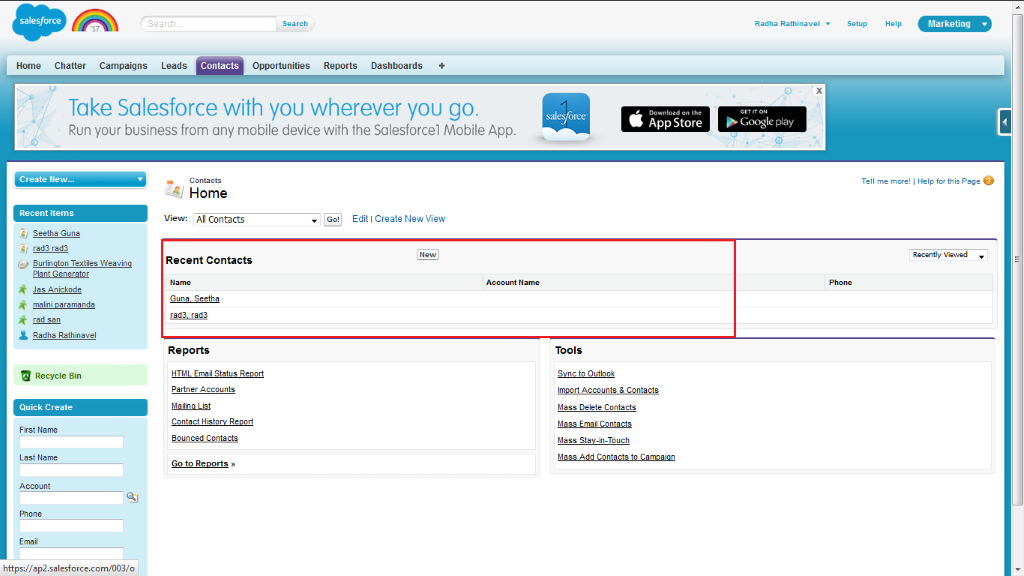
Salesforce Leads :
- We can find the submitted Contacts from WordPress in Salesforce.
- Login into Salesforce.
- Click on Leads
- Find the Contacts that were saved from the WordPress Contact Form
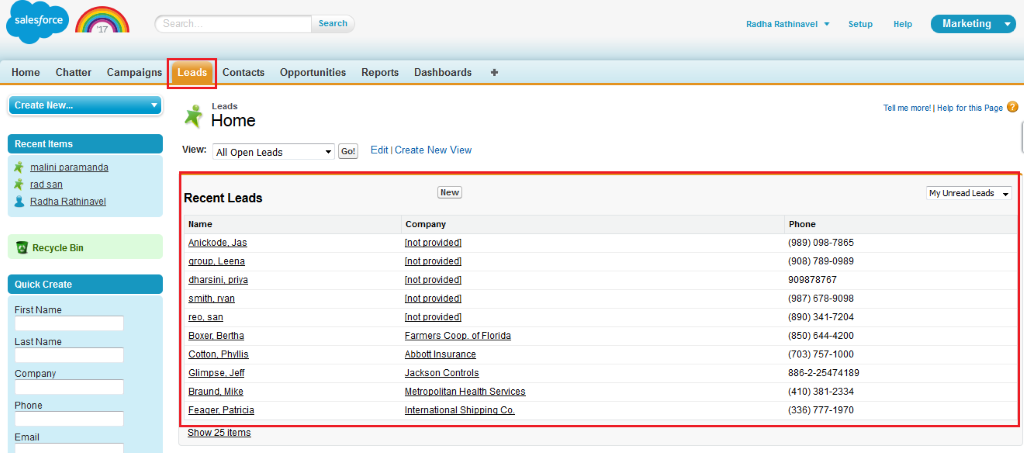
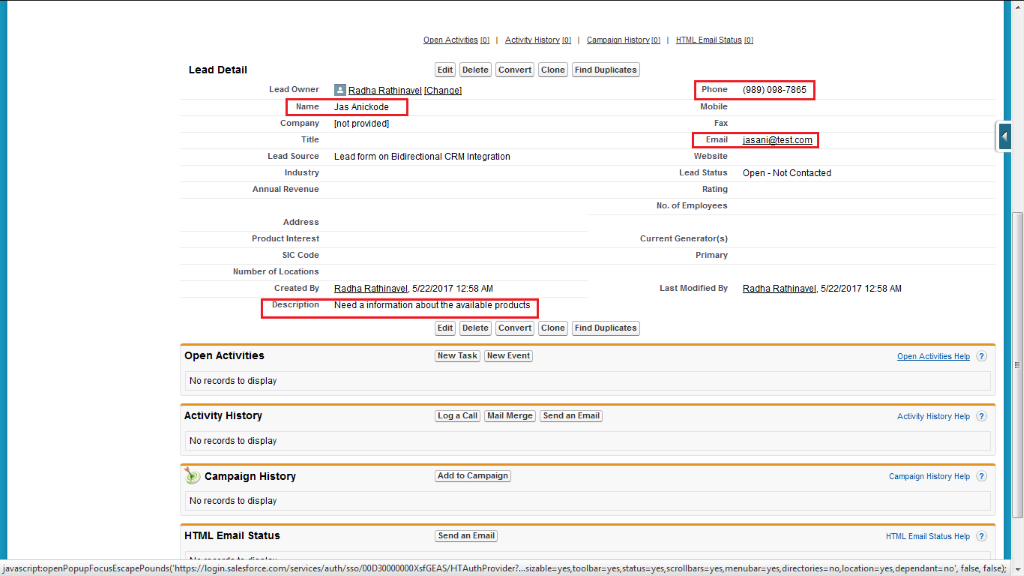
- Click on Leads for Individual Details:
- The Below images show Name, Phone, Email and Description that we used in the WordPress Contact Form.
Steps for Connecting Salesforce with Drupal
1.Download the drupal-7.54 package from drupal.org
2.Run the Package and Install in localhost
3.Install the necessary Modules
Installed Modules :
- Salesforce Suite.
Plugin Settings:
- Go to the Configuration -> Salesforce – > Authorize
- Provide Salesforce Consumer Key and Salesforce Secret with salesforce endpoint.
- Click on Authorize

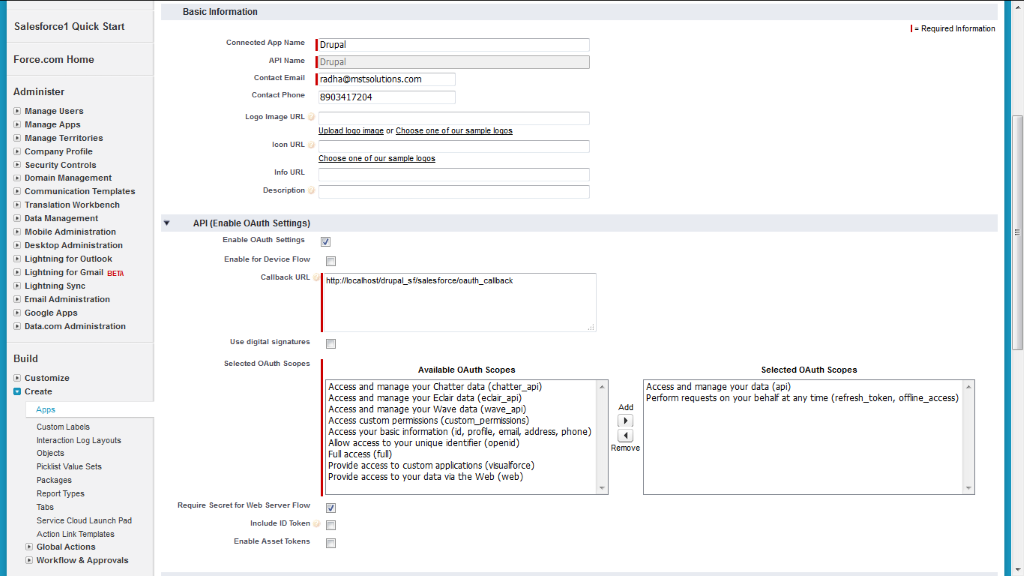
In order to get the Salesforce secret key credentials, Log into Salesforce.com
- Go to Build -> Apps -> Connected Apps -> Create New

- Provide Connected App Name, Contact Name , phone
- Enable OAuth Settings
- Provide the callback URL
- Select OAuth Scopes as,
- Access and manage your data(api)
- Perform requests on your behalf at any time (refresh_token, offline_access)
- Enable the Require Secret for web server flow
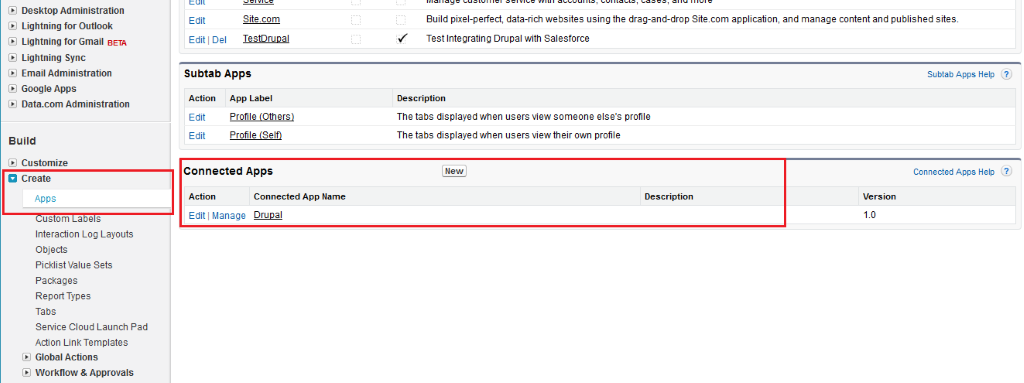
Newly created App are listed in connected App
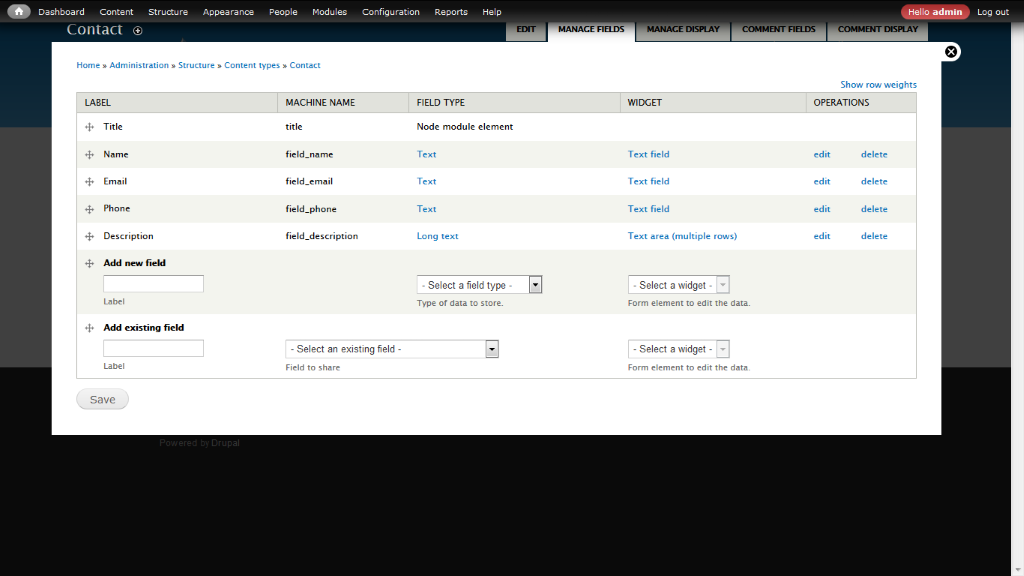
Steps to Create Drupal Content type
- Go to Structure-> Content types -> Add Content Types
- Provide Content type Name and Follow the steps to manage the Fields
- Add fields for Contacts as Name, Email, Phone, Description
- Save the Content type
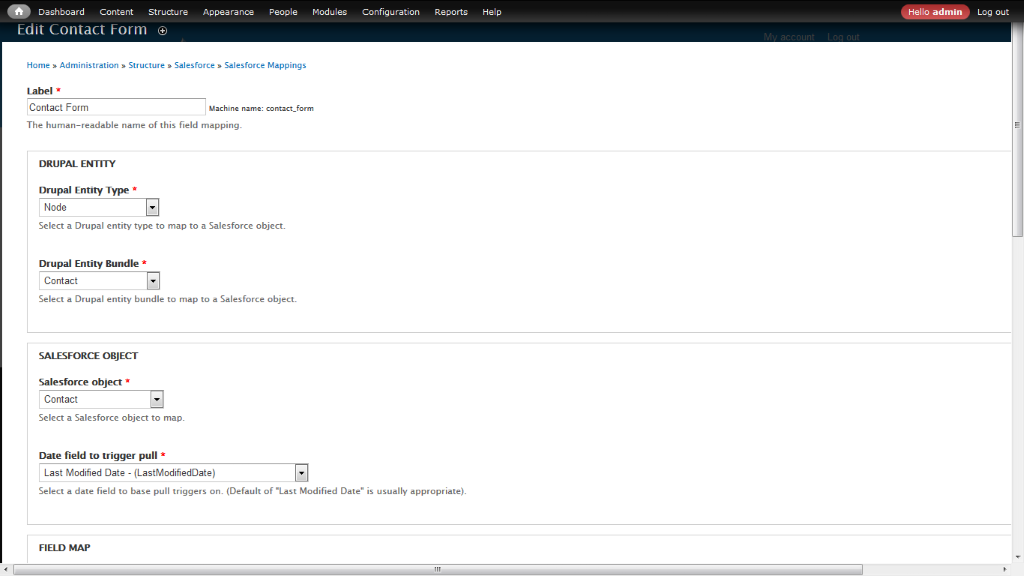
Steps to follow for mapping the fields
- Go to Structure -> Salesforce -> Salesforce Mapping -> Add Salesforce Mapping
- Provide Label Name
- Choose Drupal Entity as Node
- Choose Drupal Entity Bundle as Contact
- Choose Salesforce Object as Contact
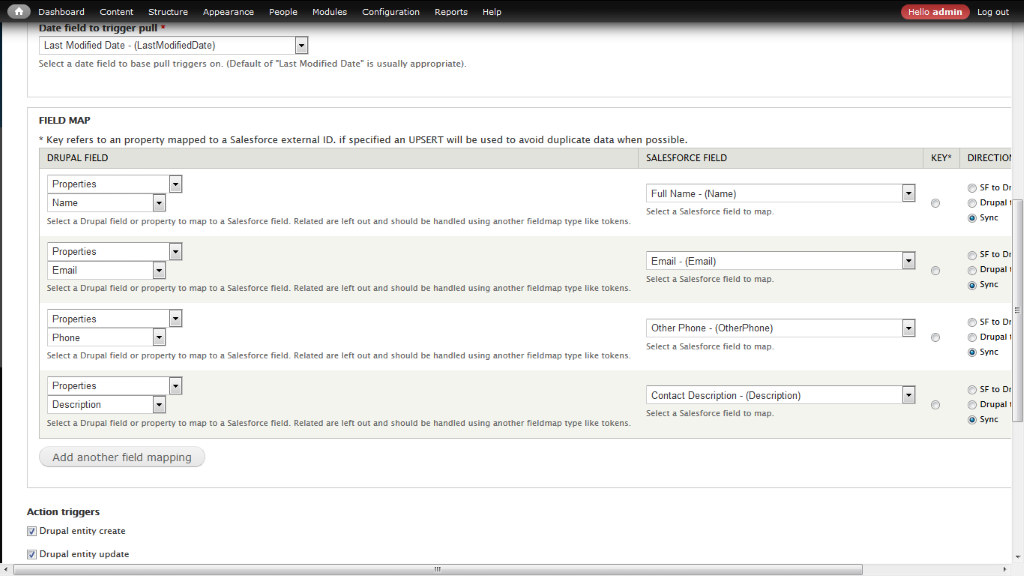
- Map the Drupal Fields and Salesforce Fields
- Choose the Direction that we have to sync the data
- SF to Drupal
- Drupal to SF
- Sync (both)
- Choose Action triggers
- Drupal entity create
- Drupal entity update
- Drupal entity delete
- Salesforce object create
- Salesforce object update
- Salesforce object delete
- Process asynchronously
- Click on Save Mapping

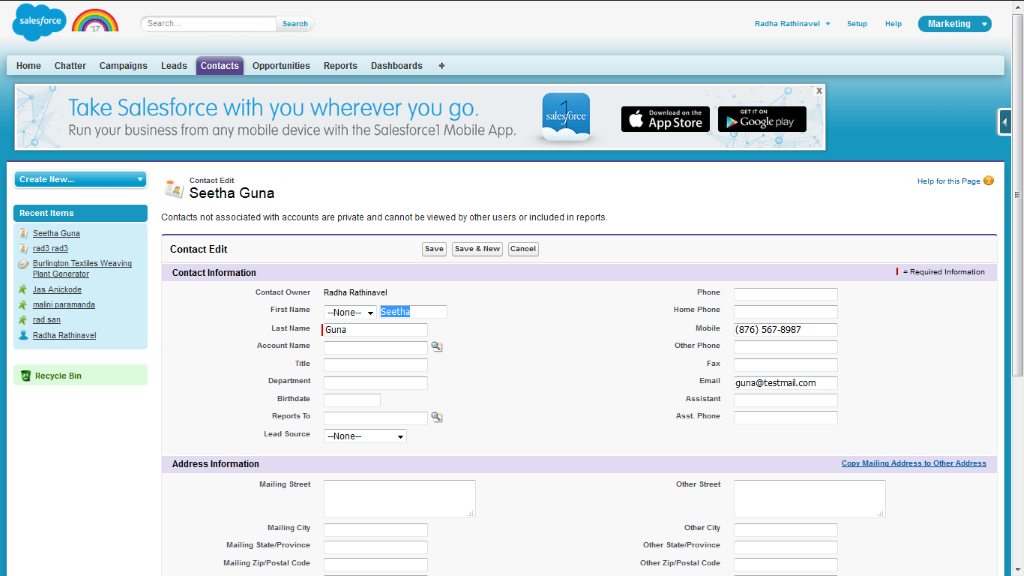
Now, Create Contacts records from Salesforce.
- Click on Menu Contacts -> Add
- Provide Contact Name, Phone, Email, Contact Description
- Click Save
Once Contact Records created, Visit Drupal Admin to check the Salesforce record Sync in Contact Node
- Go to Content -> Salesforce Mapped Objects
- Here, we can see the successfully mapped objects from Salesforce Contact
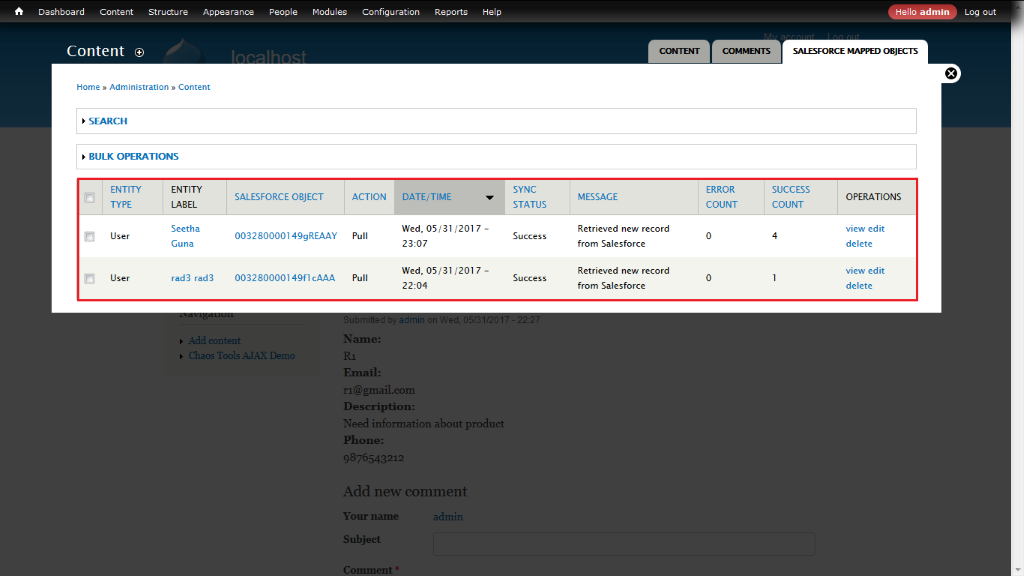
3.And thus we have Successfully Integrated the Salesforce Object to the Drupal.
