Requirements
Marketing Cloud Pro editions or higher
Permissions – create, view, and update a data extension
Considerations
The support for Interactive Email form varies with email clients. Email clients that currently support the interactive functionality are
- Apple: iPhone, iPad, and Mail
- Gmail: Webmail and App
- Yahoo/AOL Webmail
Email client that does not currently support the interactive functionality are
- Outlook
- Thunderbird
Why Use Interactive Email Forms?
Interactive Email Forms enhance the user experience by:
- Interactive Email Forms that enable customers to complete the form without leaving the inbox.
- Collecting more data by boosting engagement.
- Interactive email form can be customised to increase user engagement.
Example Use case for Interactive Email Form
A customer ordered a new credit card from a Bank. The Customer contacts the bank as the customer wants to check the status of the card. Now, the bank creates a case and tracks down the customer’s card and delivered it to the customer’s address the following day. Using an Interactive Email Form, the bank sends the customer a triggered email asking for the customer’s feedback after the case is closed. Here is the email the customer receives.

Customer knows his feedback has been submitted, as he is immediately taken to a confirmation page with a link to the bank website

Key Components of Interactive Email Forms
Interactive Email Page: For confirmation and for processing the form data, a landing page is built in CloudPages.
Data Extensions: A data extension to store the form data.
Content: Interactive Email Forms are built using Content Builder. It includes confirmation message, email form, email template and fallback content.
Create an Interactive Page in CloudPages
- From the Marketing Cloud homepage, click Web Studio.
- Then click CloudPages.
- In CloudPages, hover over a Collection. Click Open Collection.
- Click Create and then select Interactive Email Page.
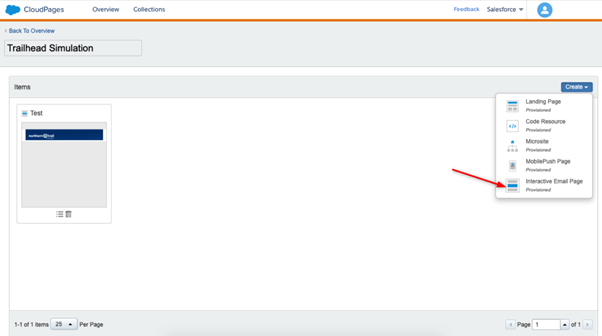
5. Give a name for the Interactive Email Page.
6. Click Create.
7. Hover over the page you created, then click Open Content.
8. Click the Email Form layout section in the editor.
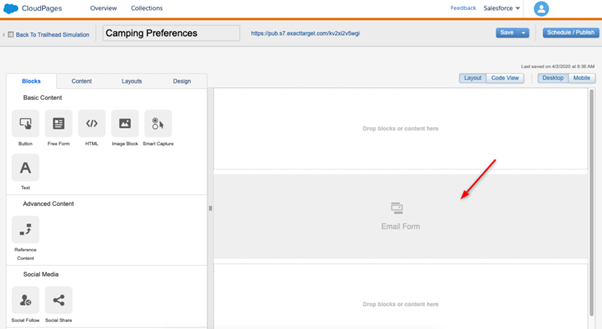
9. Under the Confirmation Message section, click the Type of Content dropdown. Choose the Block from Content Builder from the Type of Content field.
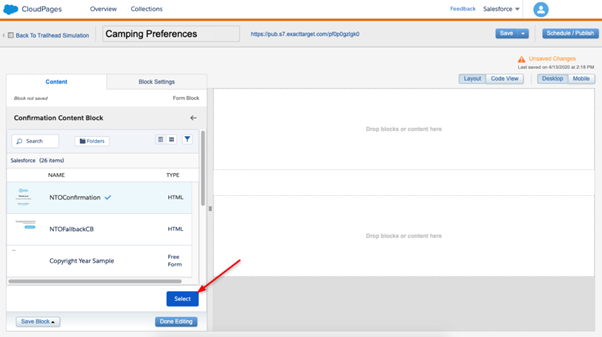
10. Click Browse and then choose the Block which has the Confirmation message.
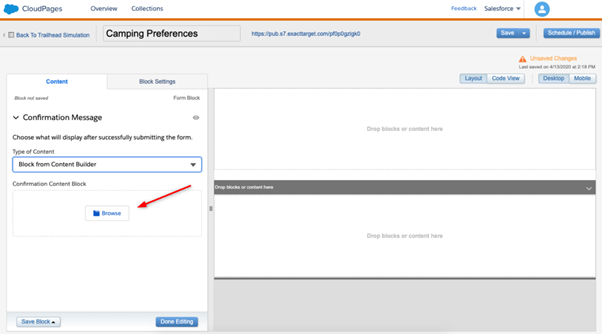
11. Click Select and Done Editing.
Add Content
Now, add a brand header to the confirmation page.
- Click the Content tab.
- Drag the file of the header image to the top content window to create a header block.
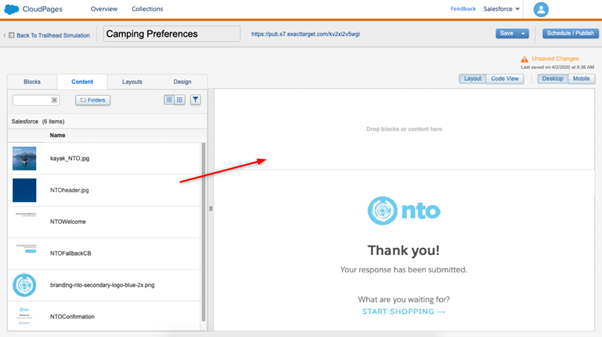
3. Click Done Editing.
Finalize Content
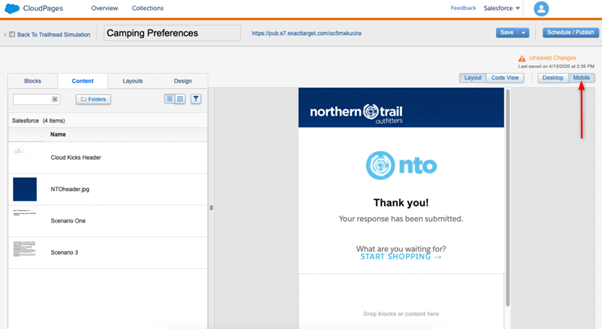
Review your content and publish your page.
- On the upper right side of the screen, click the Mobile button to see how the content looks on a mobile device.
2. Click Schedule / Publish.
3. Select Publish Immediately. Next, click Publish.
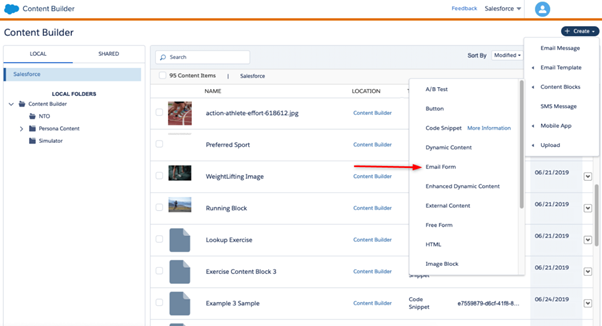
Create an Interactive Email Form Block
- From Content Builder, click Create.
- Click Content Blocks and then select Email Form.
3. Select a template, then click Continue.
4. Under CloudPages Destination, click in the Collection search field. Select a collection from the list.
5. Click in the Interactive Email Page search CloudPages field. Select the Interactive Email Page that you created from the list.

6. Under Response Capture, click the Response Capture Method dropdown. Select Create a data extension automatically.
7. Click Set Name. In the Data Extension Name field, enter a name.
8. Click Create.
Map Your Data
Now, connect each form field to a data attribute.
- Click edit for the First Name.
- Under Data Attribute, click the Select or Create Attribute Name field.
- Click Create New Attribute to add a new field to the data extension to store the data.
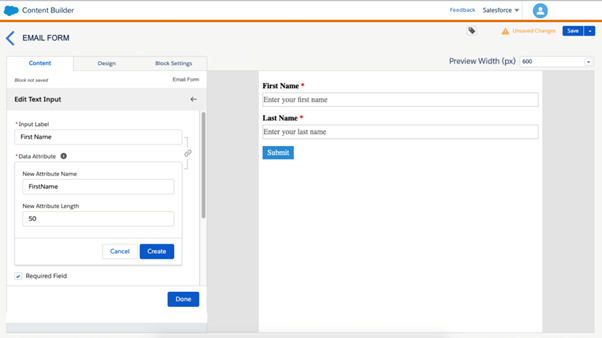
4. In the New Attribute Name field, enter FirstName.
5. Click Create. Click Done
6. Click Create New Attribute to add a new field to the data extension to store the data.
7. In the Create New Attribute Name field, enter LastName. Press Enter or Return.
8. Click Create. Click Done.
9. Click New Input to add a new field.
10. Click Select from the list.
11. In the Input Label field, type Camping Preference. Press Enter or Return.
- Click Select from the list.
- In the Input Label field, type Camping Preference. Press Enter or Return.
- Under Data Attribute, click the Select or Create Attribute Name field.
- Click Create New Attribute to add a new field to the data extension to store the data.
- In the New Attribute Name field, type CampingPref. Press Enter or Return.
- Click Create.
- Under Description, type Where do you prefer to sleep when you camp? Press Enter or Return.
- Click Add Option.
- Under Field Value, type in a tent. Press Enter or Return. Under the Option Label, type in a tent. Press Enter or Return and then click Save.
- Follow the steps above to add in an additional option: In a camper.
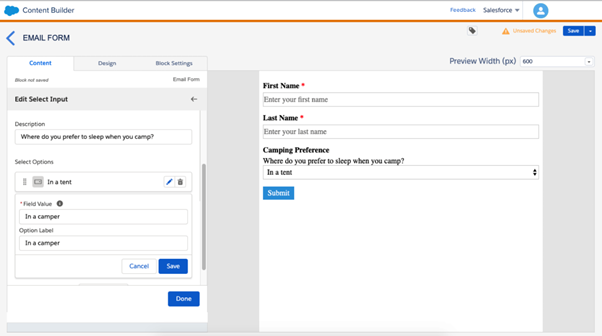
22. Now click Done.
Fallback Content
To ensure all customers have a great customer experience, you need to set up fallback content.
- Click the Design tab.
- Under Type of Fallback click Select an Option.
- Click Block from Content Builder and then click Browse.
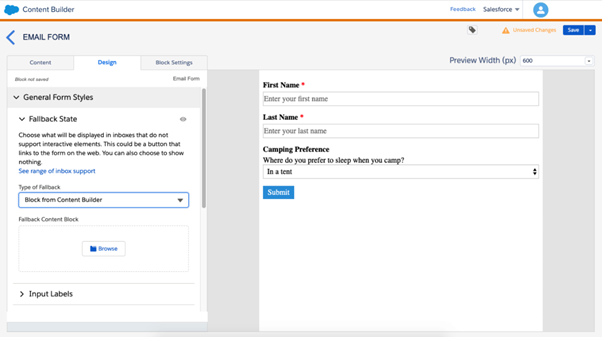
- Select a Block, then click Select.
- Click Submit Button. Under Button text, type Let us know! Press Enter or Return.
- Click Save on the upper right corner.
- In the Name field, type give a name. Press Enter or Return. Click Save.
- Click Save, and then Save and Exit.
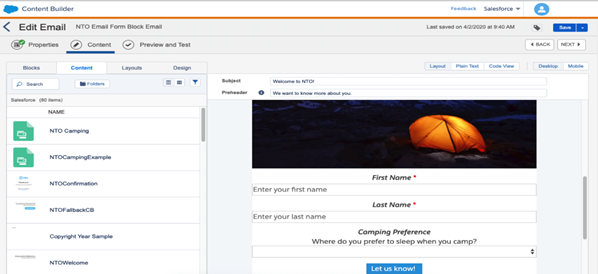
Create Email
Add the form to an email campaign. Click the dropdown arrow next an Email and then click Edit.
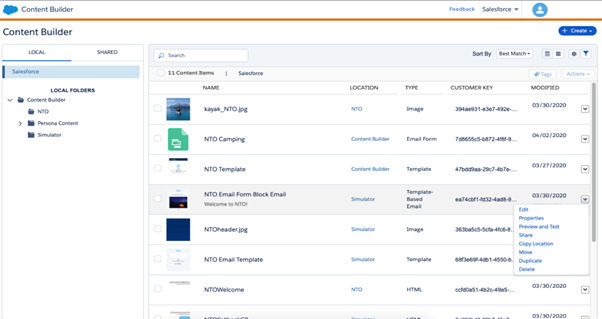
2. Click the Content tab, then drag the content block under the tent image and click save.
References
https://help.salesforce.com/articleView?id=mc_ceb_interactive_email_form_block.htm&type=5
https://trailhead.salesforce.com/en/content/learn/modules/interactive-email-forms
