Introduction:
This article explains how to build an Image Slider using a Lightning Component. The component is an App Exchange Lightning component and it slides the attached images on any sObject record.
It can be used in the following areas:
1. Lightning App Builder.
2. Visualforce Page.
3. Another Lightning component.
It reads and displays the images from attachments and it supports all types of images. Besides, it automatically slides the images and adjusts auto play duration and slider height.
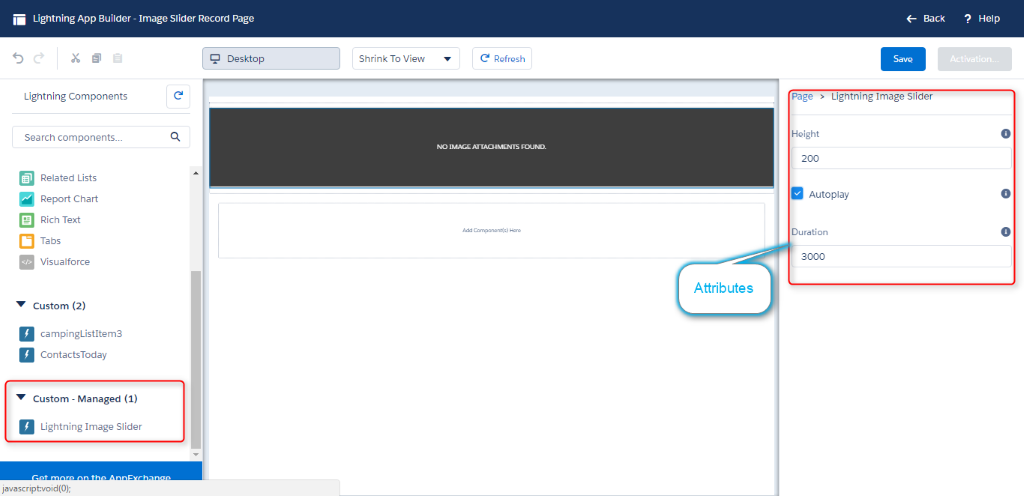
Attributes:
1.sliderHeight
Slider height in pixel. The default value is 200 pixels.
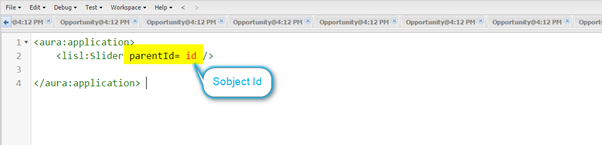
2. parentId (required)
Sobject record ID for query the image attachments.
- autoplay
Attached images automatically slide. Default value is TRUE.
- duration
It defines the time for switching the next image when the auto-play is set as true. This unit is in milliseconds. Its default value is 3000ms
- Lightning App Builder
Step 1: Navigate from Salesforce Classic to Lightning.
Step 2: Create or edit the record page in which you want to place the image slider.
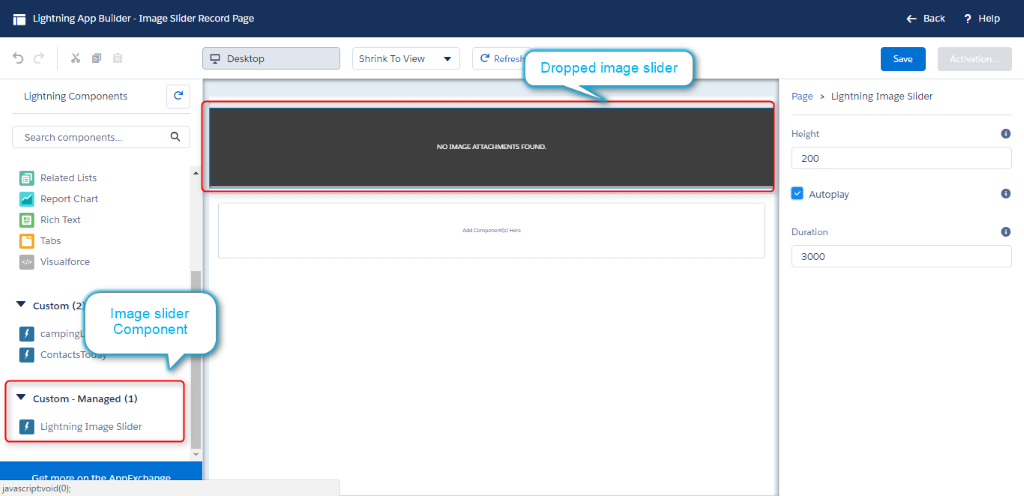
Step 3: Drag and drop the image slider component into one of the grid.
Step 4: Set the attribute values for the slider.
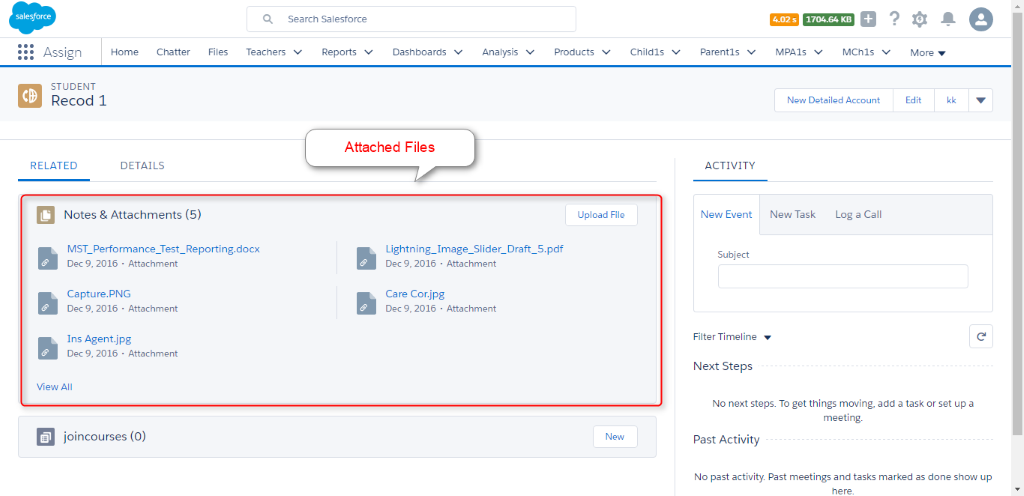
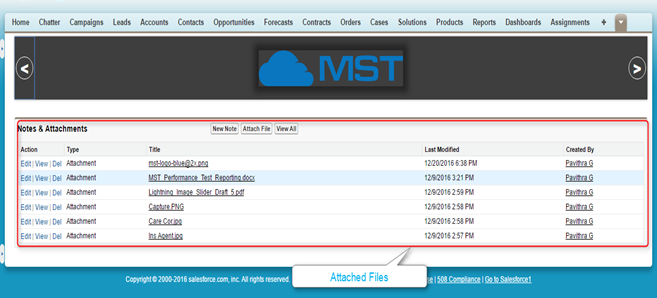
Step 5: Go to the Record detail page and add the image attachments.
OUTPUT:
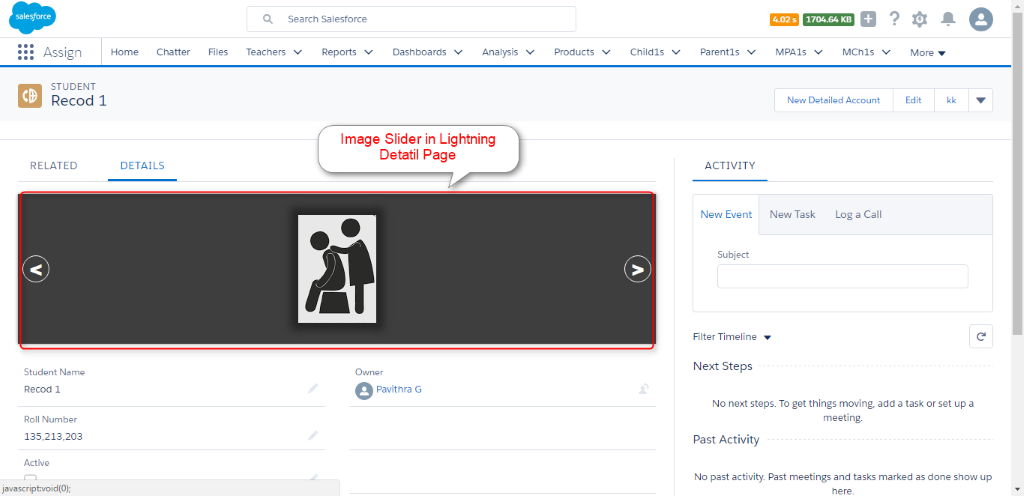
Related List Page:
2.Image slider in another Component
Step 1: Go to the Developer Console
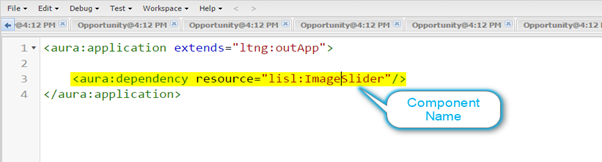
Step 2: File -> New -> Lightning application
Step 3: Please add the following code
Step 4 : Save and Preview the page.
3.Image slider in a Visualforce page
Step 1: Go to the Developer Console
Step 2: File -> New -> Lightning application [Create a lightning application with the name of sliderApp].
Please add the following code
Step 3:File -> New -> VisualForce Page
Please add the following code:
<apex:page standardController="Student__c"  >

<apex:form >

 <apex:repeat value="{!Student__c.id}" var="id1">

 <Script>

 Var id;

 Id="{!id1}";

 </script>

 </apex:repeat>

 </apex:form>

<apex:includeLightning />

 <div id="sliderHolder"></div>

 <script>

  $Lightning.use("c:SliderApp", function() {

  $Lightning.createComponent("lisl:Slider",

{

           parentId: id, autoplay:false,sliderHeight:100


              },         "sliderHolder",         function(cmp) {

                       });

       });

 </script>

      <apex:repeat value="{!Student__c.Attachments}" var="attachment">

    </apex:repeat>

</apex:page>
OUTPUT:
Conclusion:
Thus, if we use an image slider on a record page or Visualforce page, then we can easily slide the attached images one by one.
