Definition
Using Lightning Web Component Local Development Server, we can build component modules and view our changes live without publishing our components to an org.
Prerequisites
- Developer Hub-enabled org
- Local Development Server
- Salesforce CLI installed VS code
Enable Dev Hub
- Login as System Administrator to developer edition or production or business org
- Setup –> enter Dev Hub –> select Dev Hub Click enable
- Once it is enabled it cannot be disabled
Local Development Server Installation
Steps
- To install the Local Development Server, we need to run the following command in a new terminal window
Sfdx plugins: Install @salesforce/lwc-dev-server

- We need to check whether there is an update for Local Development Server. If exists, then run the following commands
Sfdx plugins: Update

- Navigate to SFDX project ,or clone one that has Lightning Web Components
git clone git@github.com: trailheadapps/componentname.git
- If not in the lwc-sample root directory already, cd into it
cd componentname
- Add the .localdevserver folder in SFDX project to .gitignore file. This folder contains the local development configuration. Do not modify any files.
- Enter the command to open a Dev Hub login window in the browser
Sfdx force: auth: web: login -d -a myhuborg
- To create a scratch org, run this command from the command line
Sfdx force: org: create -s -f config/project -scratch-def.json -a “LWC”
- Push the code to the scratch org
source: push
- Start the server
Lightning: lwc: start
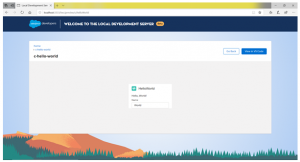
- View the server at http://localhost:3333/.
Access Local Development Server from VS Code
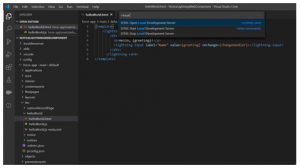
We can access the local development server’s SFDX commands from VS code by pressing Ctrl + Shift + P. Enter as local development
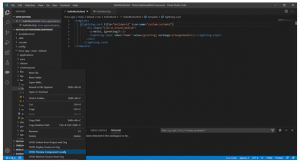
To preview Lightning web Components, right click any line of code in the component’s HTML,CSS or JS files
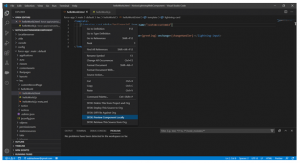
We can also right click any of the HTML,CSS or JS filenames or the component folder
Preview of the component in the local development server