Introduction:
In the fast-growing IT industry, there are more need for tools to make the life of IT professionals easier. To serve that purpose we are going to look at a tool “QASE” – Test management tool which will be useful for the Testing process during the Testing lifecycle and will help both the Development and QA team.
Qase is a cloud-based test management tool developed by Nikita Fedorov. This tool can manage test models, compose test plans and perform manual test runs. It’s one of the self-exploratory Test Management tool in the current market.
Why QASE?
- Qase is a cloud-based test case management tool
- If we choose a tool a based-on budget, then open source is a good option. Qase is an open source tool at free of cost (with major features available)
Note: Paid versions are also available Business & Enterprise version with some extra features like Single Sign-On, more files/attachments storage., etc
- Among the other management tools, Qase is good at providing Live Chat support within 30 minutes.
How does it differ from other tools?
- Lifetime access for startup organization
- Immediate response from the support team
Qase setup:
First, we need to register with Qase. Following are the steps to register with the Qase tool.
Step 1: Navigate to the official website of Qase – https://qase.io/signup
Step 2: Enter the required details in the following fields:
- Password
- Confirm Password
Step 3: Click the ‘Create your Qase account’ button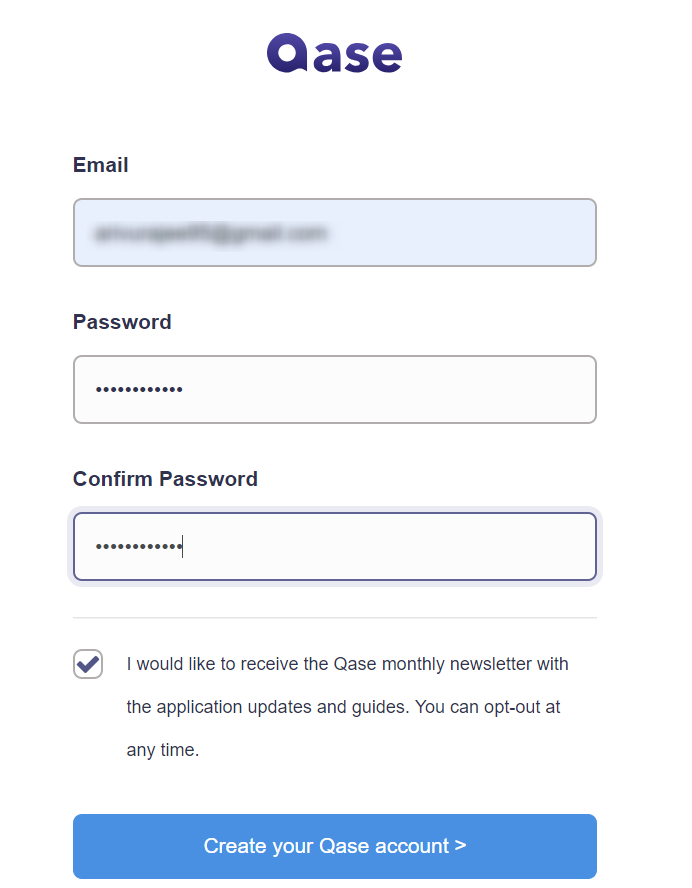
Step 4: Confirmation link will be sent to the email address we used. Open the email and click the ‘Confirm email’ button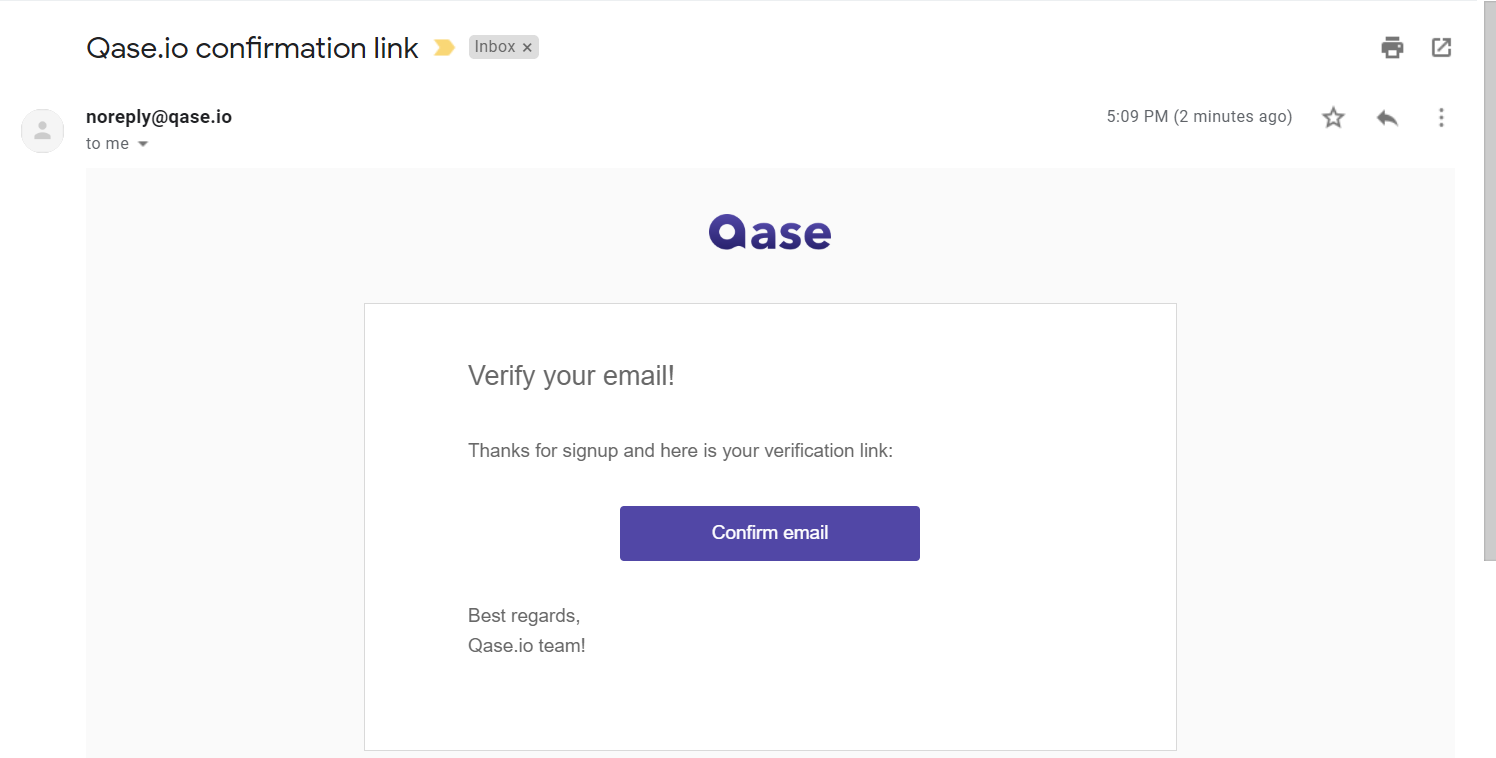
Step 5: Use the following link to log into the QASE https://app.qase.io/login
Enter the login credentials (Email and Password) and click the ‘Login’ button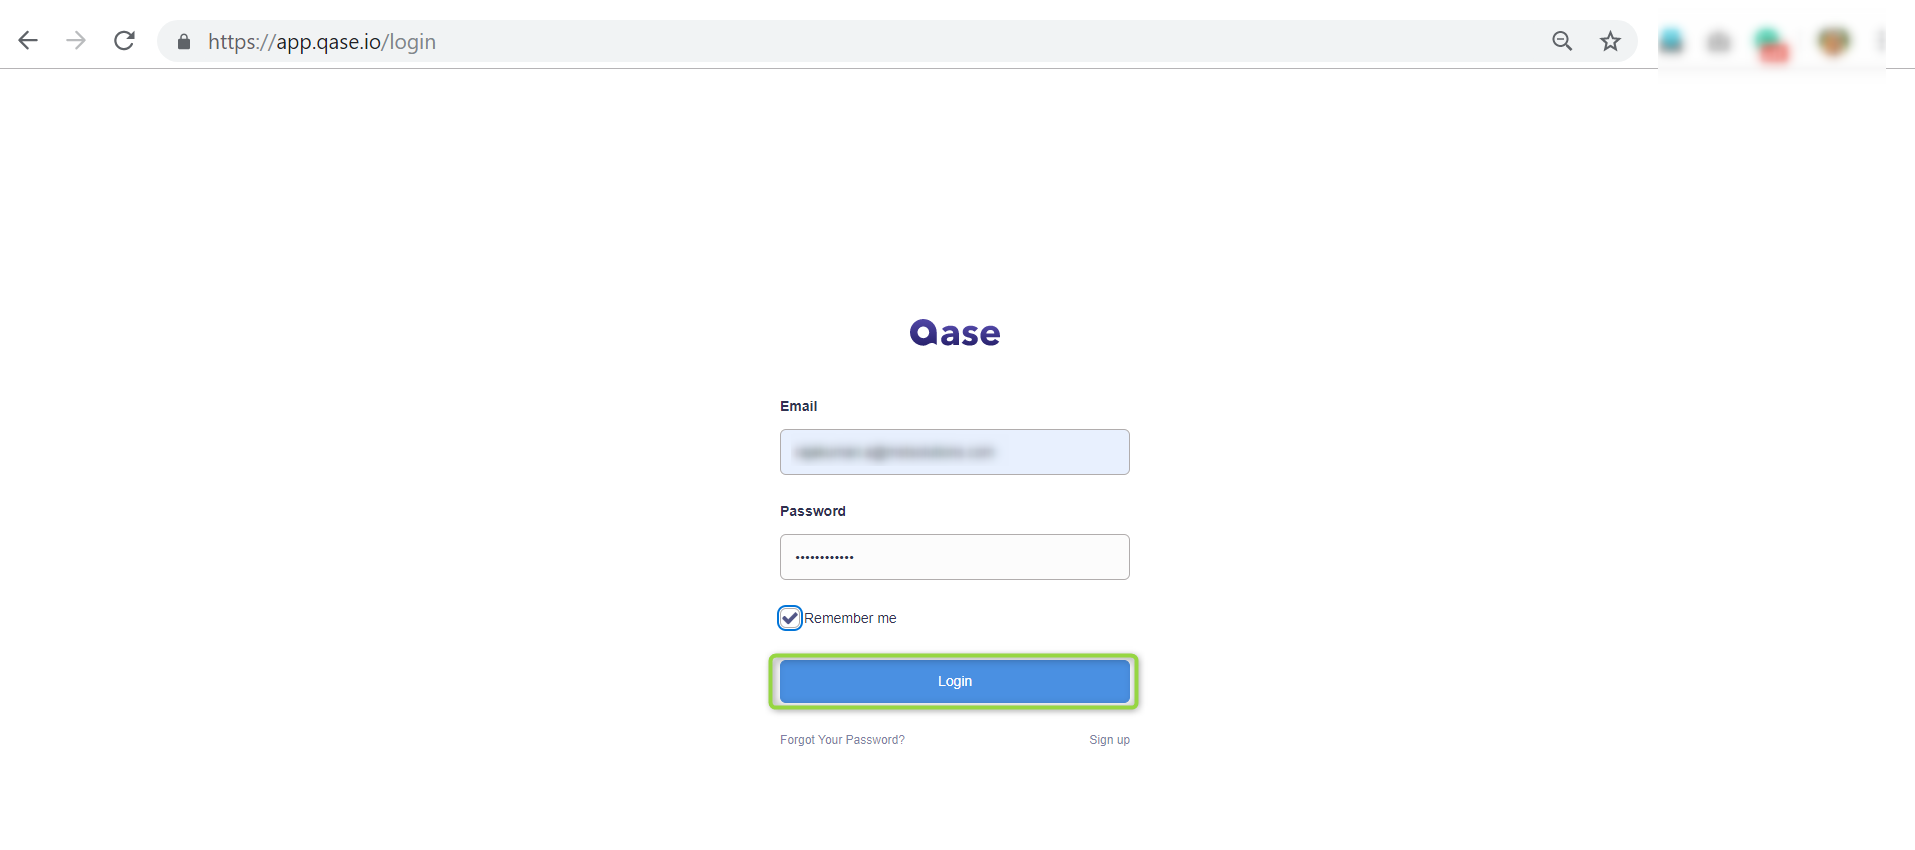
Diagram to show the important features in Qase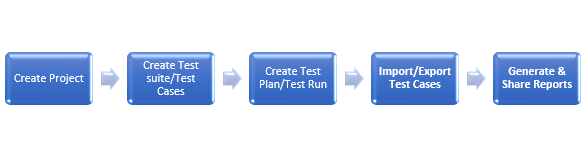
QASE features for Test designing:
Creating a project on Qase:
Step 1: Click the ‘Create New project’ button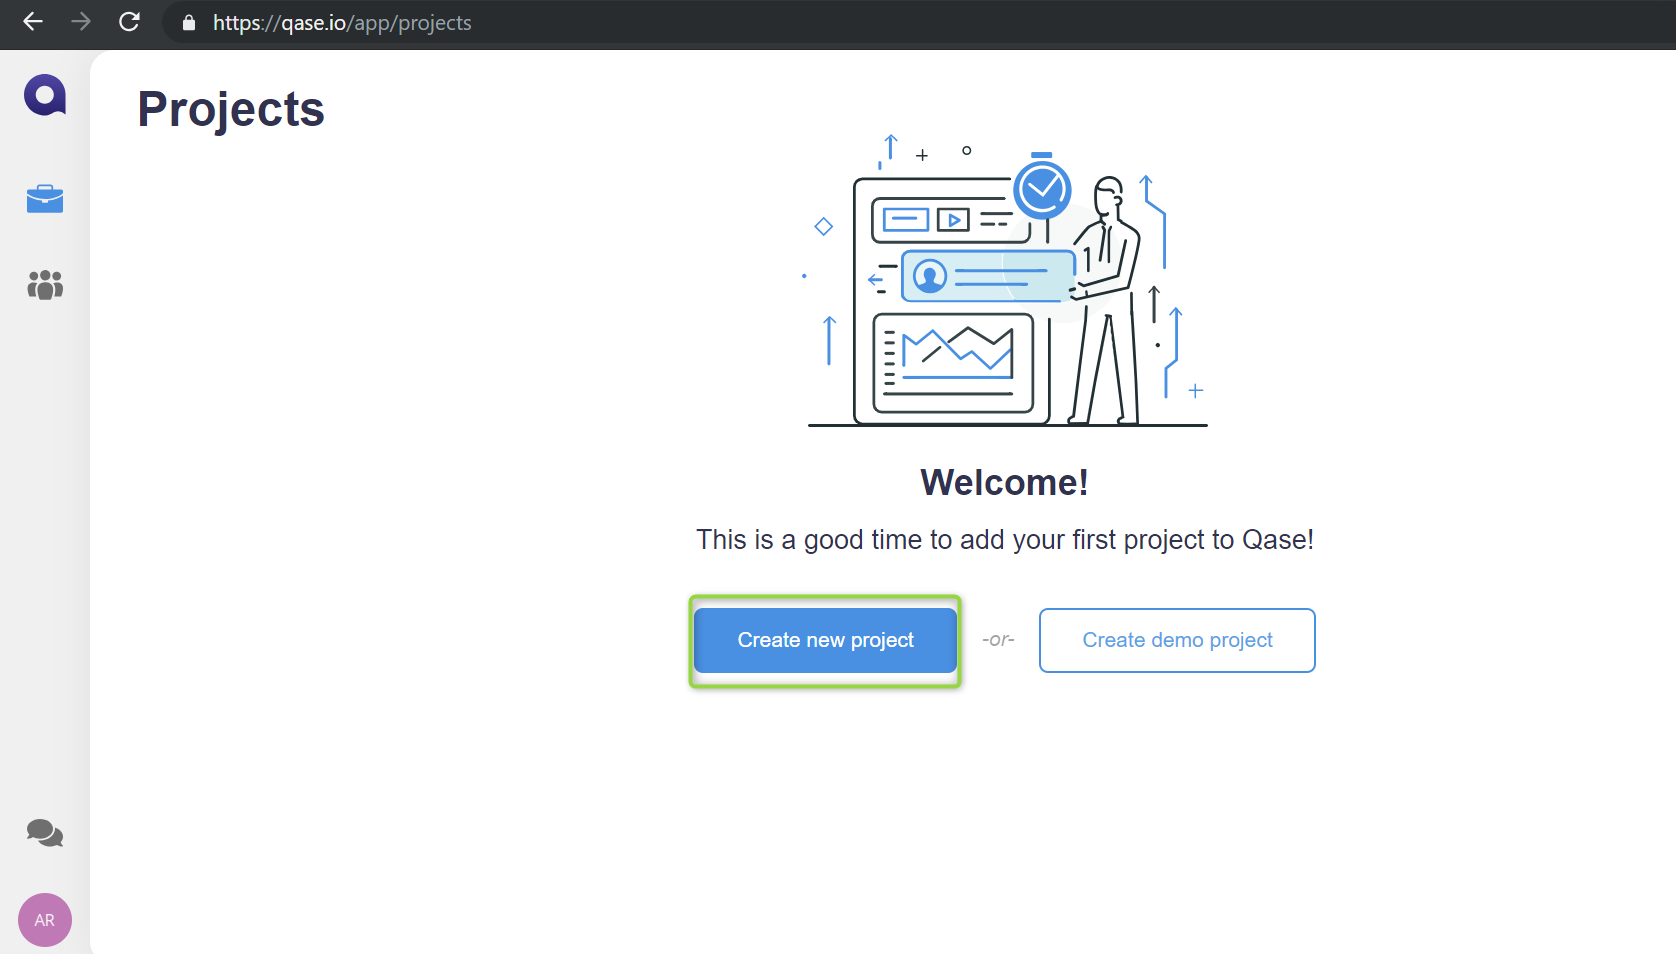
Step 2: Enter the project details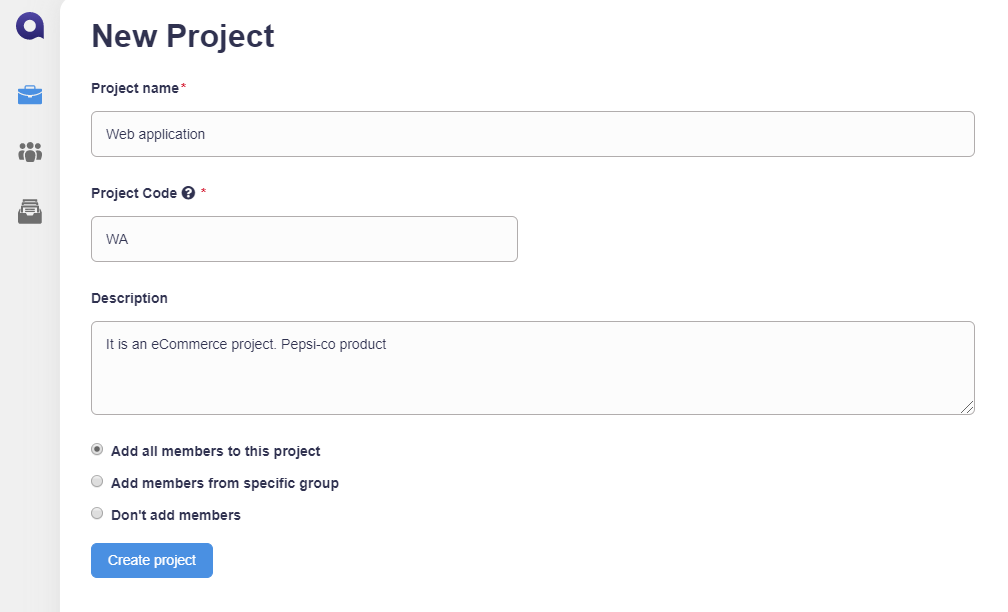
Step 3: Click the ‘Create project’ button
Creating Test Suites and Test Cases:
We can save and execute all our test suites and test cases in one place. Test suites allow us to organize all our test cases into logical groups. Test cases allow us to define parameters such as expected results etc.,
Creating Test Suites:
Below are the steps to create a test suite:
Step 1: Click on the created project and then click the ‘Create new suite’ button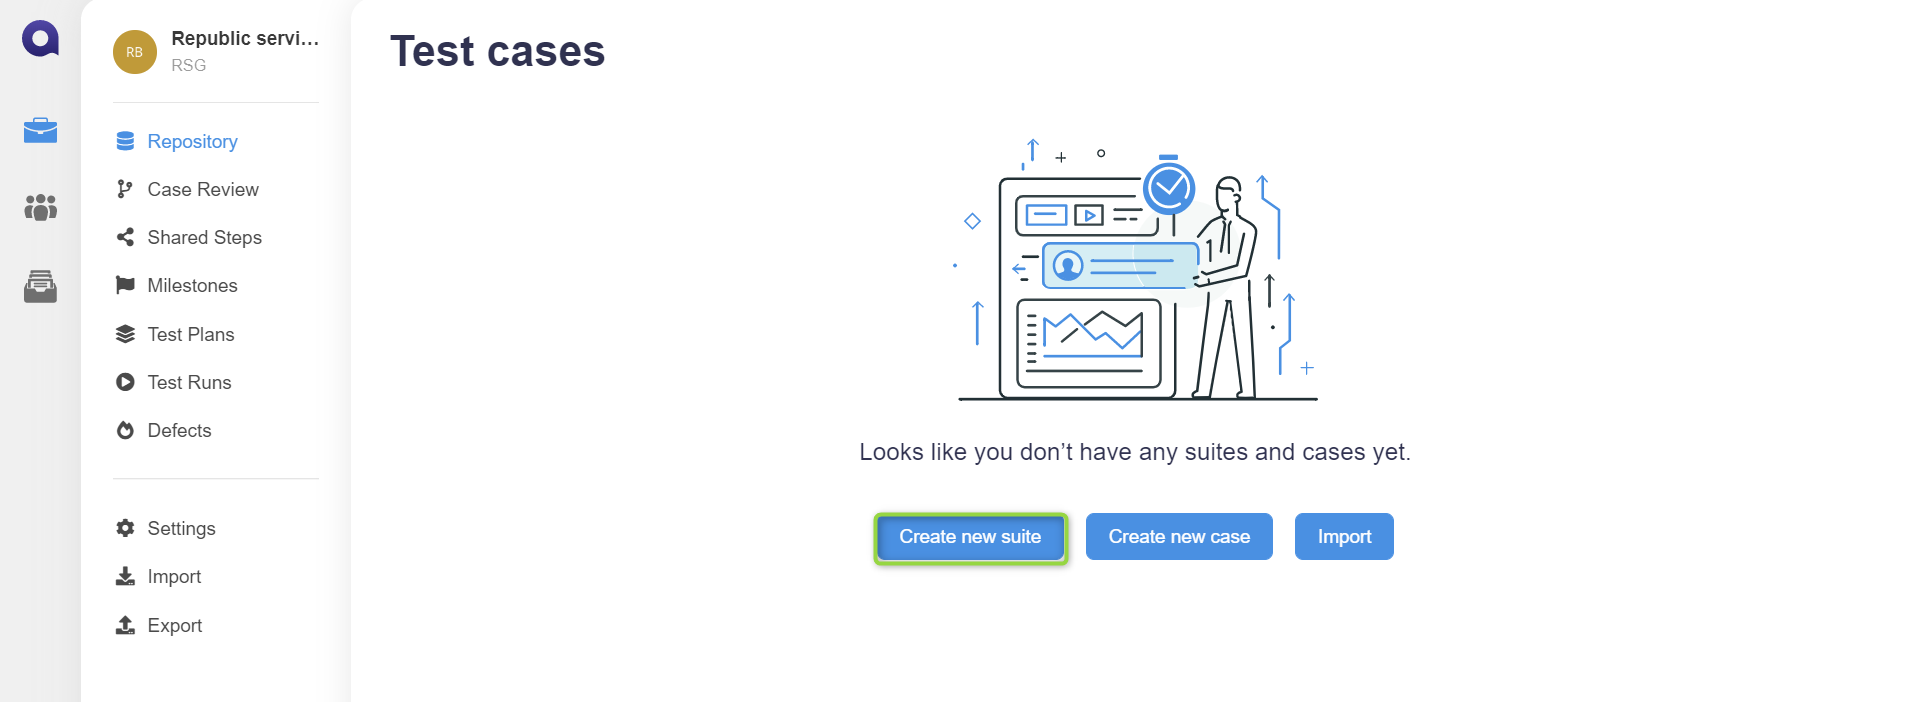
Step 2: To create a test suite, enter the Suite name, choose parent suite (if any), add description, pre-conditions and click the ‘Create suite’ button.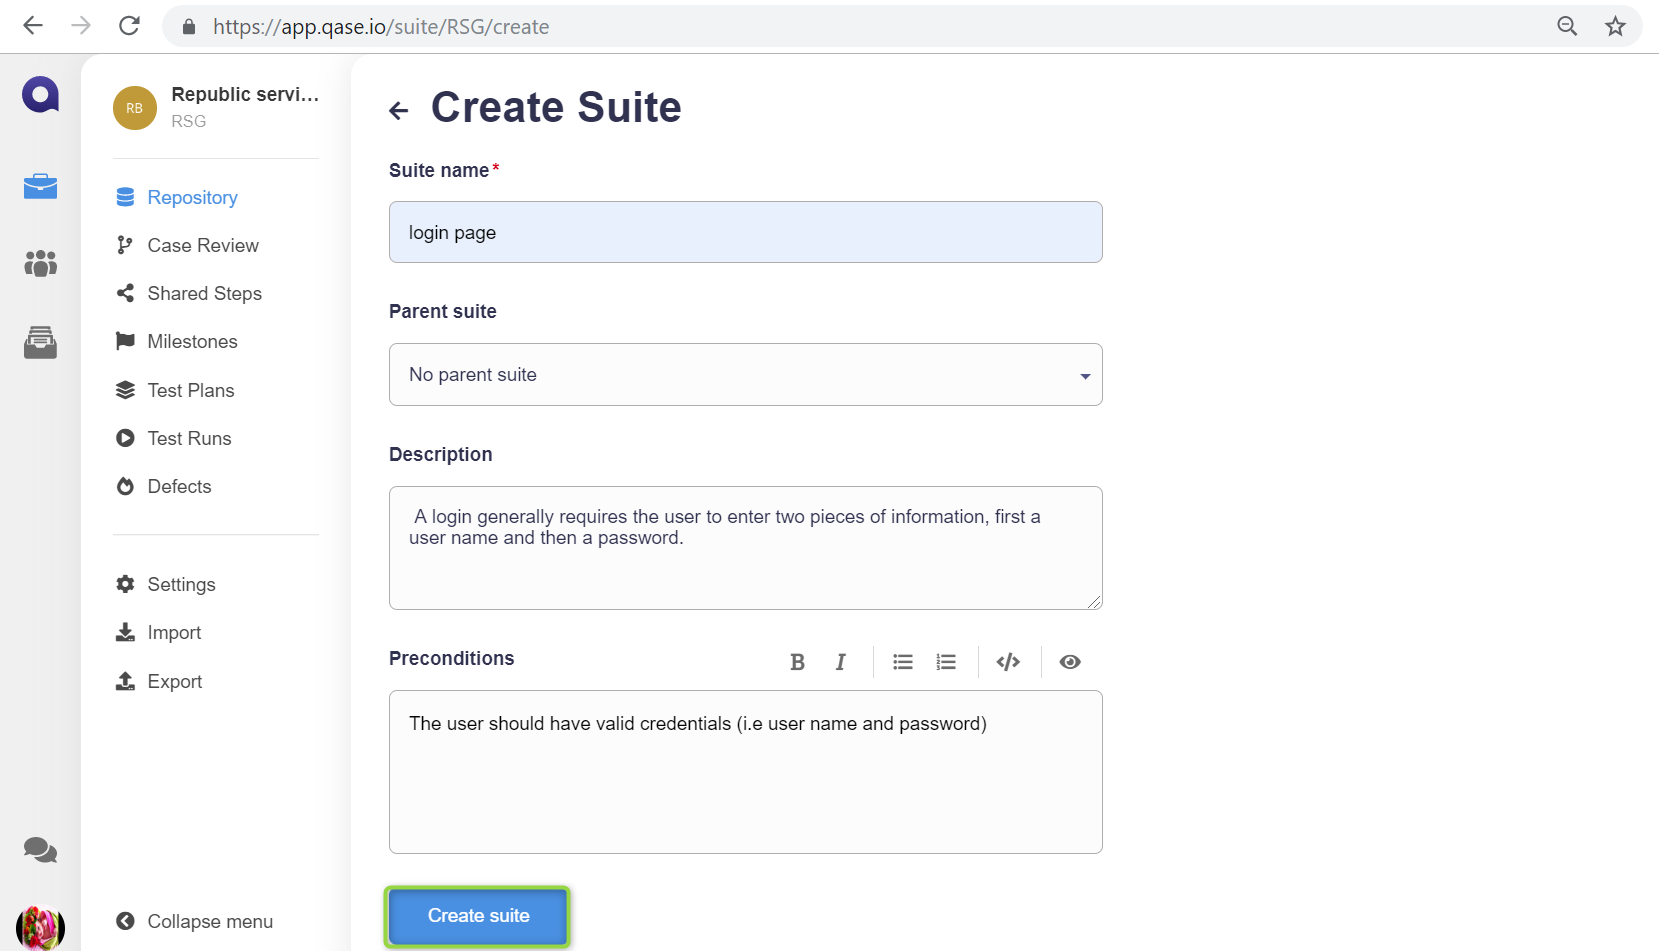
Creating Test Cases:
Below are the steps to create a test case:
Step 1: To create test cases, click the ‘Create case’ button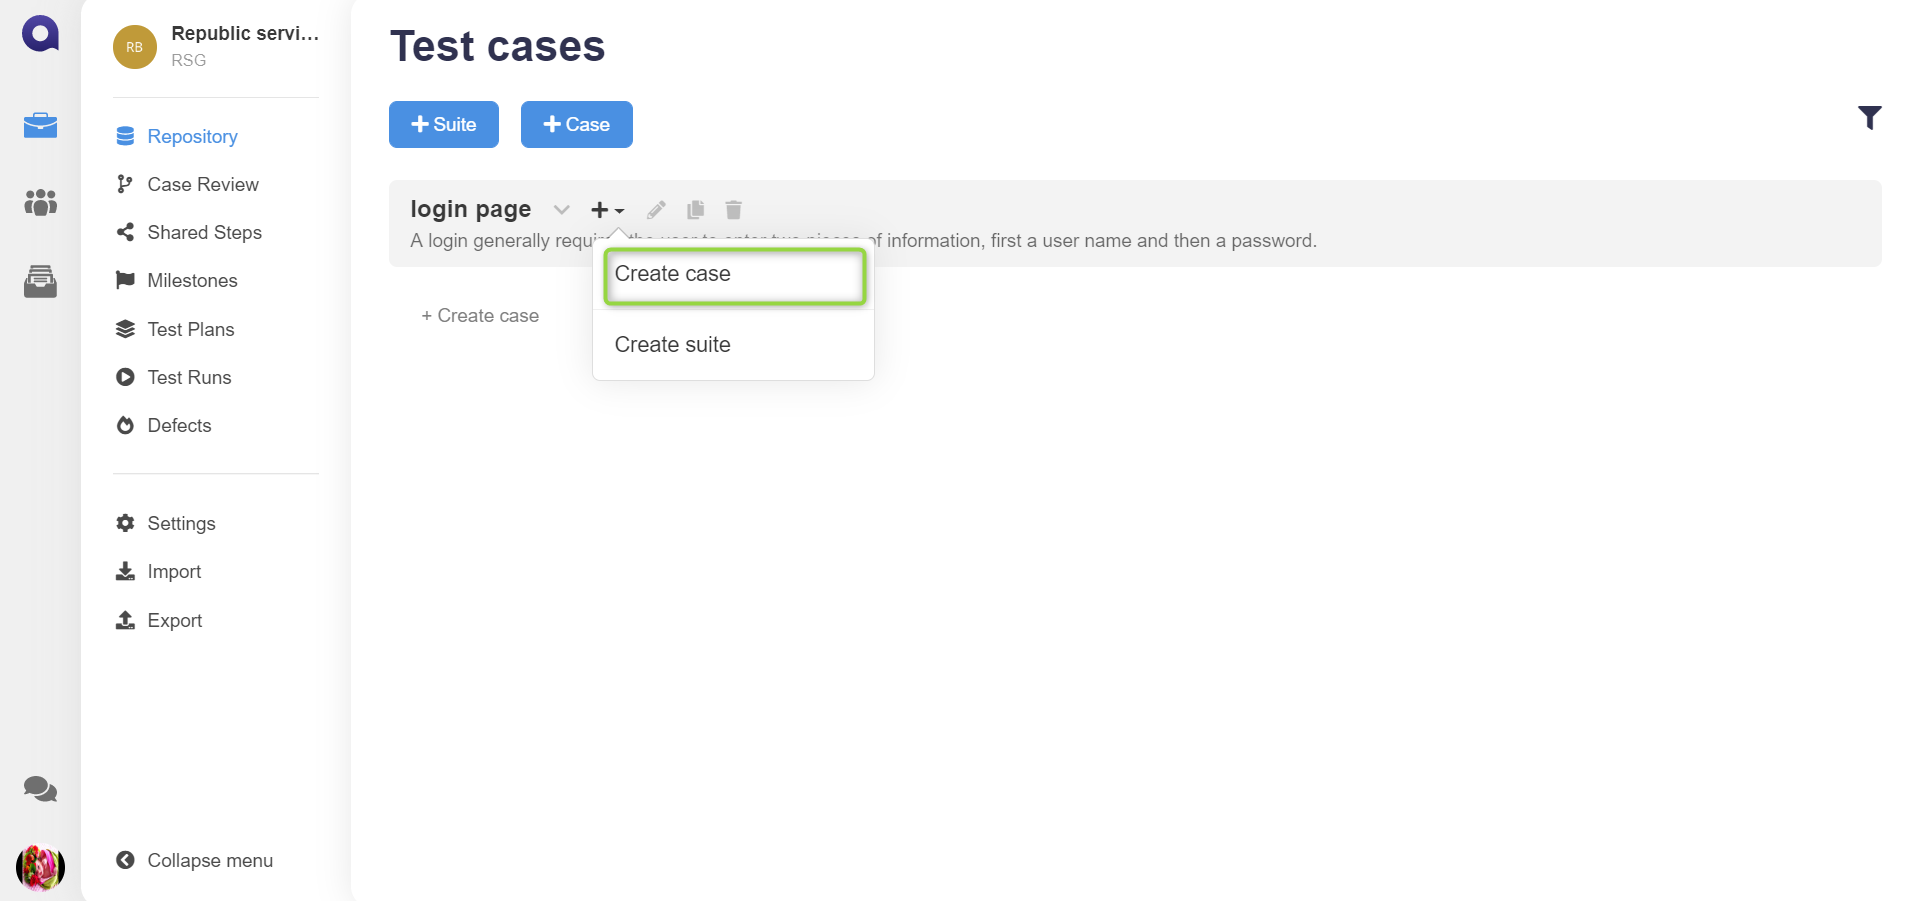
Step 2: Enter the required fields and click the ‘Save’ button.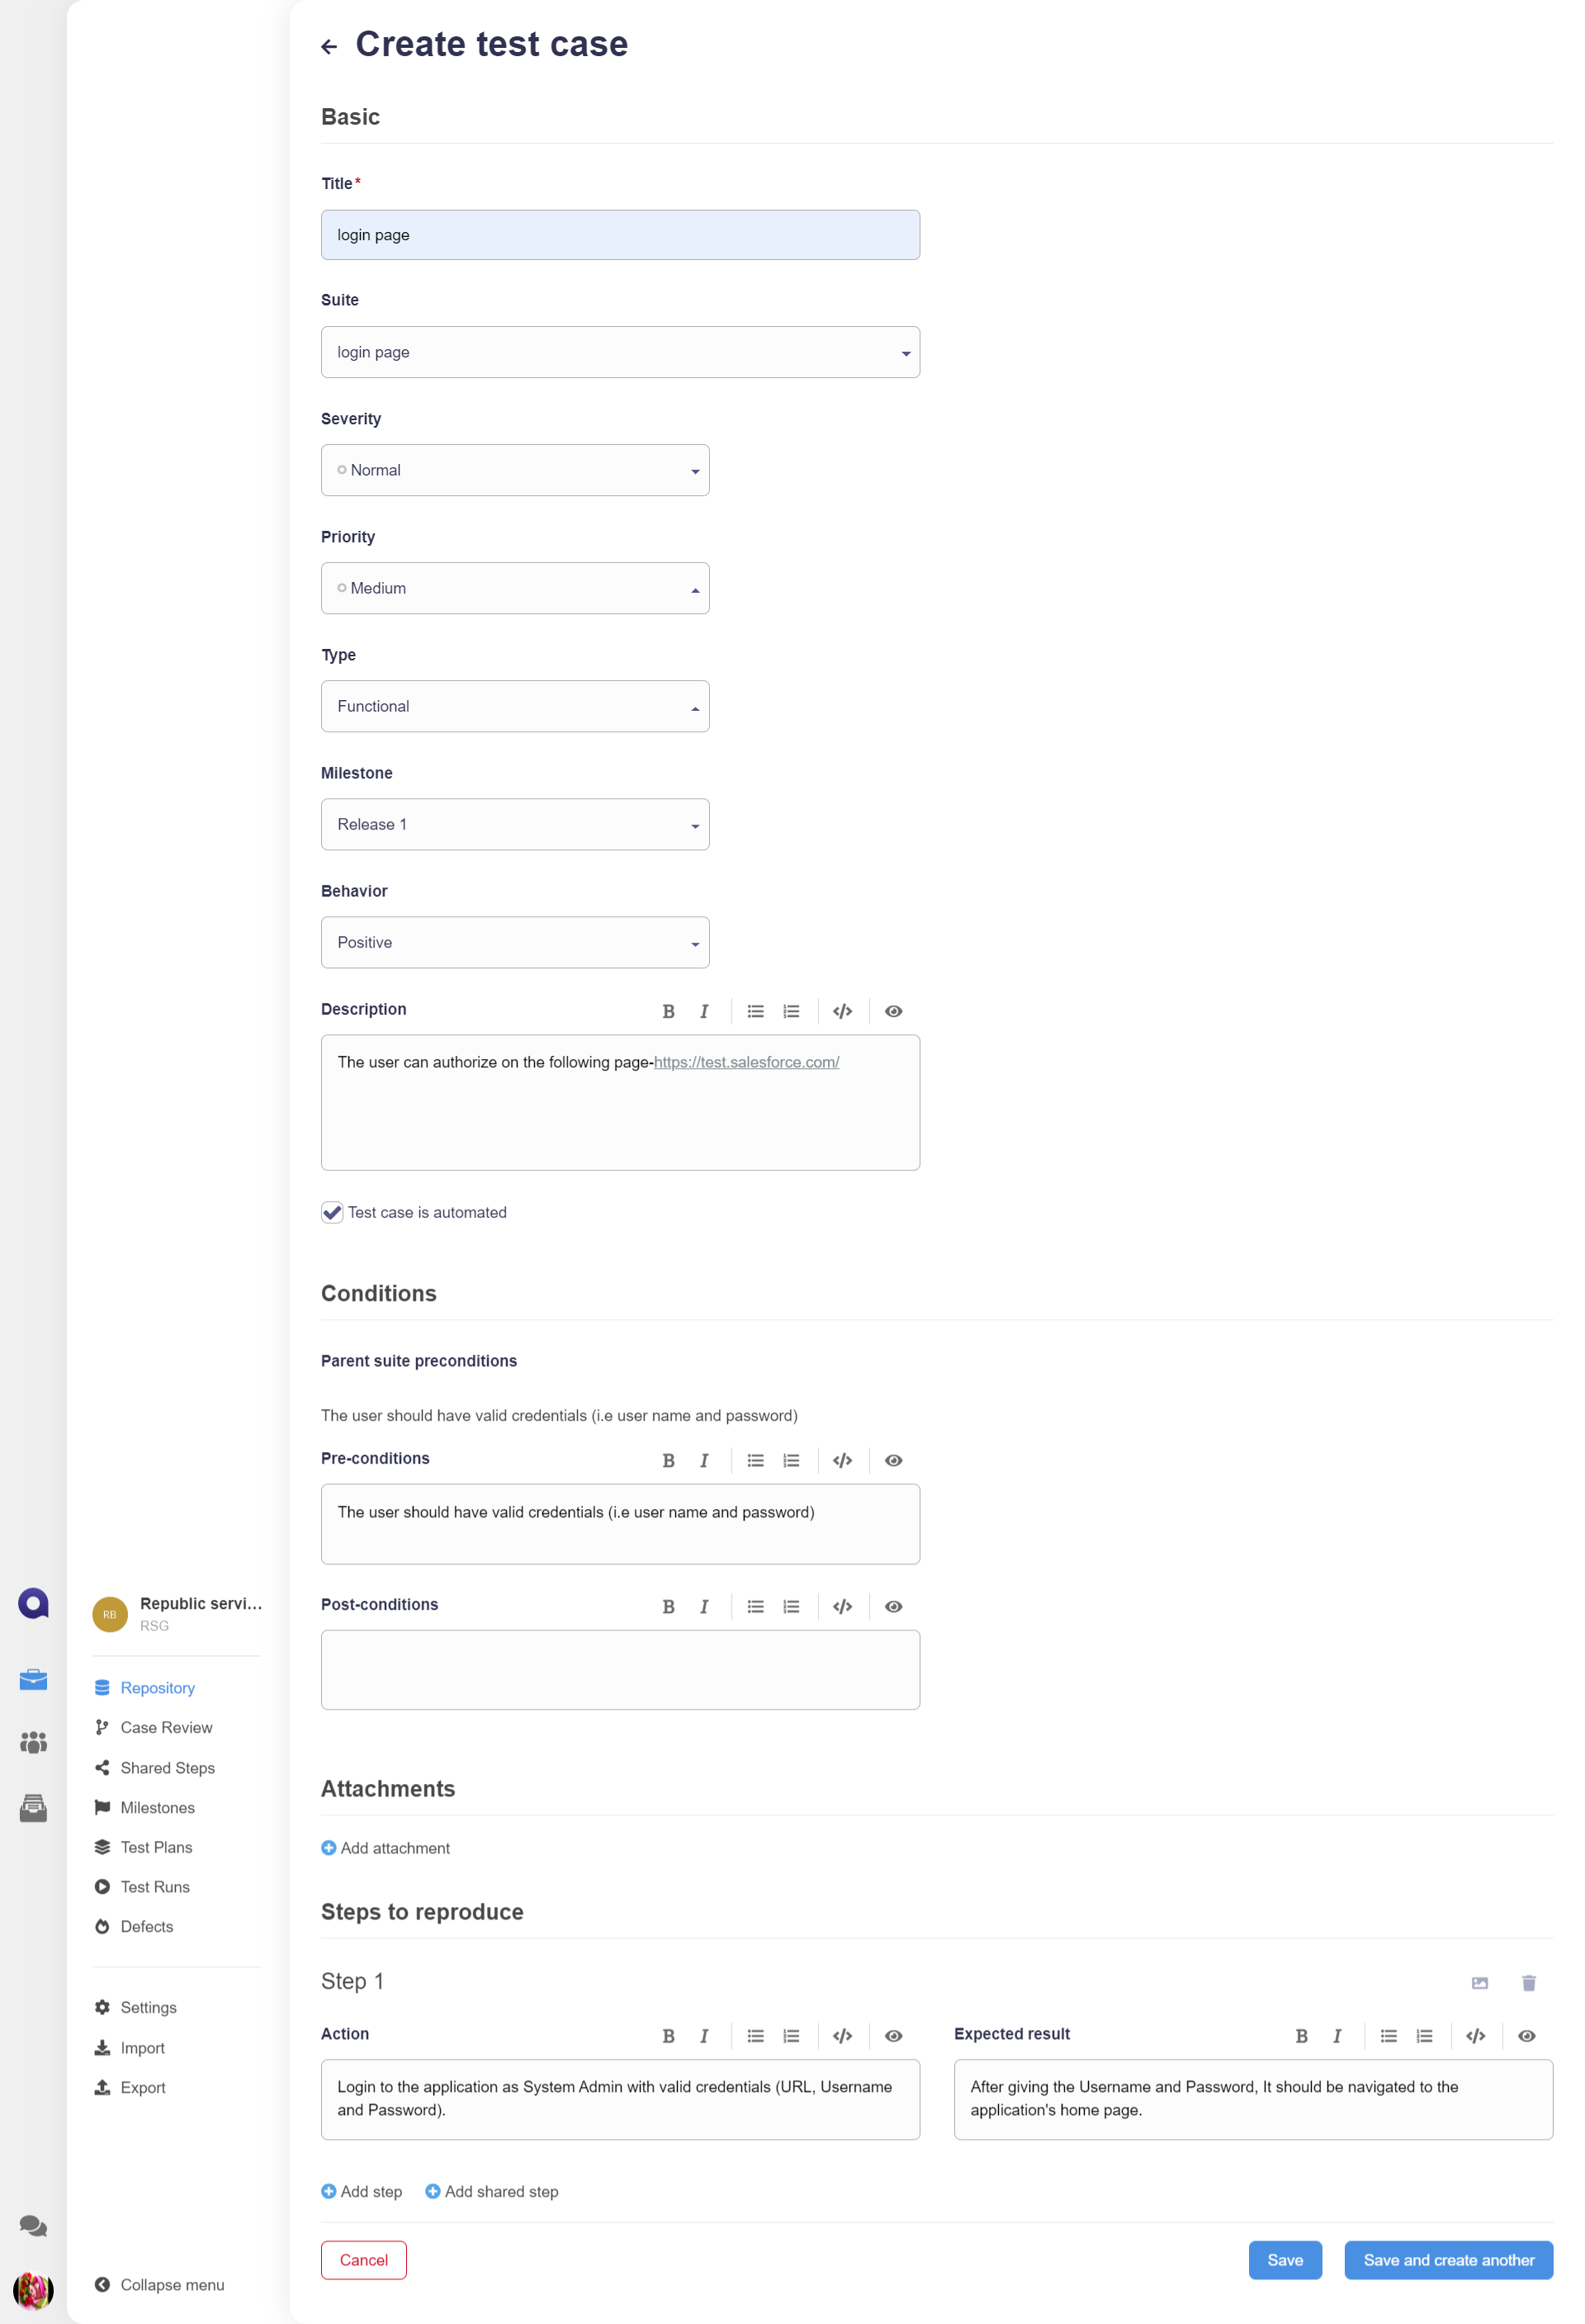
Create Test Plans & Runs:
We can create several test plans and add existing or new test cases/suites to it. We can run test plans and track whether the test cases are passed or failed or blocked from the Test Runs screen itself.
Create a Test Plan:
Below are the steps to create a test plan:
Step 1: Click on the Test Plans
Step 2: Enter the title of the test plan
Step 3: Select required test suites from the list
Step 4: Select required test cases from the list
Step 5: Select the user which we want to assign from the dropdown list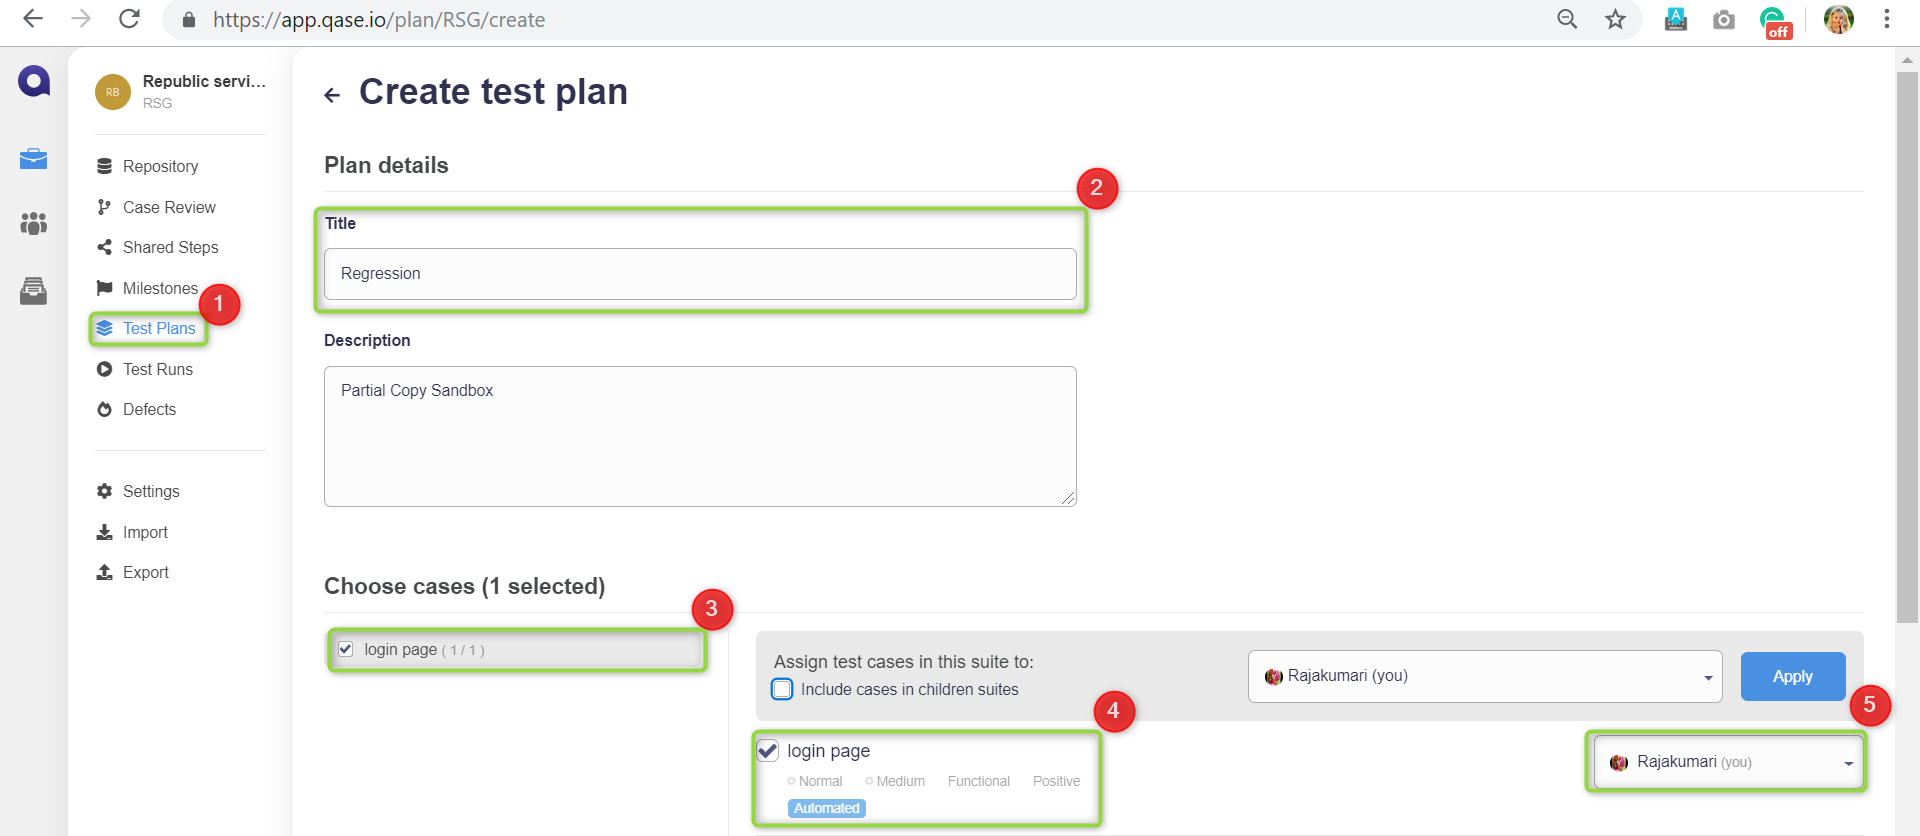
Step 6: Click the ‘Create plan’ button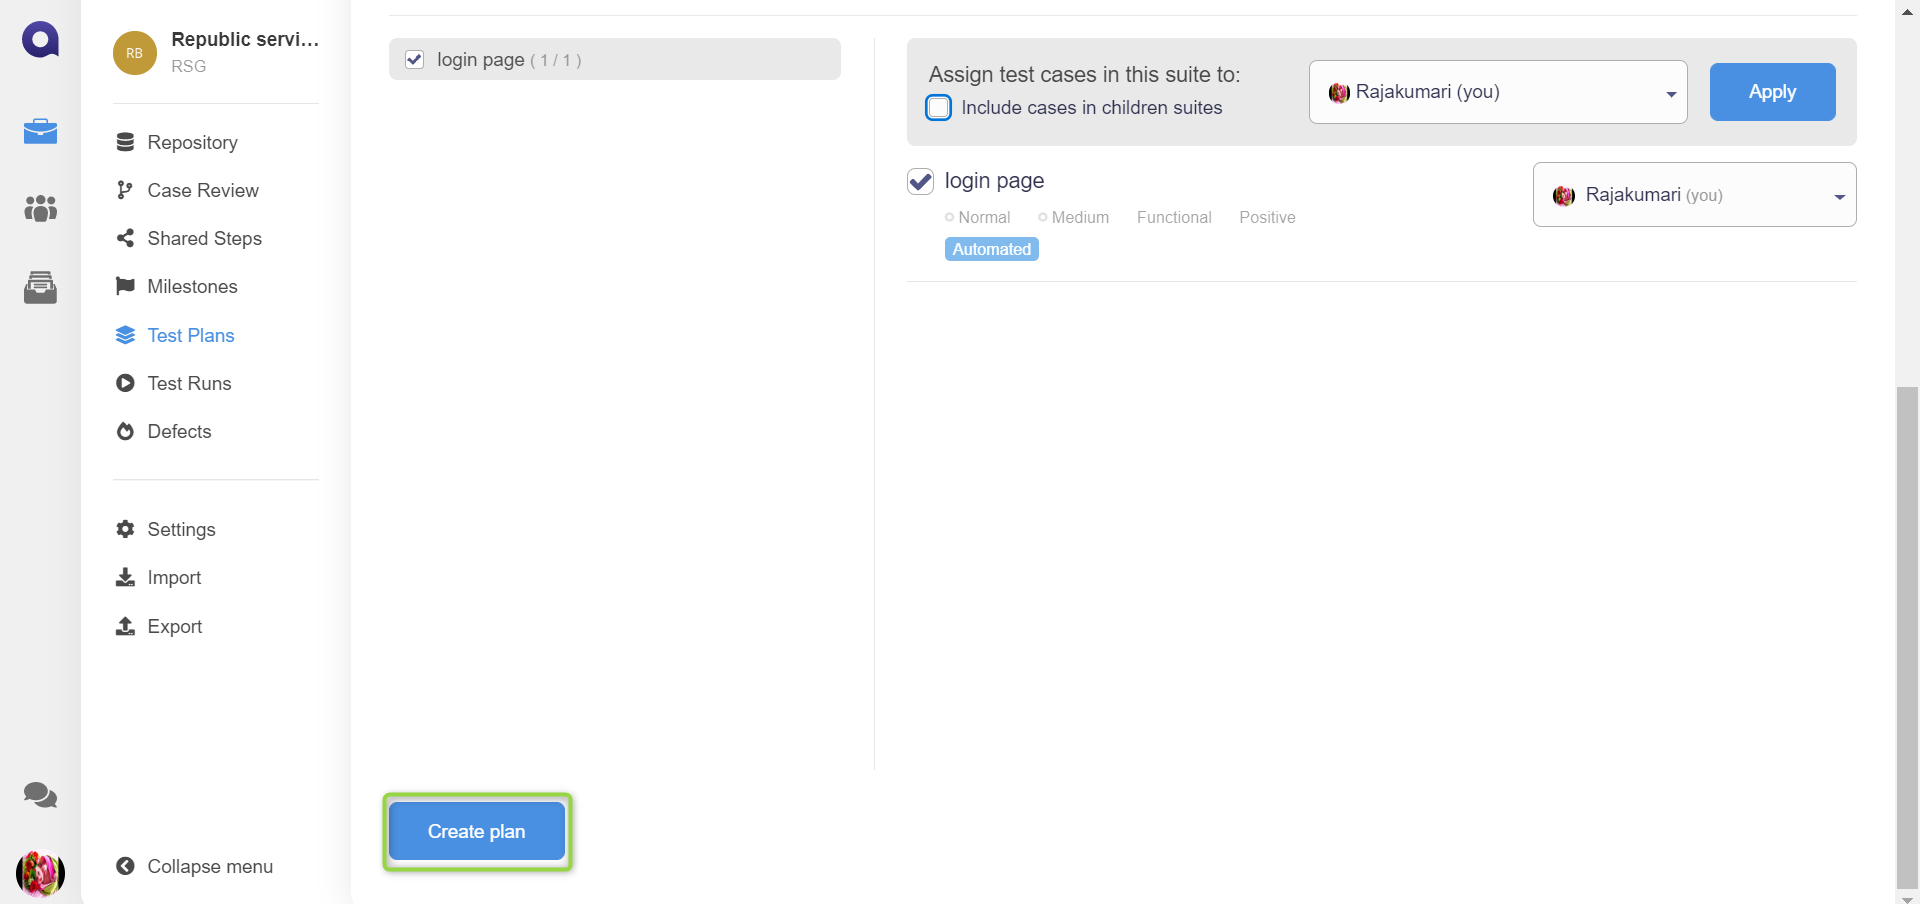
Creating Test Run:
The following are the steps to execute test cases using qase
Step 1: Click on the Test Runs
Step 2: Enter Run title
Step 3: Select Test plan from the dropdown list
Step 4: Select the user we want to assign to from the dropdown list
Step 5: Select required test suites from the list
Step 6: Select required test cases from the list
Step 7: Select the user we want to assign to from the dropdown list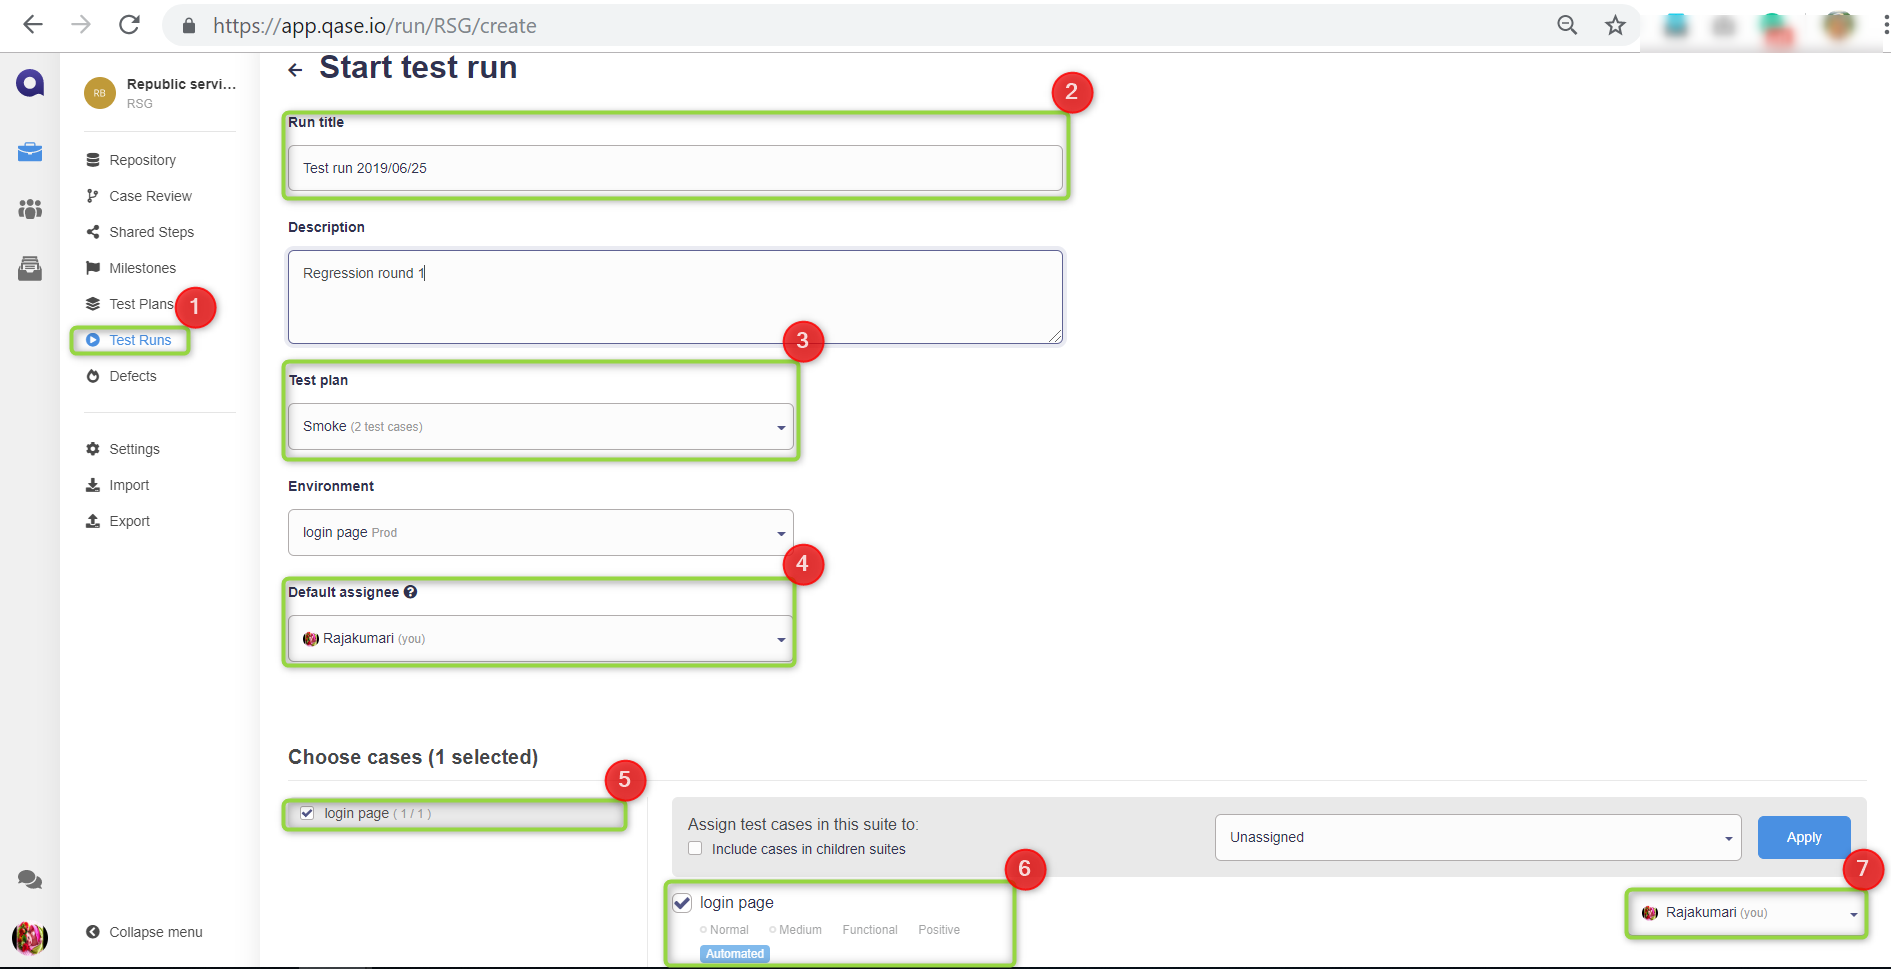
Step 8: Click the Start button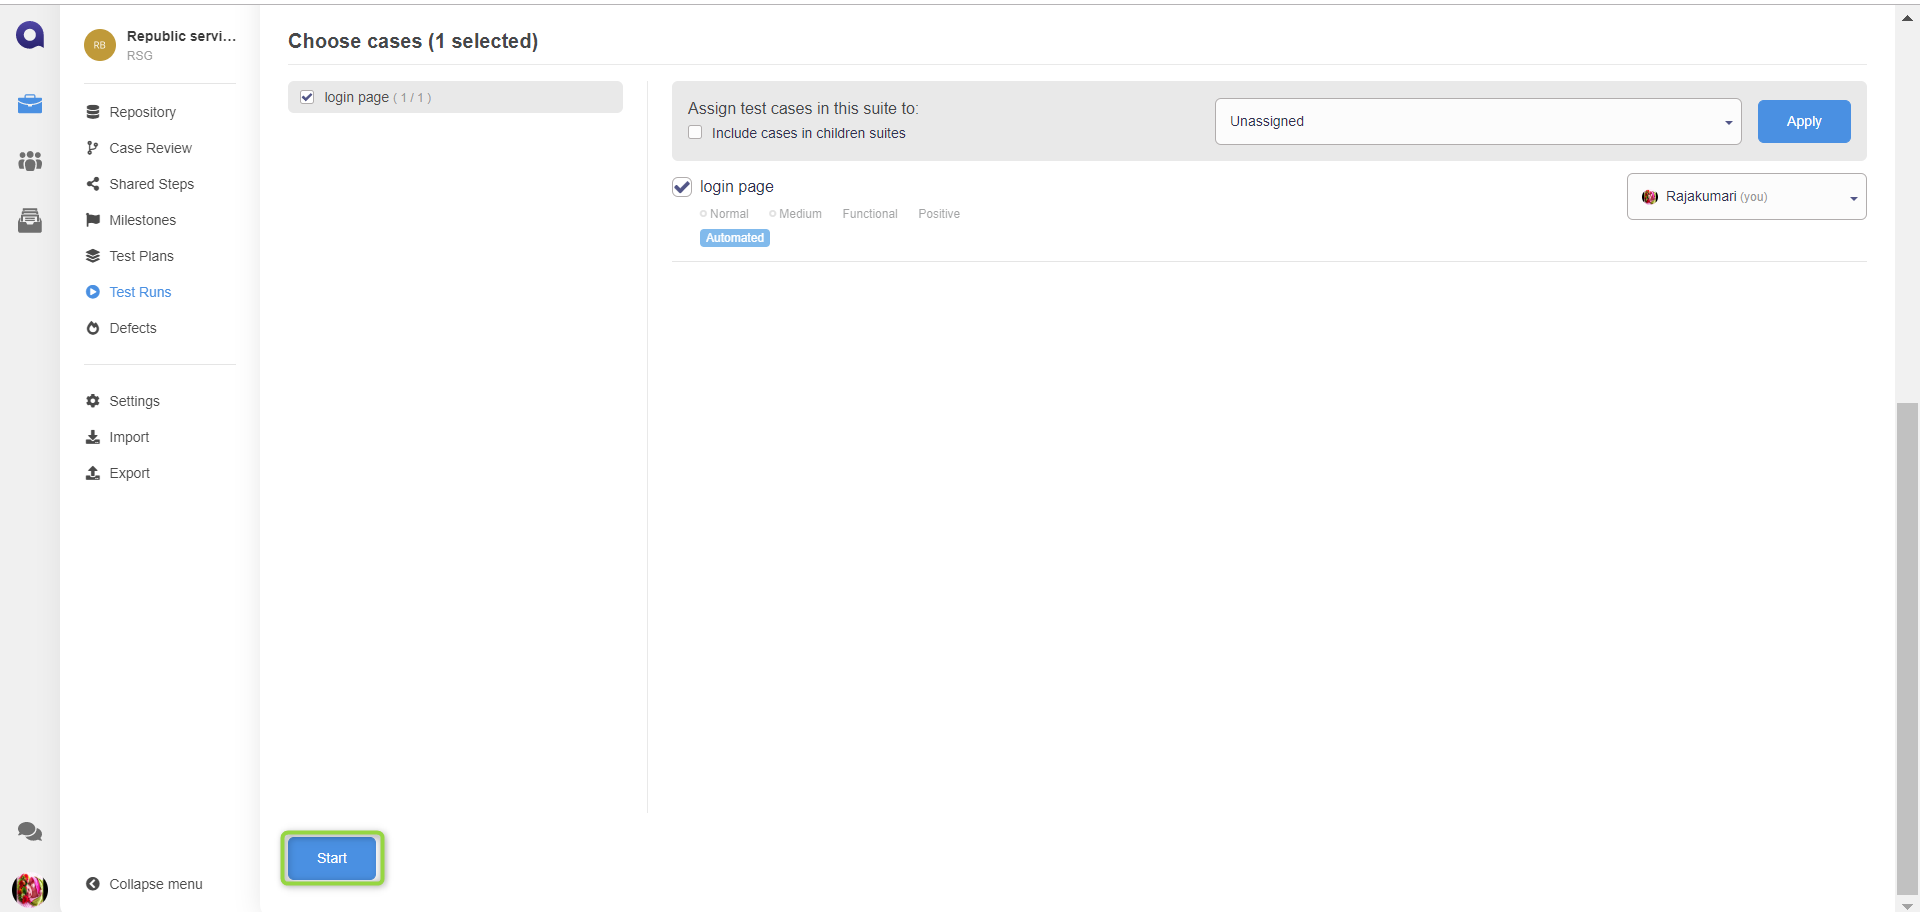
Step 9: Click the Launch Test Run button
Step 10: We can see Pass, Fail, Block statuses or skip the test case.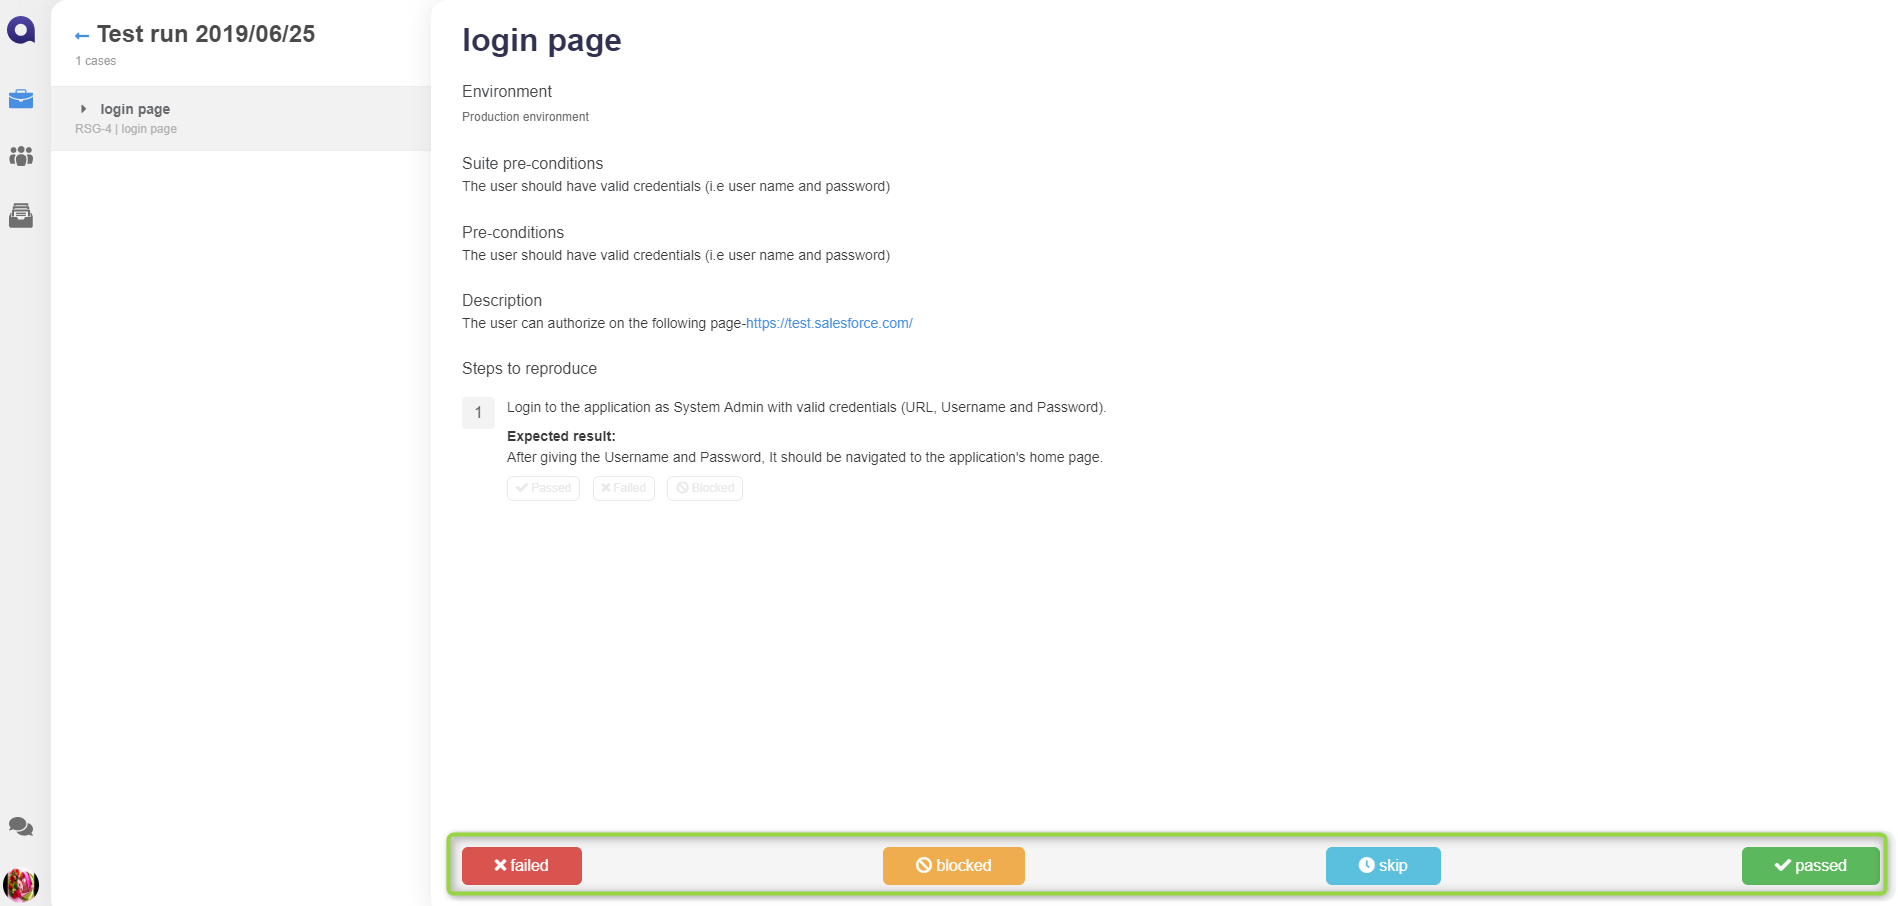
Note: If a test case is failed, we can add it in the same screen itself.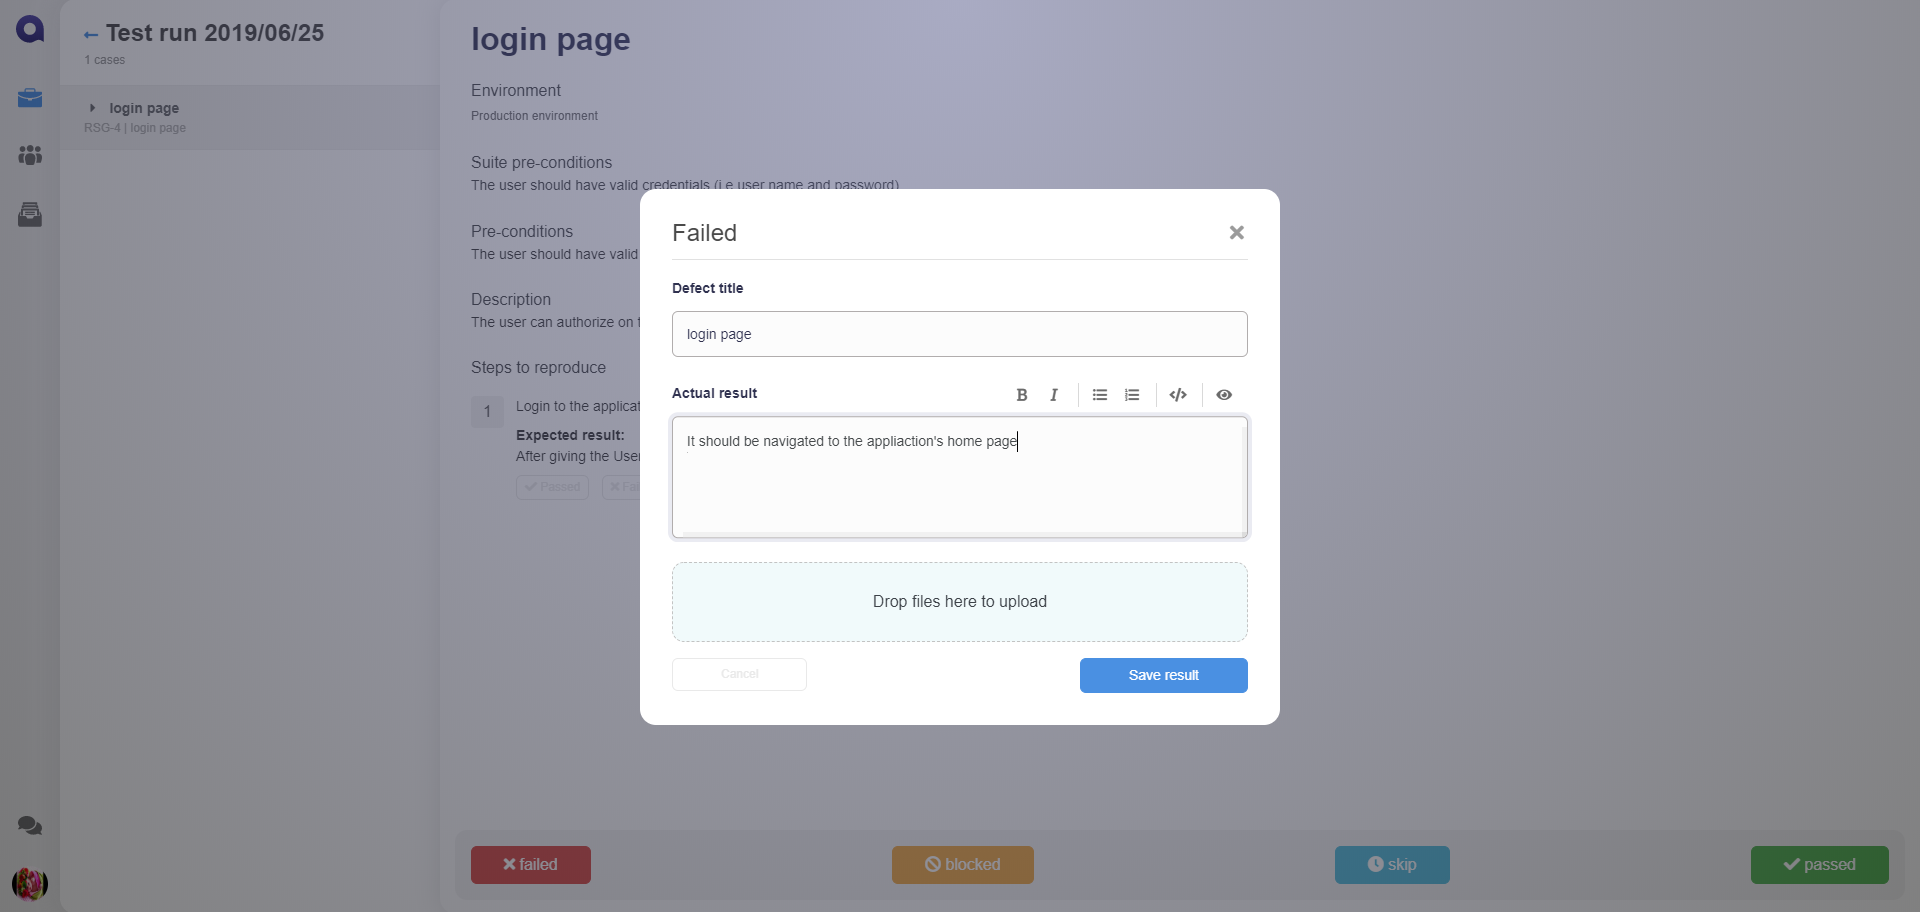
Note: Defect created in the test run can be seen under the Defects tab.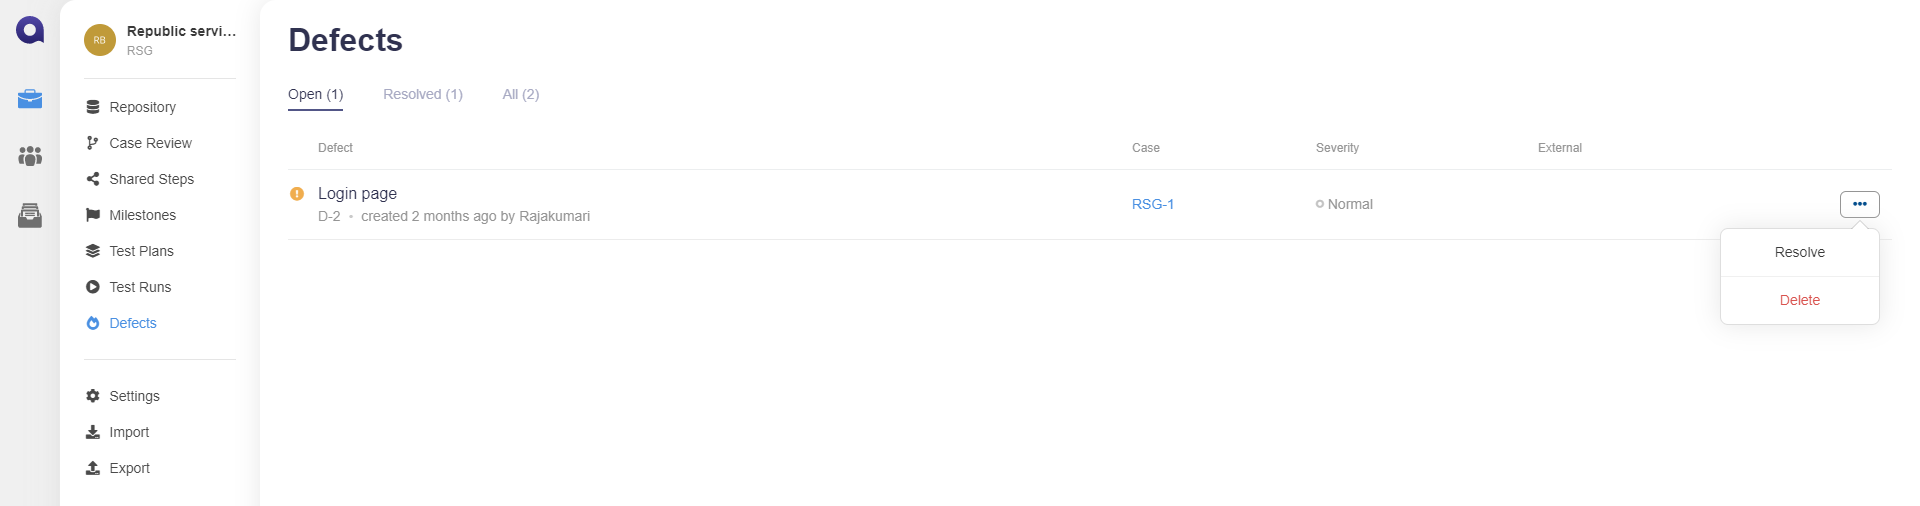
Import & Export of Test Cases:
We can import test cases from popular test management tools and export test cases from Qase to different formats like XLSX, CSV, etc.,
Importing Test Cases:
It allows the user to import the test cases from XML, JSON, TestRail, TestLink, Test Management for JIRA, SquashTM., etc
Following are the steps to Import Test Cases:
Step 1: Click the Import button as shown in the below screenshot
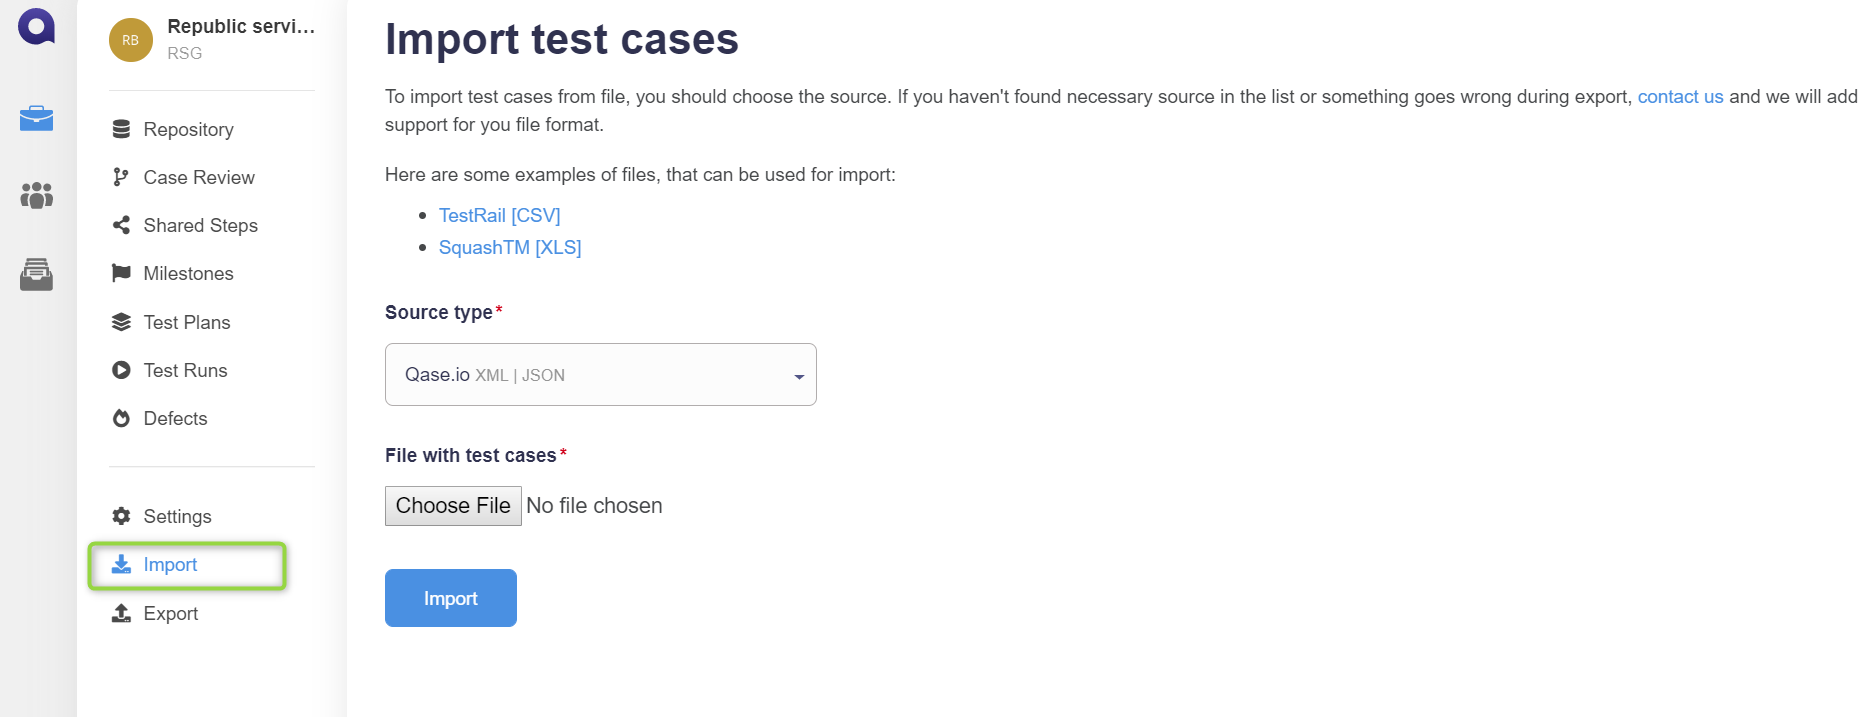
Step 2: Select the source type, upload the required file, and click the Import button
Export Test Cases:
It allows the user to export test cases in different formats such as JSON, XML, CSV, etc
Following are the steps to export Test Cases:
Step 1: Click the ‘Export’ button as shown in the below screenshot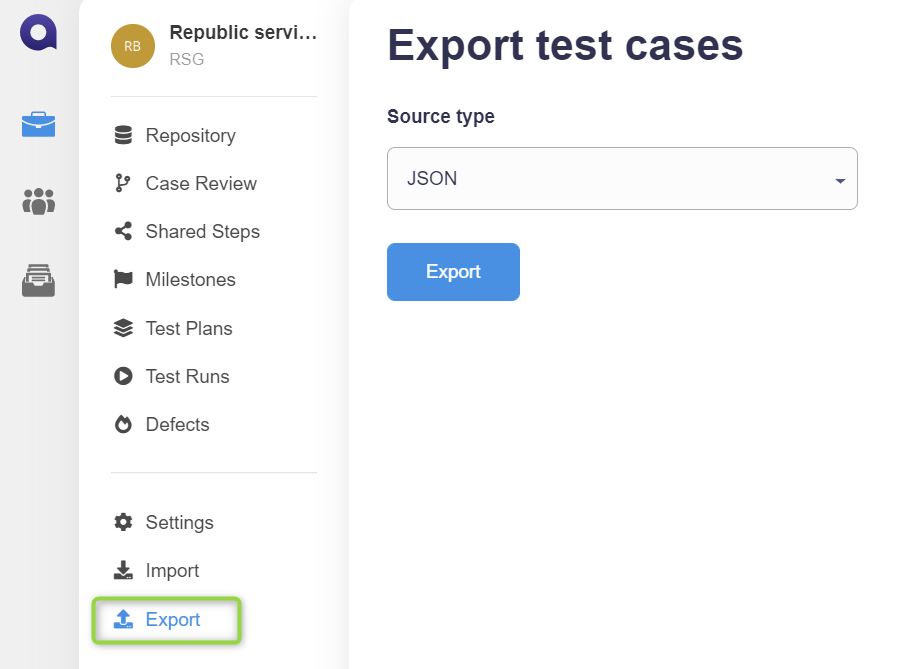
Step 2: Select the source type and click the Export button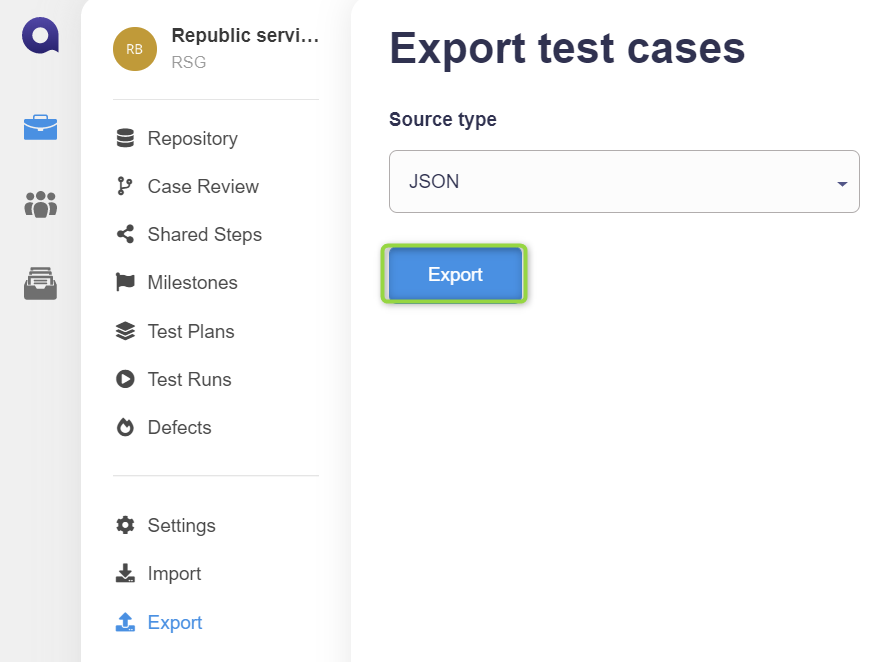
Integration Qase with Issue Trackers:
Qase allows us to integrate with most popular bug tracking systems like Jira, Redmine, Slack, Youtrack, GitHub.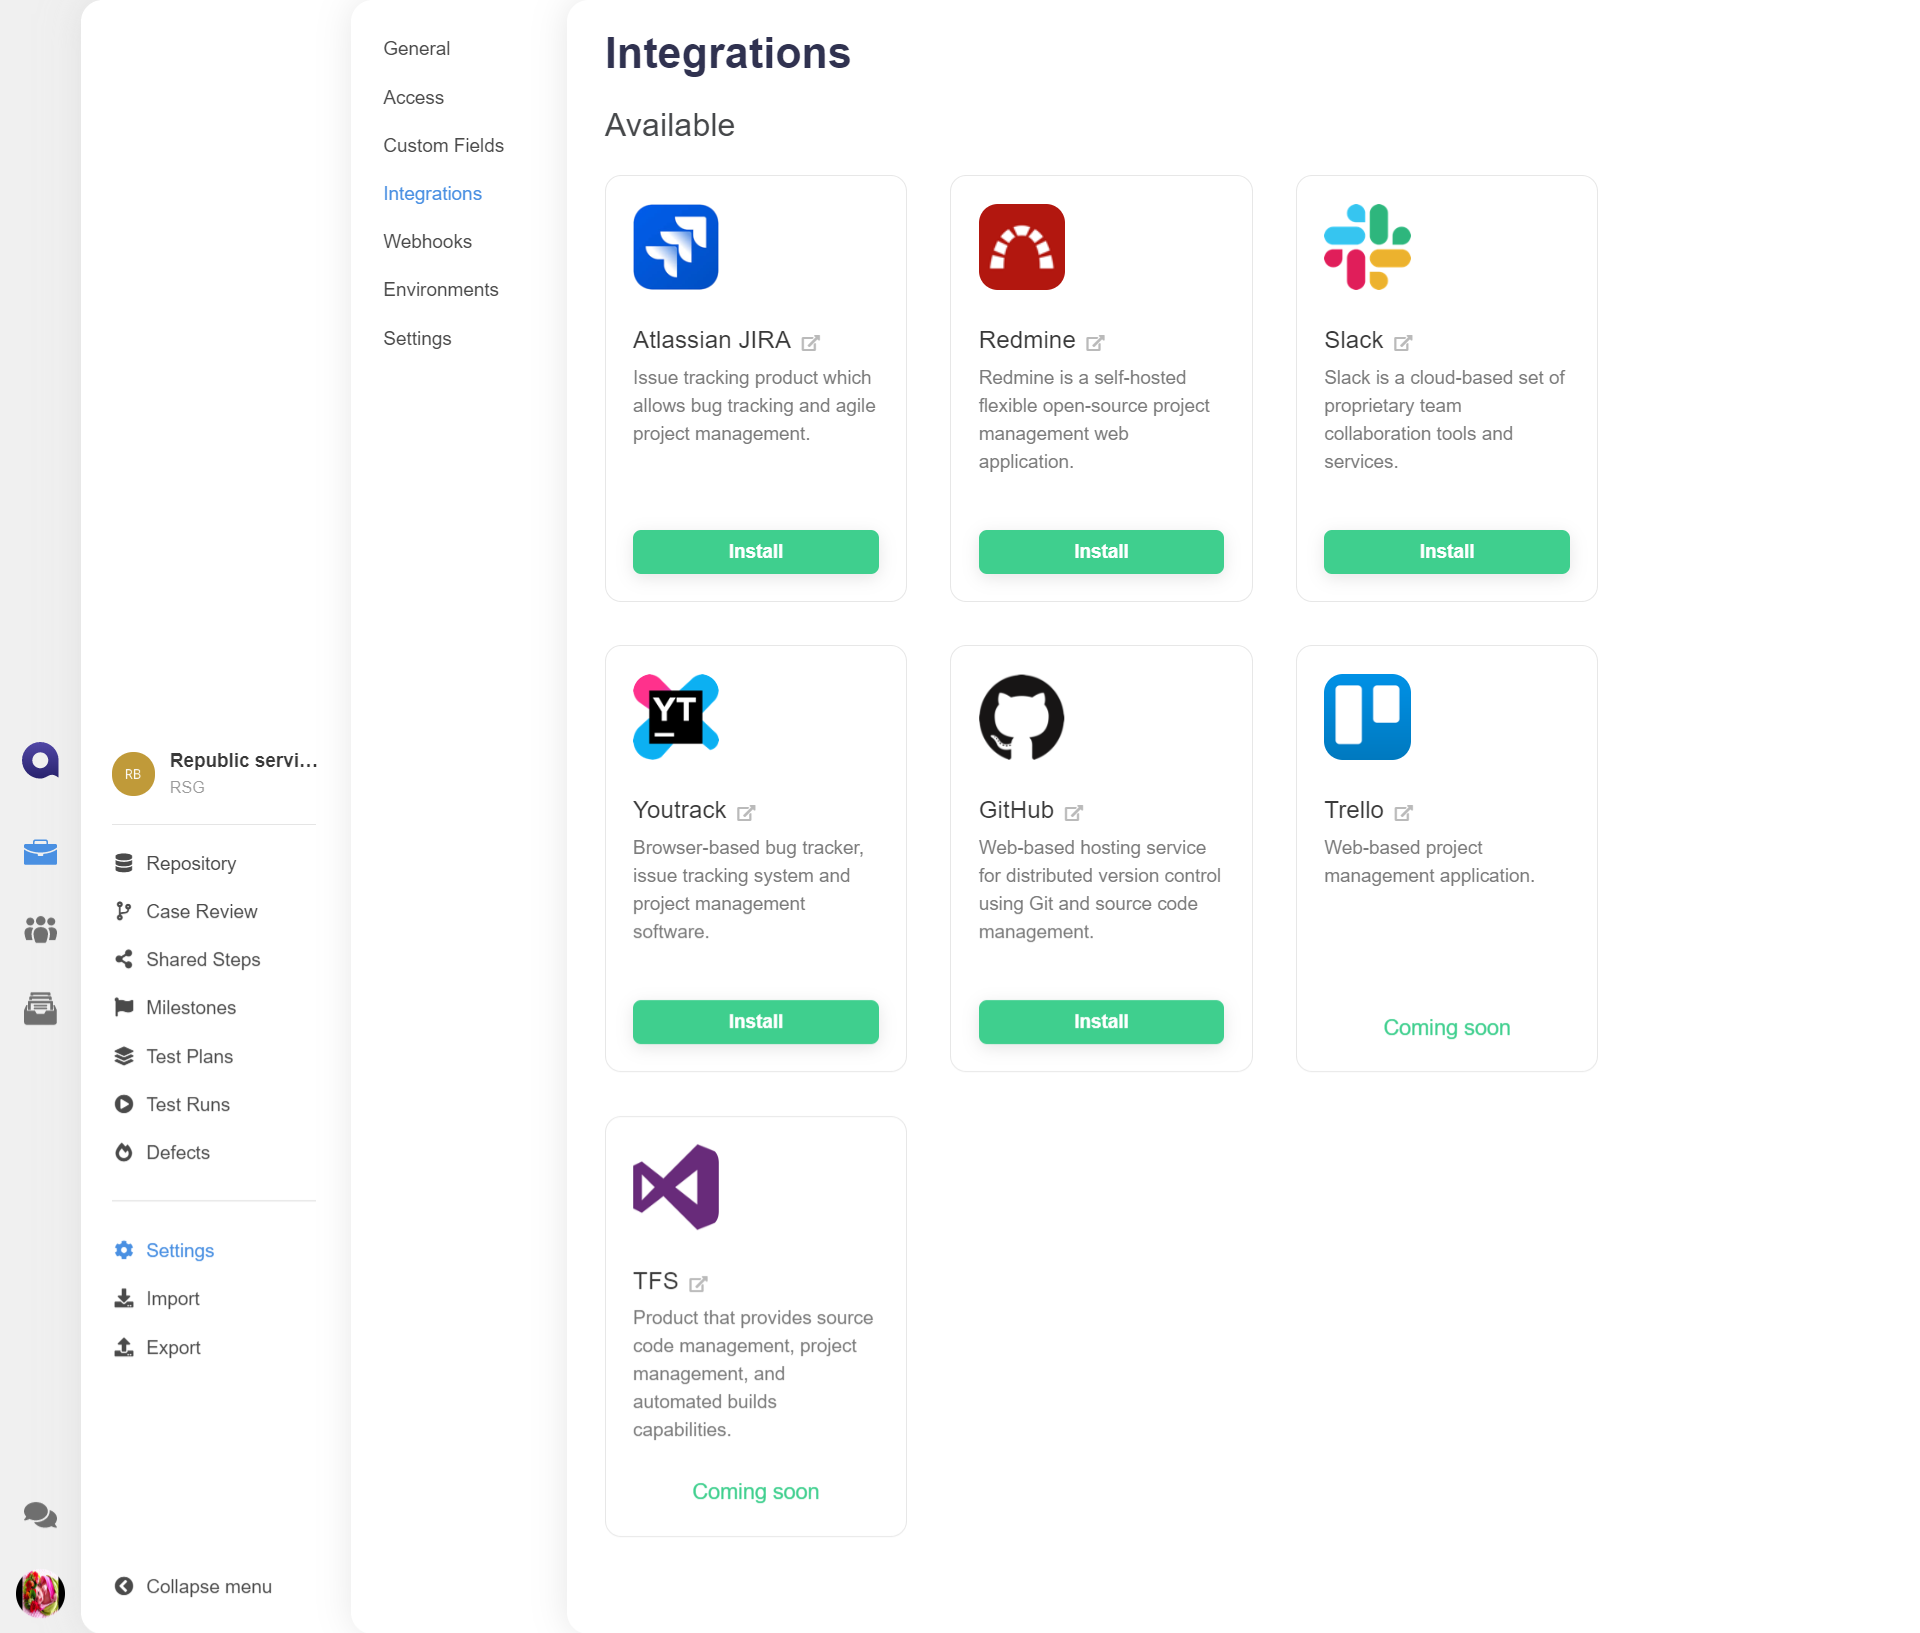
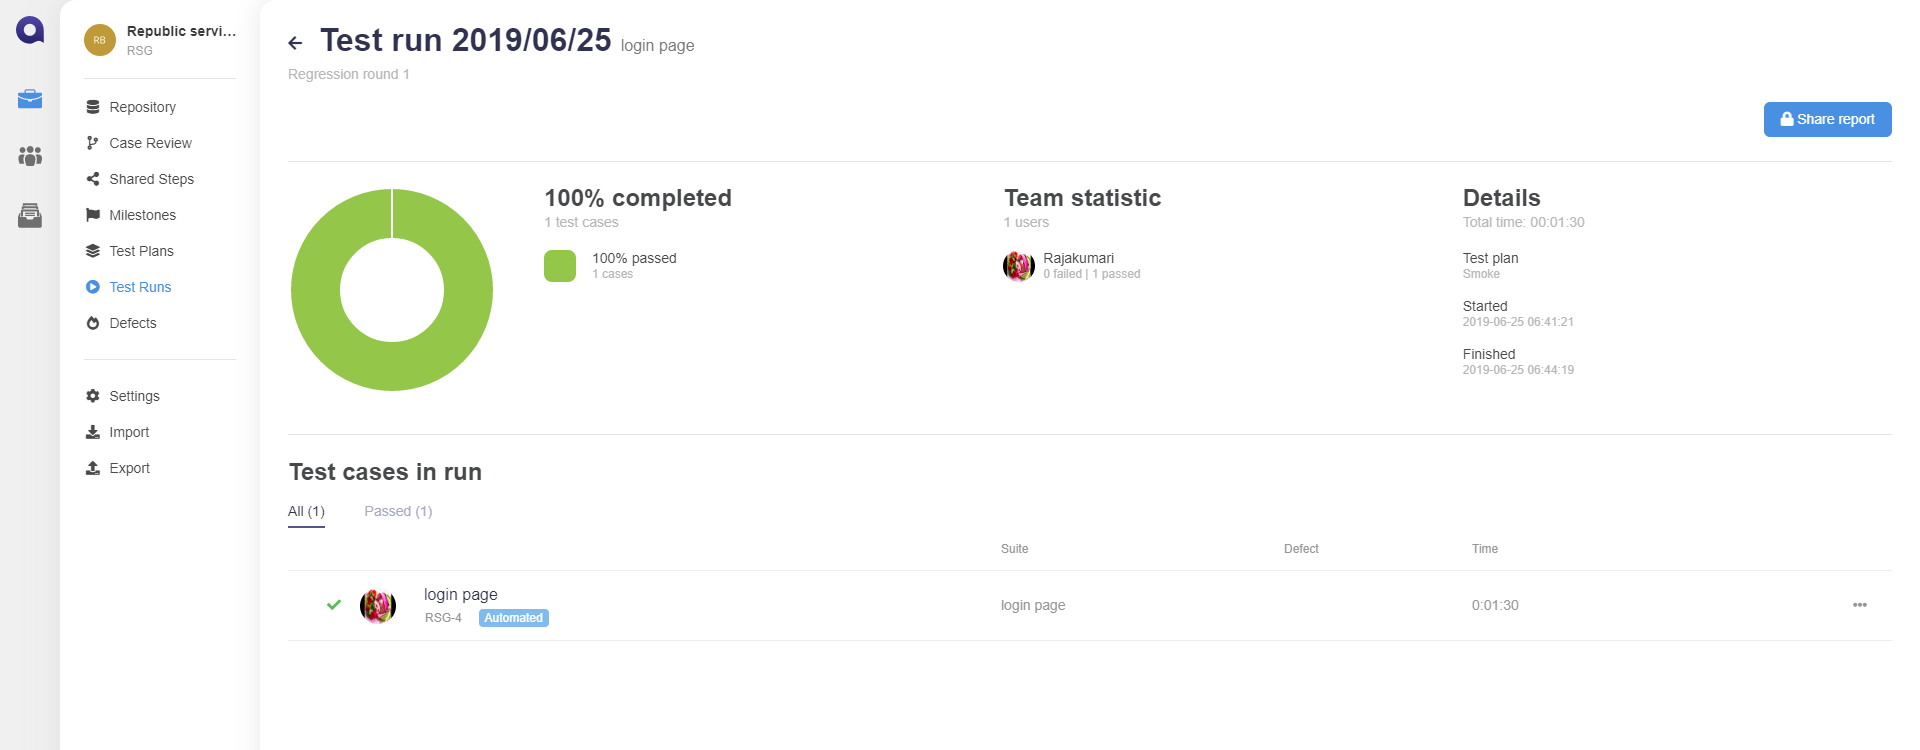
Generate & Share Reports
Following are the steps to generate & share reports:
Step 1: Click the Share report button
Step 2: Share the link with the team to access and view the test run report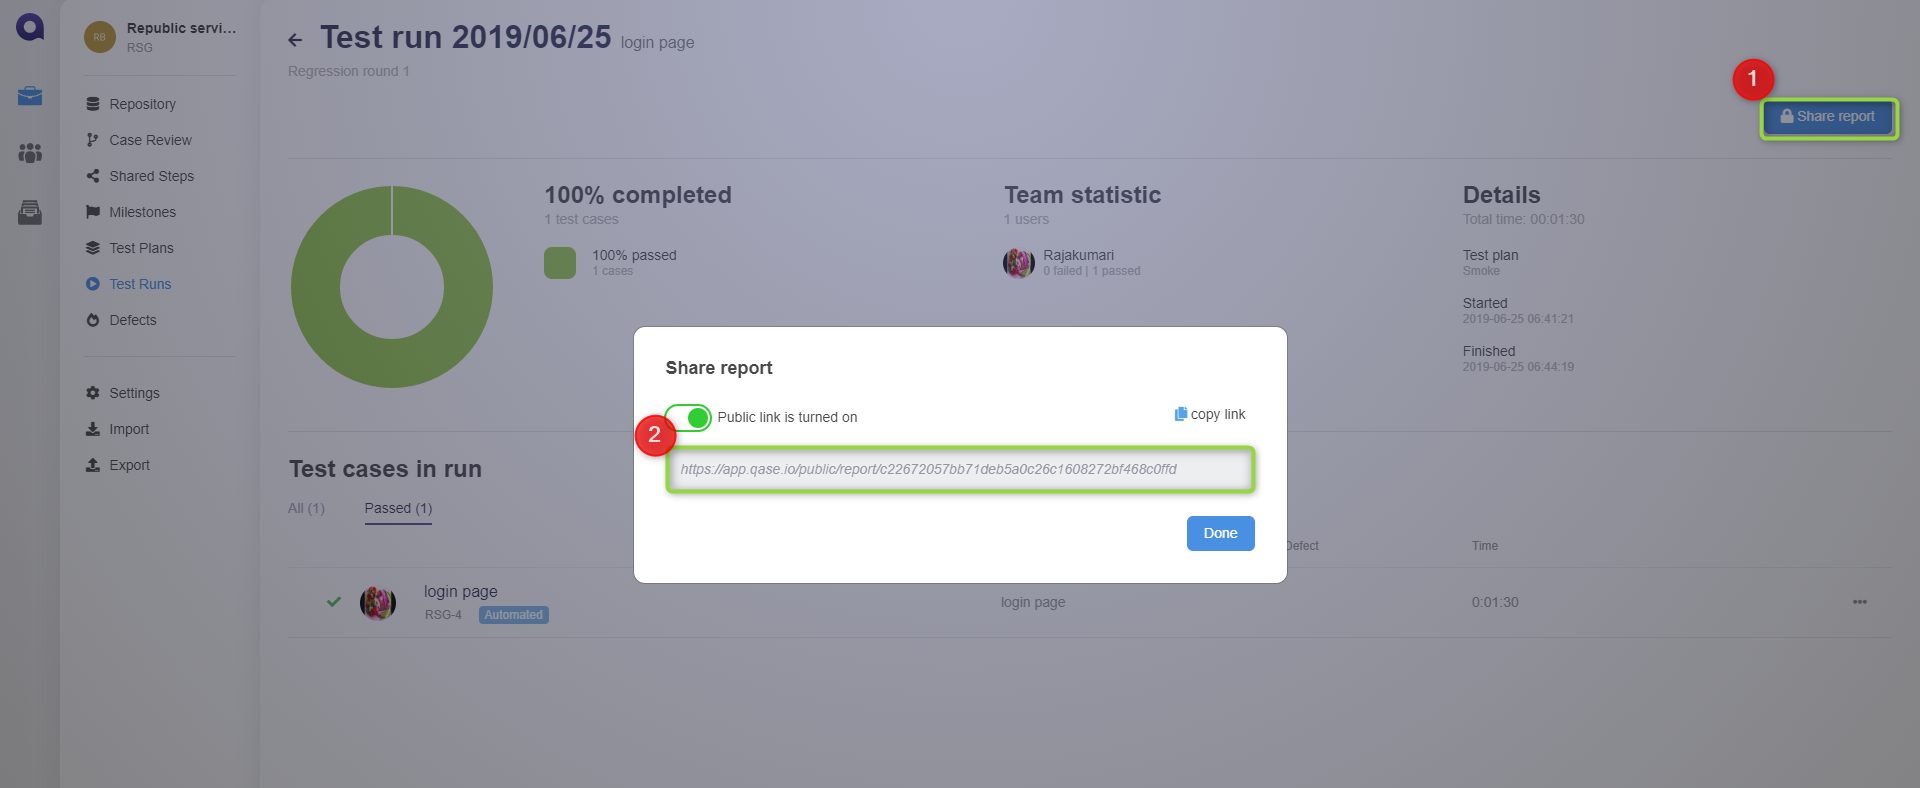
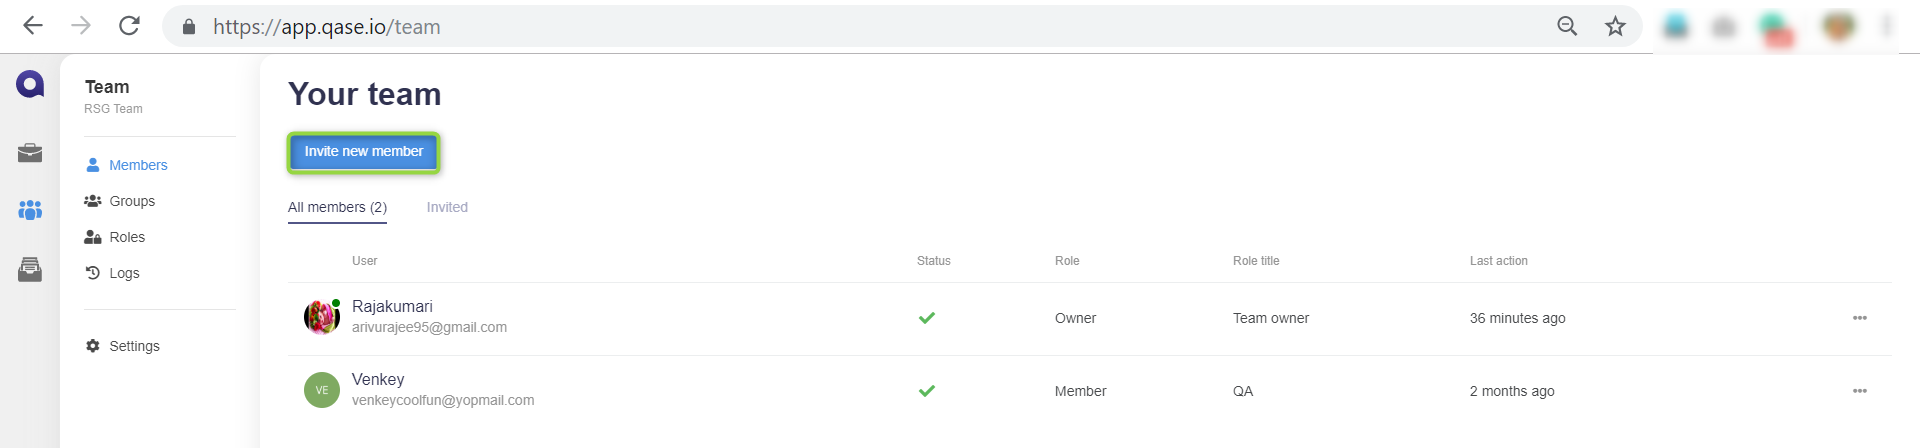
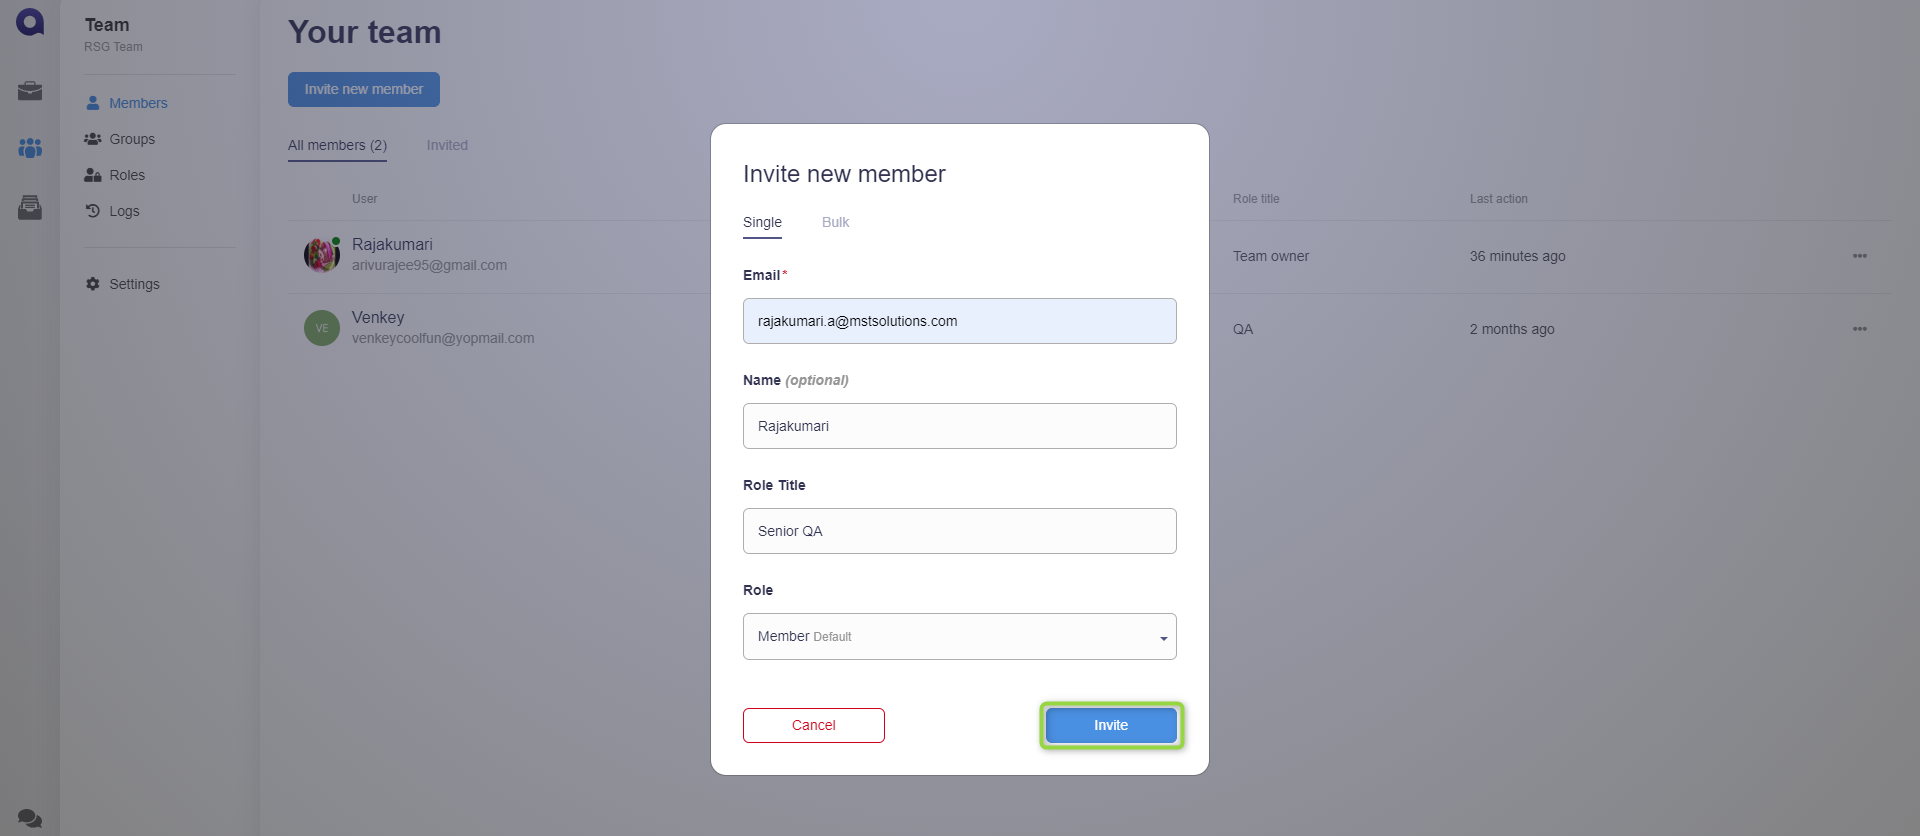
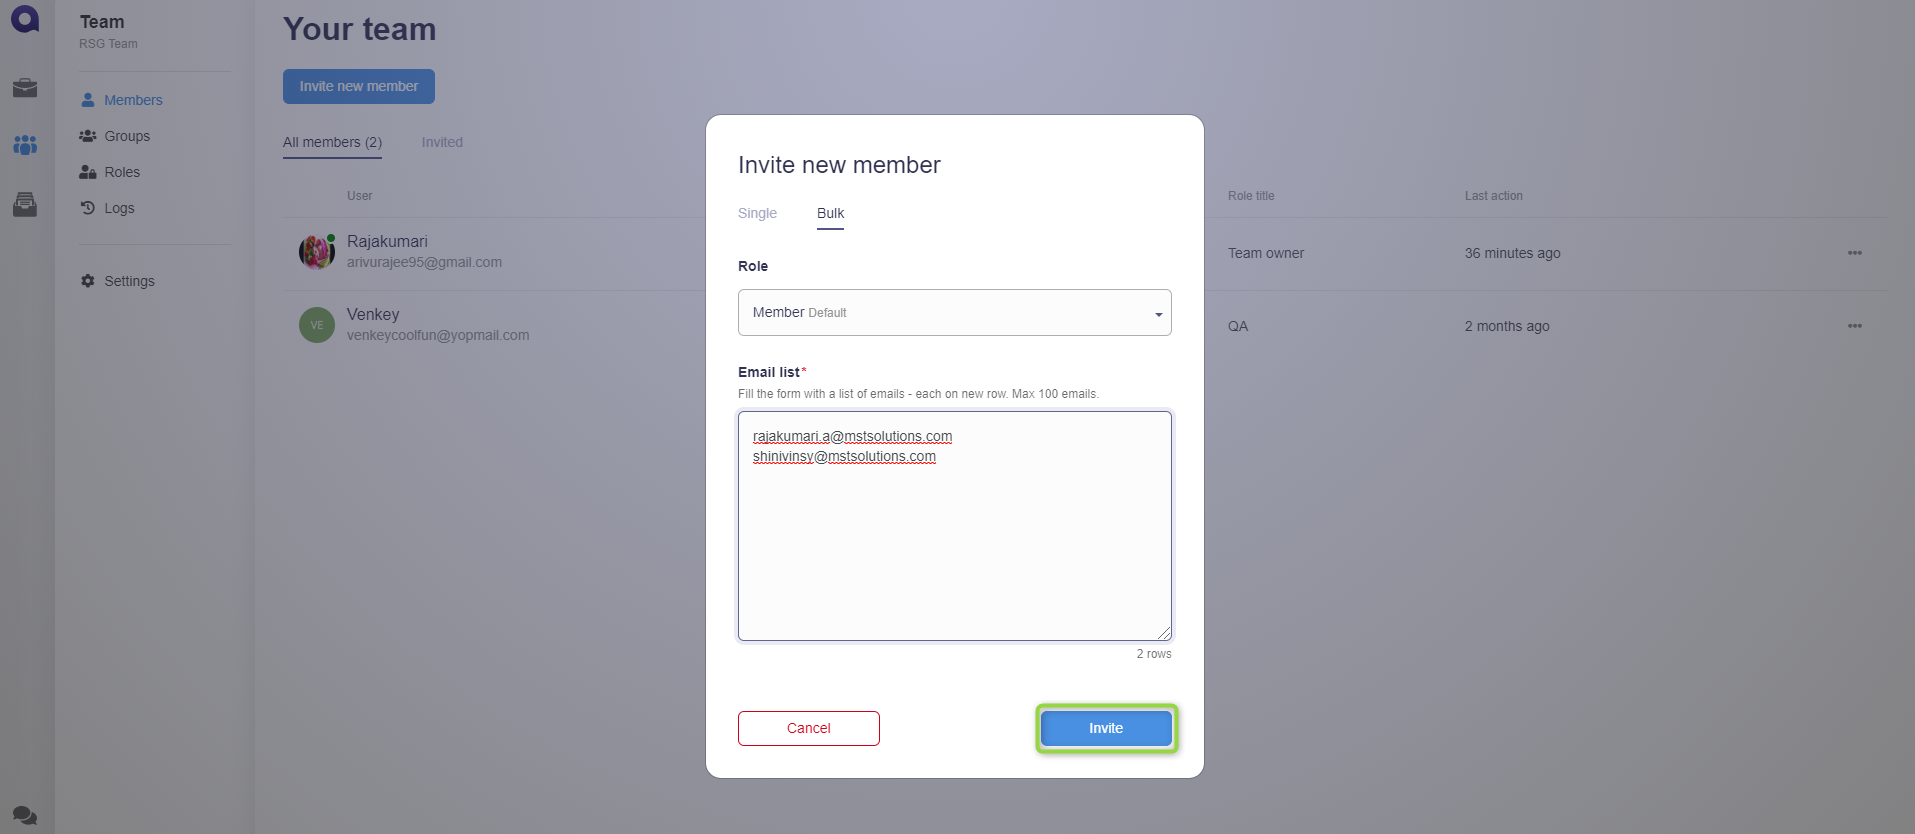
Team Management:
We can invite our team members to the projects and the team members can access our project based on role access control.
- Click the Invite new member button
- How to invite a single member?
- How to invite more than one member?
Reference link:
