Introduction:
qTest is one of the foremost test management tools developed by QA Symphony and widely used by leading global enterprises such as Salesforce, Adobe, Zappos, Barclays, VISA, Verizon, etc. It is a cloud–based tool that has been designed to provide a complete set of options for testing. It is one of the best tools for agile testing team, and it provides simple and flexible test management solutions to manage the test cases effectively. qTest has instinctual interface that is easy to use and understand. By using the qTest tool, we can integrate the defects with some of the defect tracking tools like Jira, Bugzilla, etc.
qTest Setup:
Start using the qTest tool by installing the 14days trial version to know the set of amazing features.
Step 1: Click the link to install qTest trial https://www.qasymphony.com/qTest-trial-qascom/
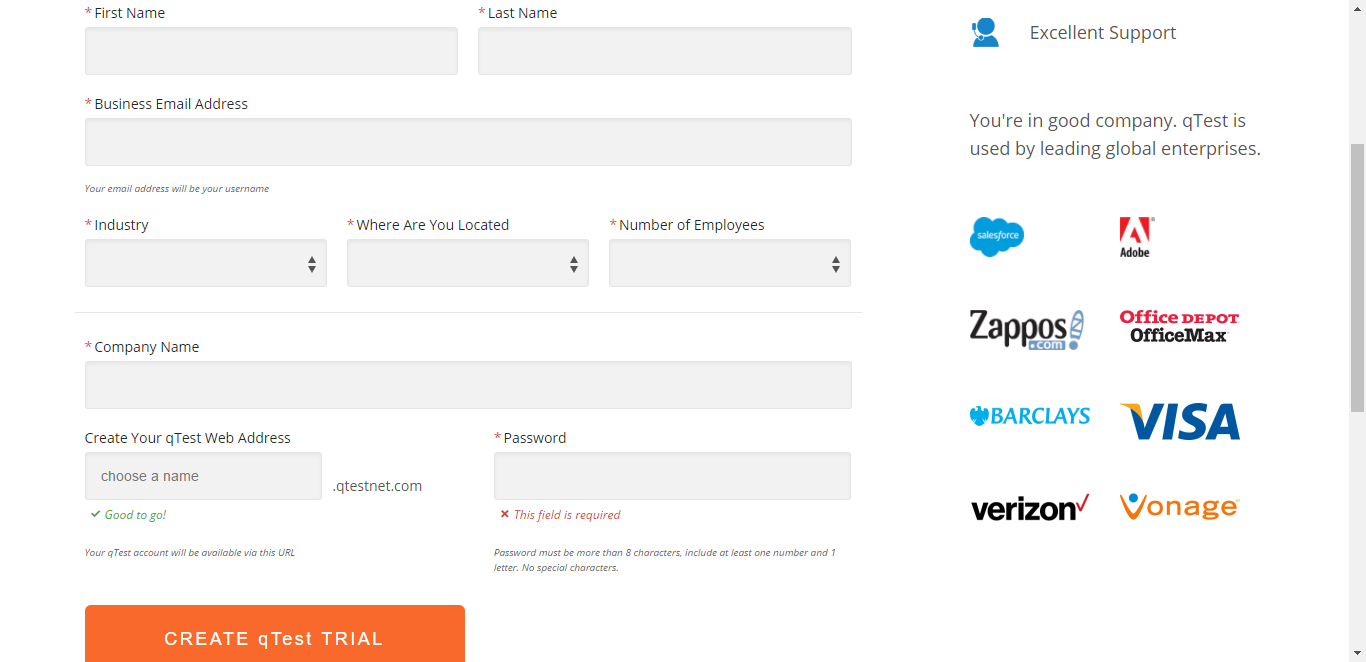
Step 2: Enter the details in the following fields
- First Name
- Last Name
- Business Email Address
- Industry
- Where are you located
- Number of Employees
- Company Name
- Create your qTest web address
- Password
Step 3: Click ‘Create qTest Trial’ button
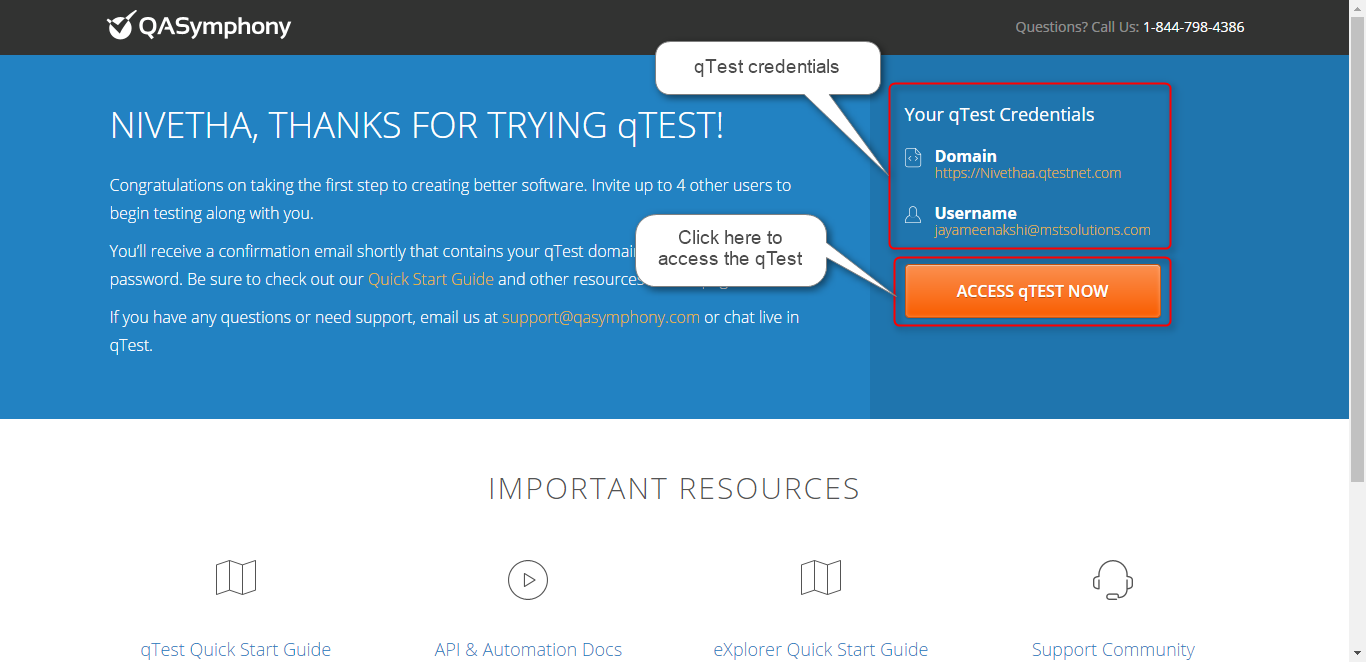
Step 4: After clicked, the qTest account is created for the trial version; click ‘Access qTest Now’ button to access the qTest
qTest Features for Test Designing:
Creating a Test Project
1. Click ‘Add new project’ button
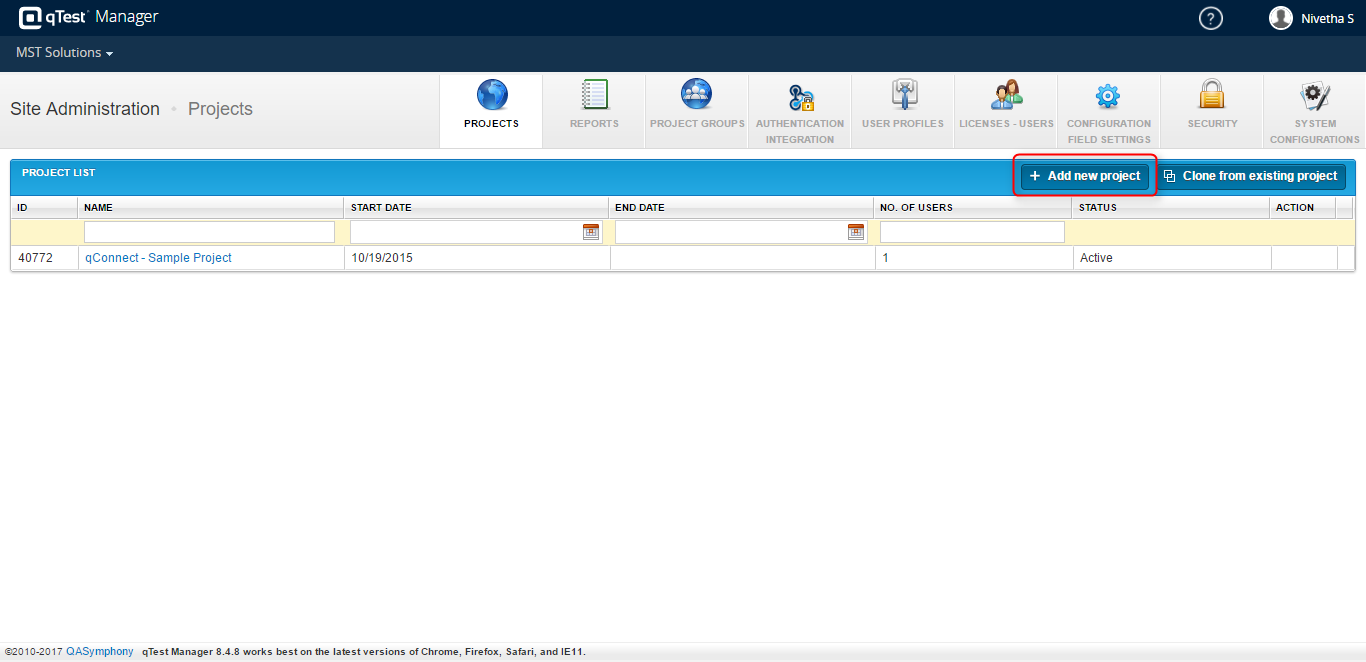
2.After clicking Add Project button, enter the following details to create a test project and click ‘+Add’ button.
- Project Name
- Start Date
- End Date
- Assign Project Admin
- Description
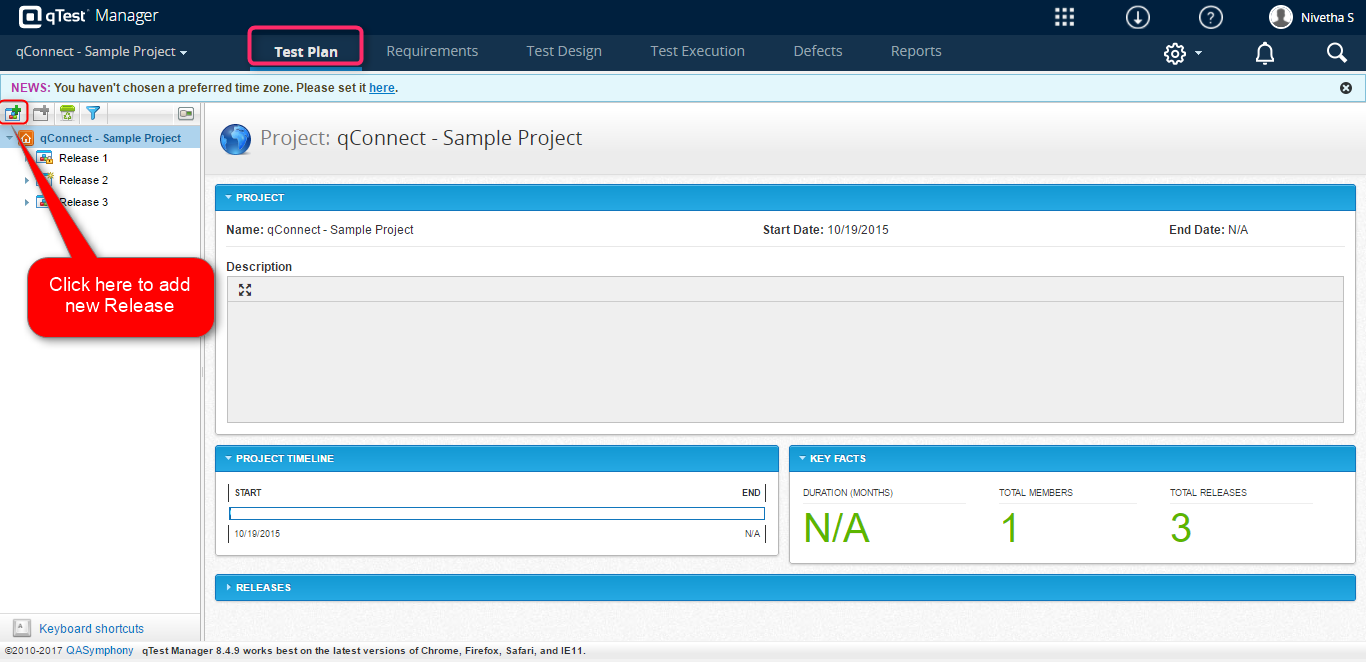
Test Plan
In test plan, the users can create schedules/releases, and able to fix the timespans around the testing that needs to be completed.
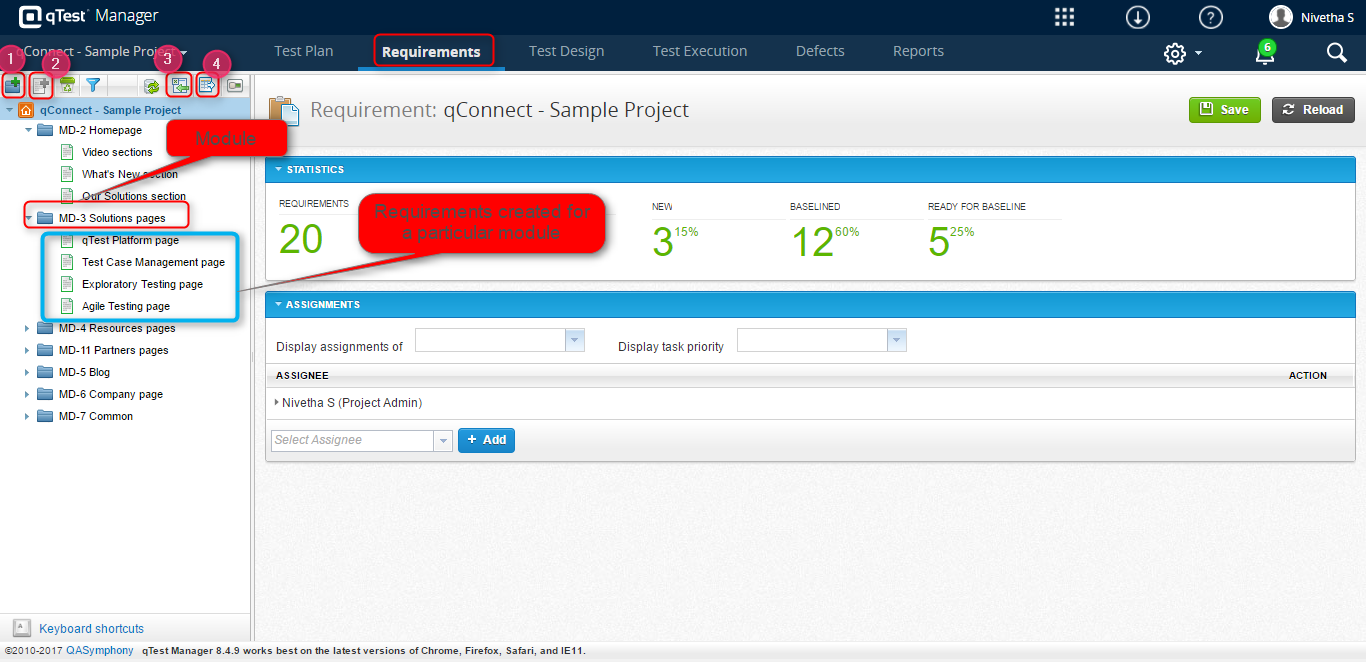
Requirements
In qTest, we can pass the requirements or user stories from agile development and it is feasible to create test cases directly from the requirements, so the test cases are linked automatically.
- Creating a new module
- Creating a new requirement for each module
- Import the requirements from excel
- Export the requirements to excel
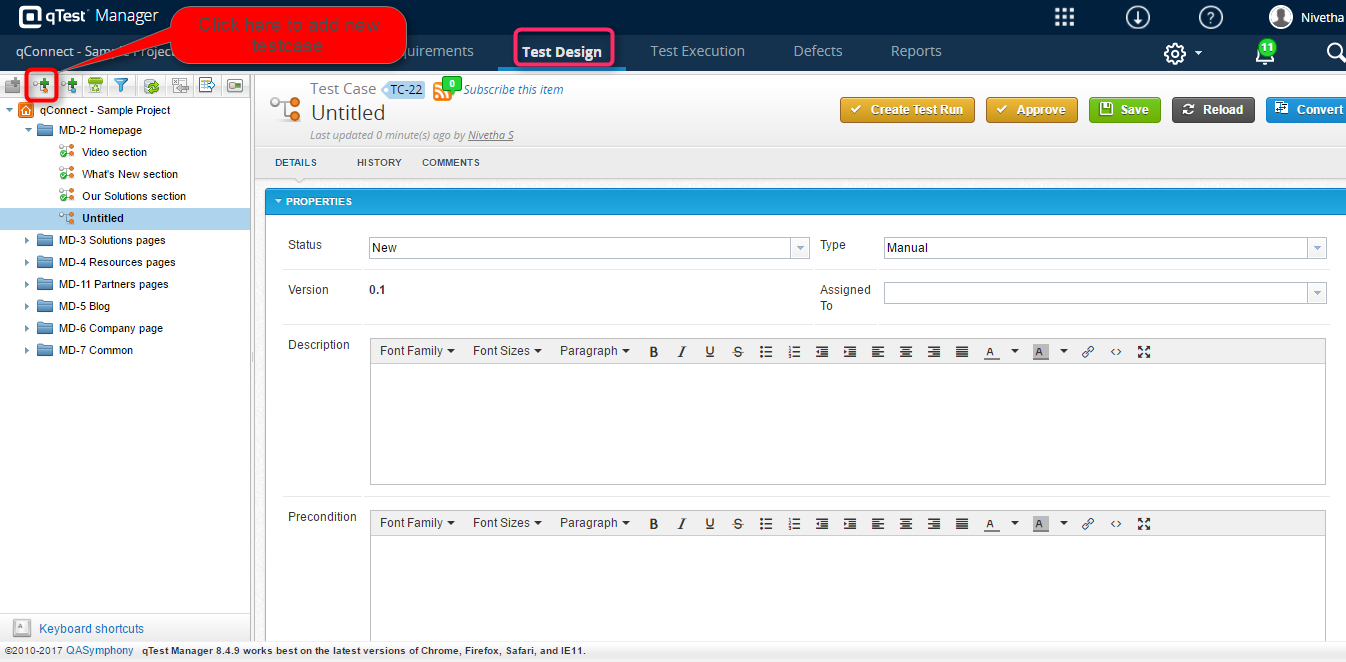
Test Design
In test design, we can create a test case with set of test steps and link it with a specific requirement and can execute the test case, once it is approved.
Test Execution
The test cycle can be planned in test execution module and arrange the Test Suite and Test Runs according to our plan. In home page of test execution module, it shows the overall status of the test cases designed. The execution summary report and defect summary report are exported as an excel file.
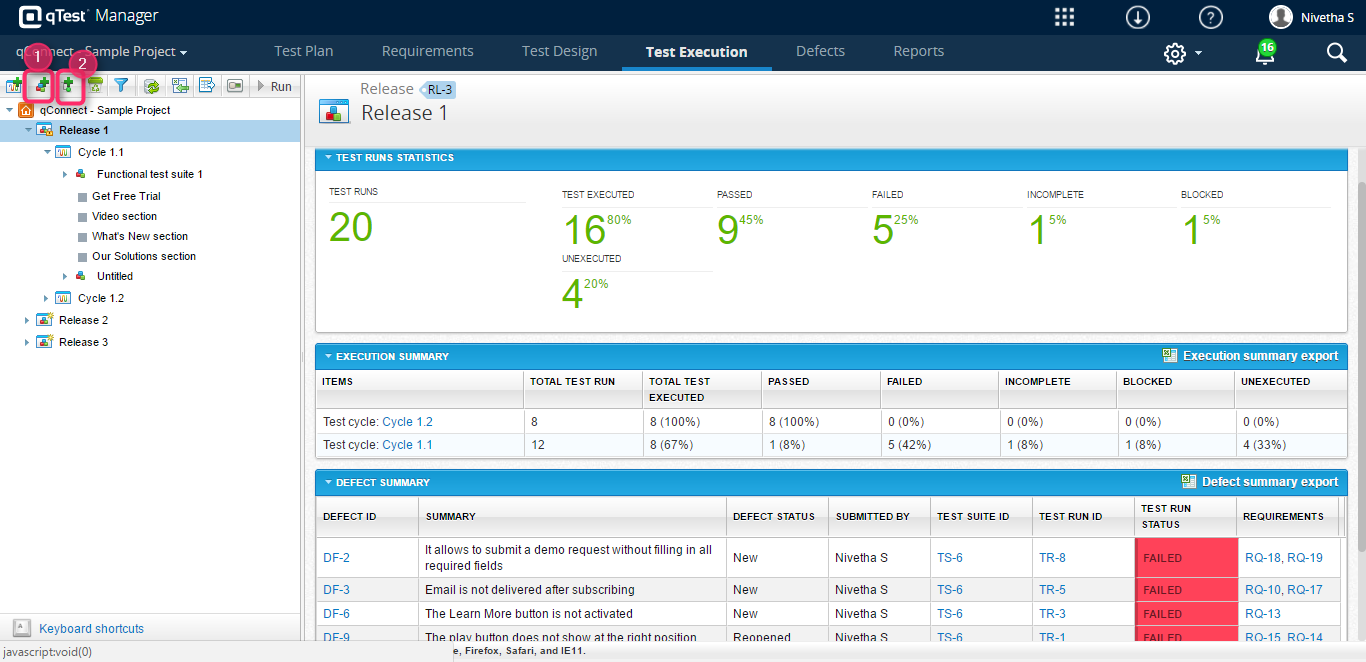
- To create a new Test Suite
- To create a new Test Run
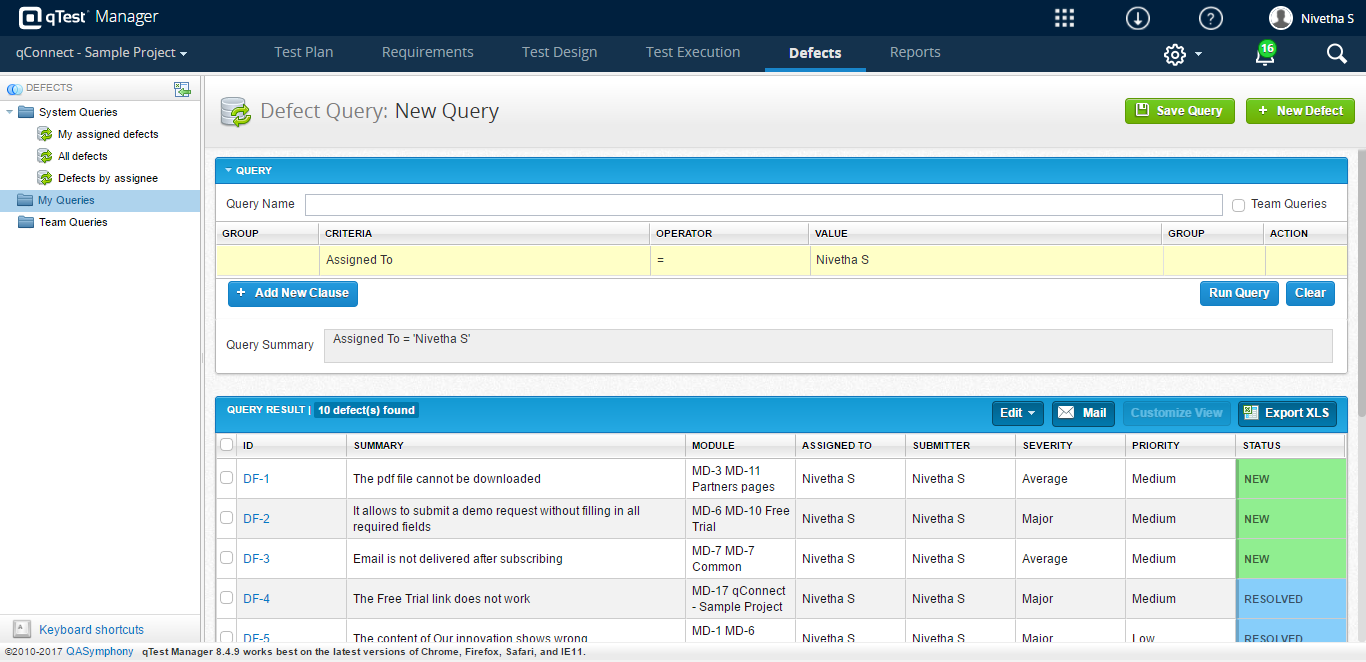
Defects
In qTest, we can get the list of defects by creating a custom query and executing it. And, we can create a new defect and integrate it with JIRA, Bugzilla, etc.
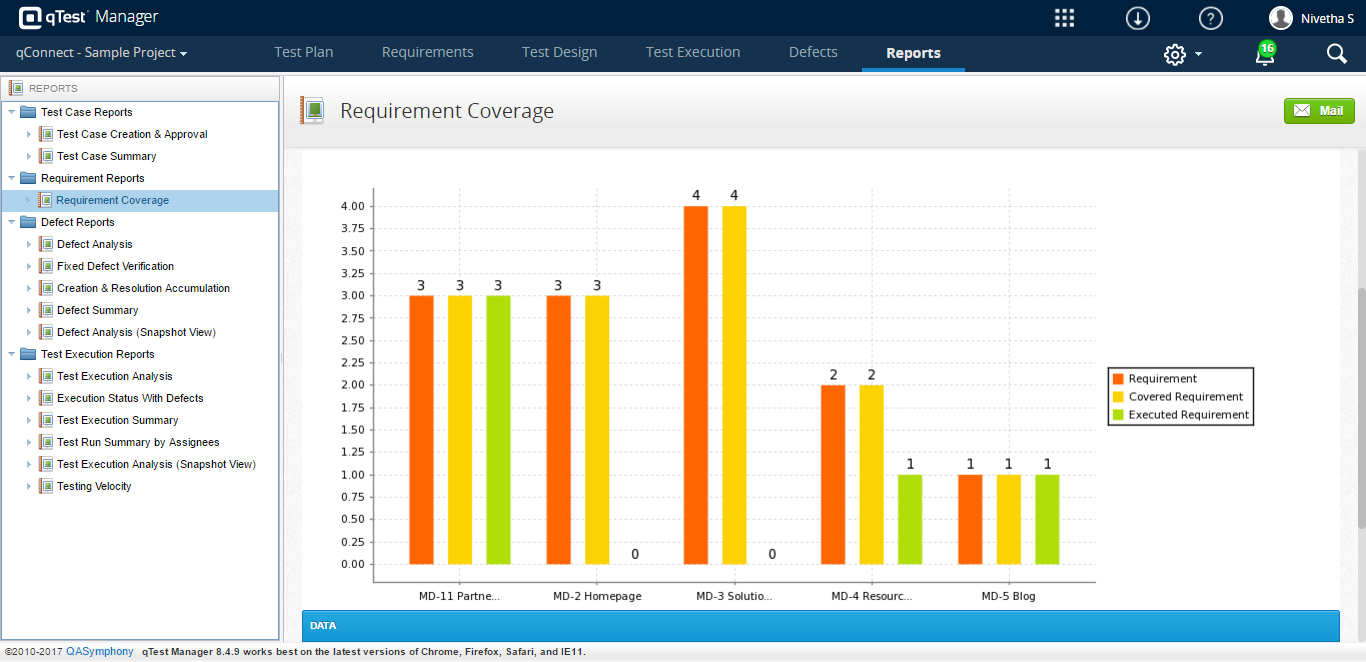
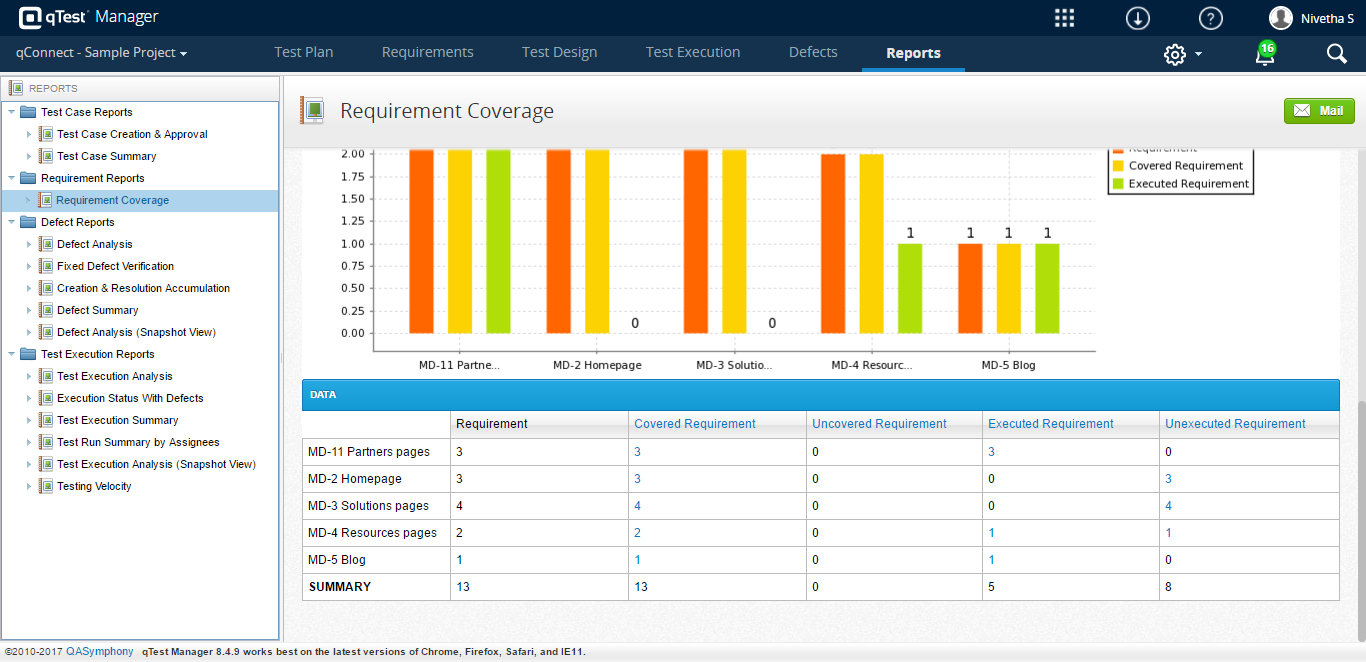
Reports
In qTest, there are some pre-built report templates for each module such as Test Case Reports, Requirements Report, Defect Reports, Test Execution Report, and we can customize views for the reports.
qTest Explorer and Session:
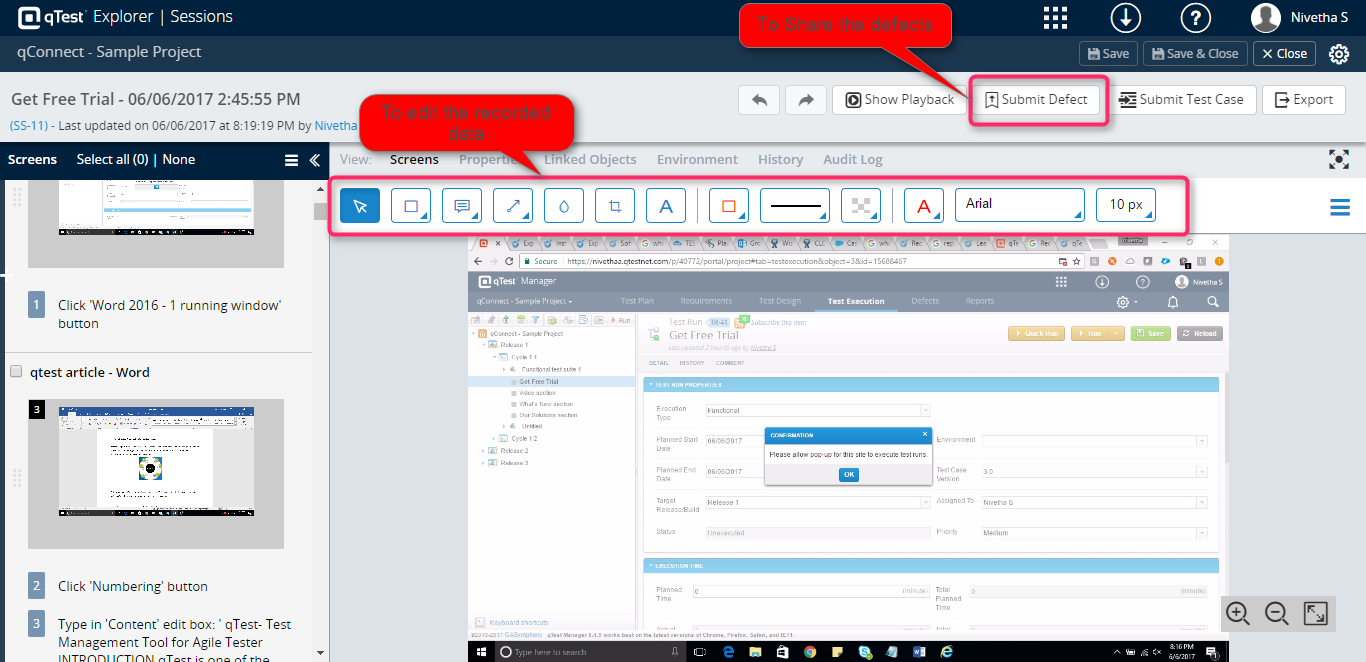
qTest Explorer saves the time by automatically recording the testing data as screen shots and preparing the documentation. Using qTest explorer, we can edit the recording data and delete the unwanted data. It provides details about the environment where we tested the data. We can also submit the defects to an external system. We can run and record the testing manually or by creating a session.
Installation Guide for qTest Explorer
1. Click the Resource icon in the home page
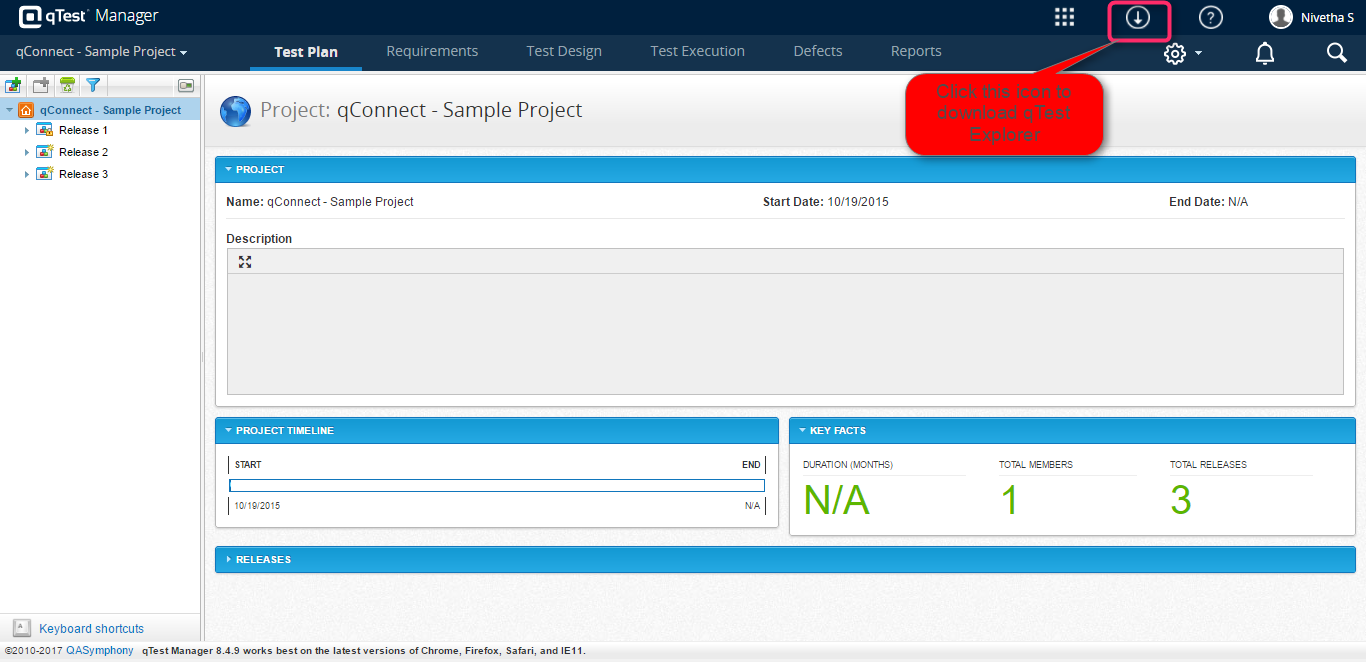
2. Click the ‘qTest Explorer Integrated Edition’ link
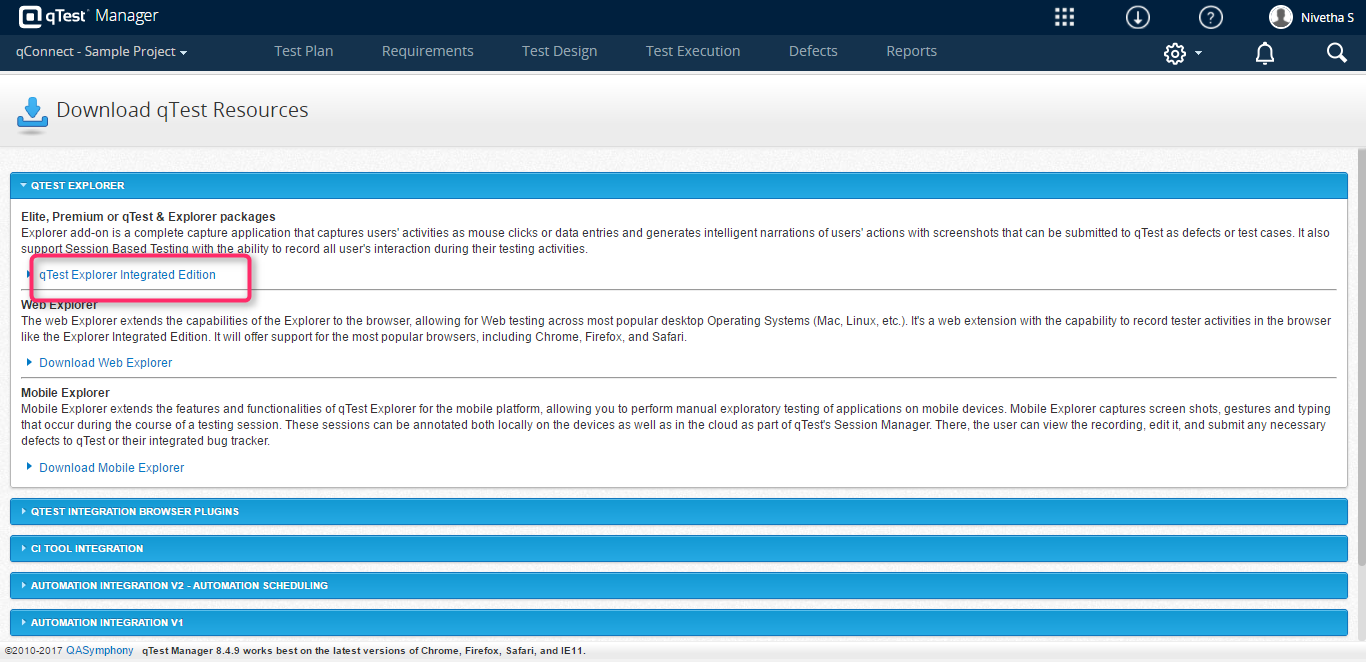
3. Download and Install any of the Desktop Explorer based on our system requirements.
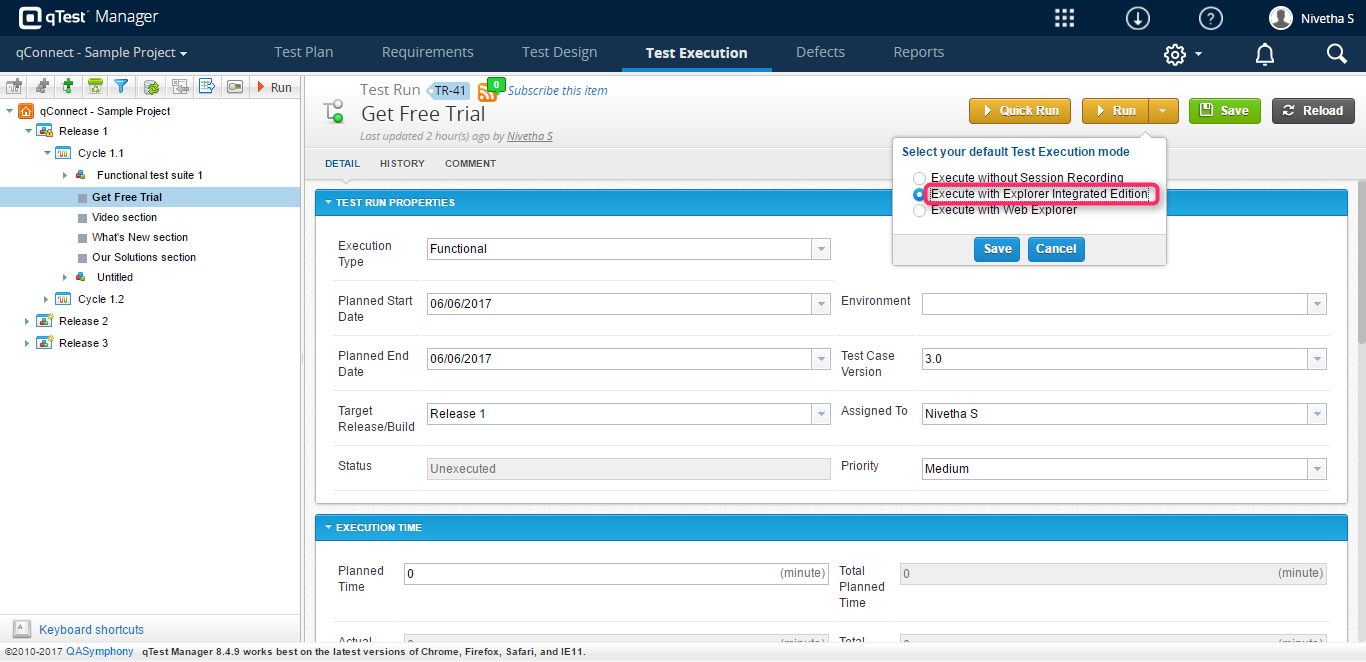
To run the testcase, the user can have Four options in qTest.
I. Quick Run.
II. Run
a) Execute without Session Recording
b) Execute with Explorer Integrated Edition
c) Execute with Web Explorer
If we want to run the testcase using qTest explorer, we should choose ‘Execute with Explorer Integrated Edition’

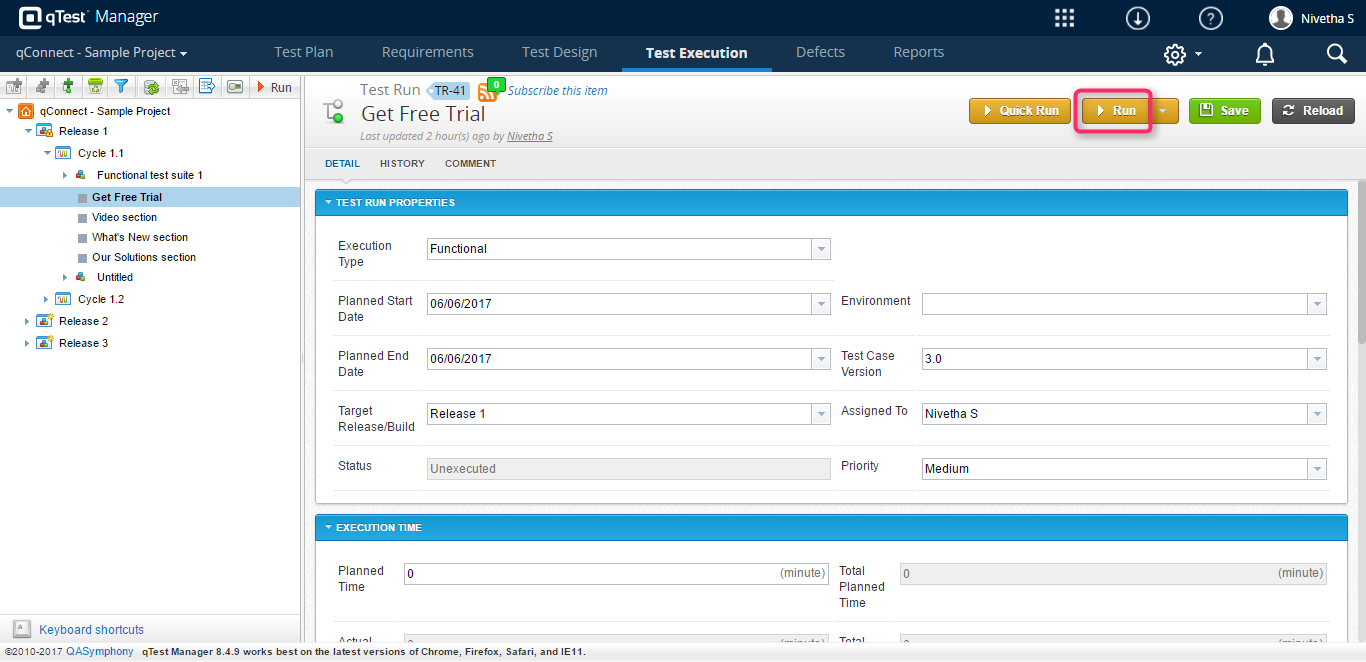
To run the qTest Explorer
1. After choosing the Run type, Click the Run button.
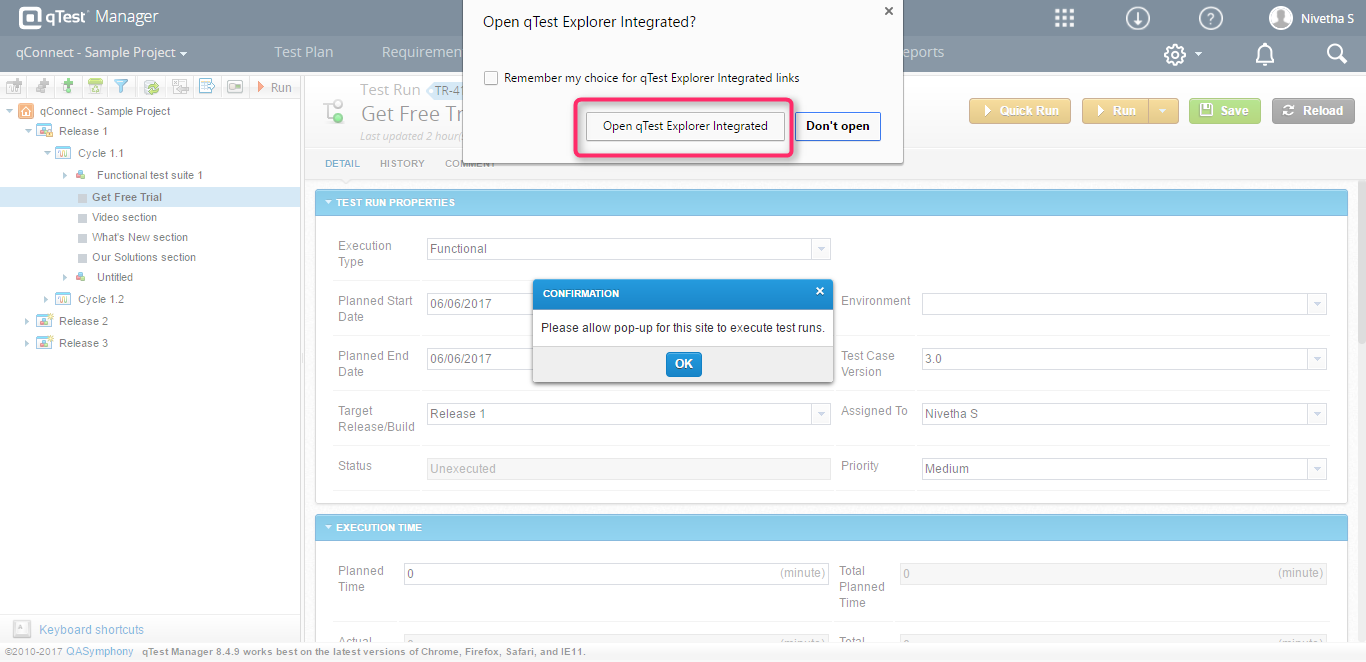
2. Then click ‘Open qTest Explorer Integrated’ button on the pop-up message.
3. Then, select the application and set the Record mode and number of screens to be captured.
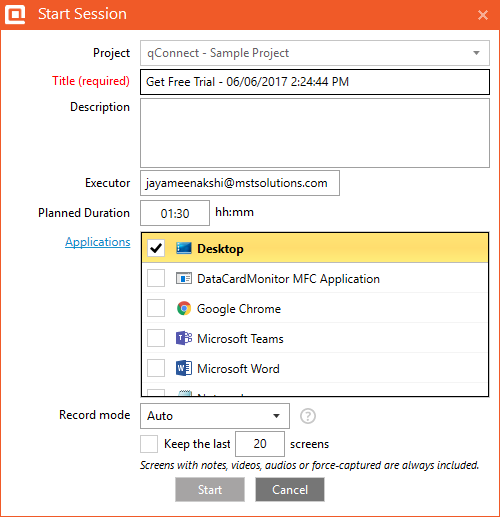 4.Click the ‘Start’ button to start the session
Features of qTest Explorer:
Record
Captures full screen or selective screens or active/scrolling windows along with the user interactions with the application. By this feature, detailed documentations are automatically created and can be stored and shared.

- Force Screen Capture
2. Record Multimedia
3. Add a note side by side while recording
4. Show/Switch time type
5. To pause the session
6. To stop the session
Edit:
Allows to modify the captured data. We can delete or edit the captured screens and can also edit test step information related to screen captures.
Share:
Export the defects to Word, PDF or JPEG files. Share the issues with the team by integrating with JIRA, Rally and VersionOne. We can create test cases by converting the test session.
Automate:
qTest can generate automated test scripts. With a simple click, the test sessions are turned into scripts. It supports Selenium and Protractor frameworks.
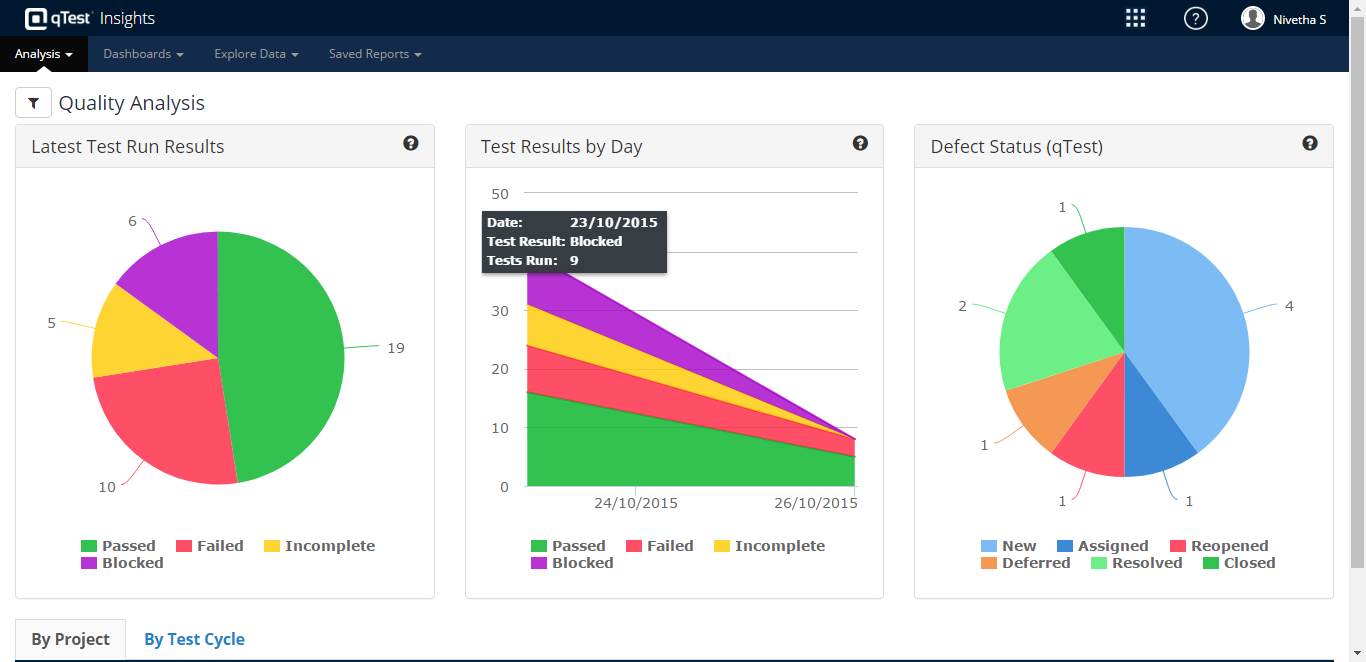
qTest Insights:
qTest Insights is an entire recreation of?qTest?reporting.?By using Insights, the testing team can associate, accomplish and analyze all the test metrics. We can analyze the report by quality, coverage and velocity and can arrange the dashboard as shared or personal.
qTest Jira Integration:
By Integrating Jira with qTest, the defects are submitted into Jira. The Status and test steps are auto populated into Jira and Created as an Issue in Jira. The requirements and project created in Jira are also transferred to qTest and vice-versa.
Jira Integration Setup
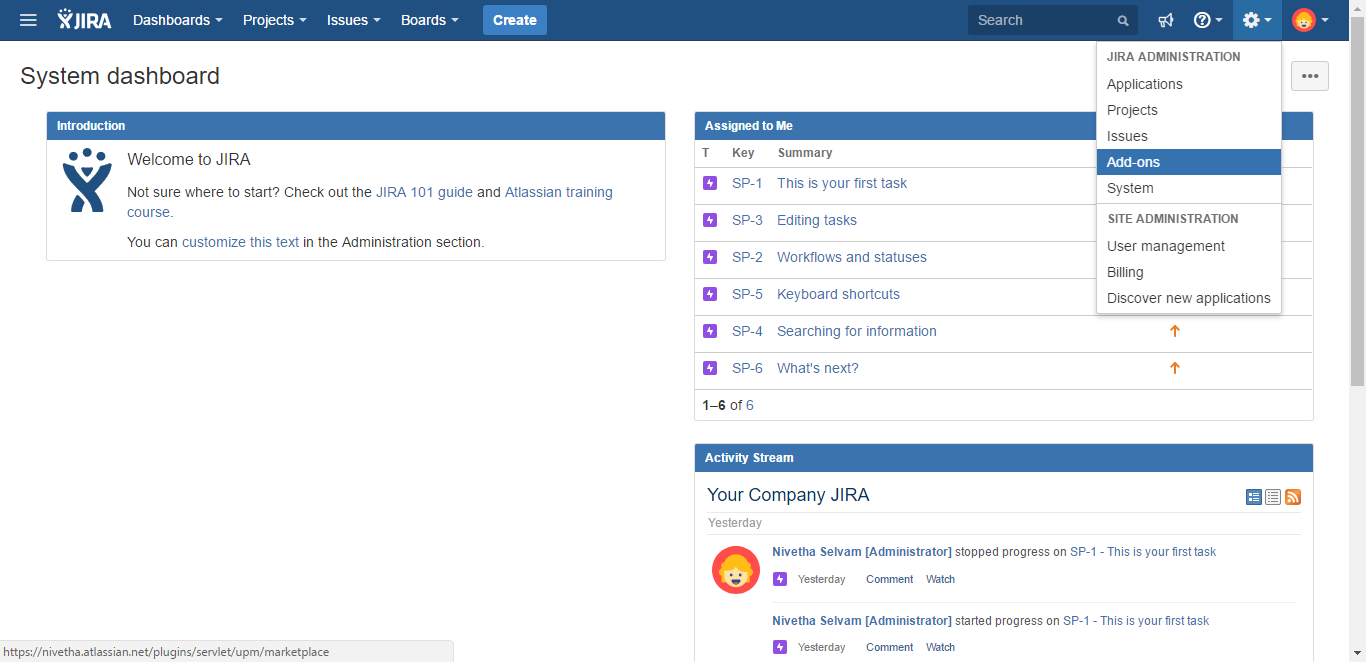
1.Login into JIRA instance as an Admin and Click ‘Add-Ons’ on the top of navigation bar
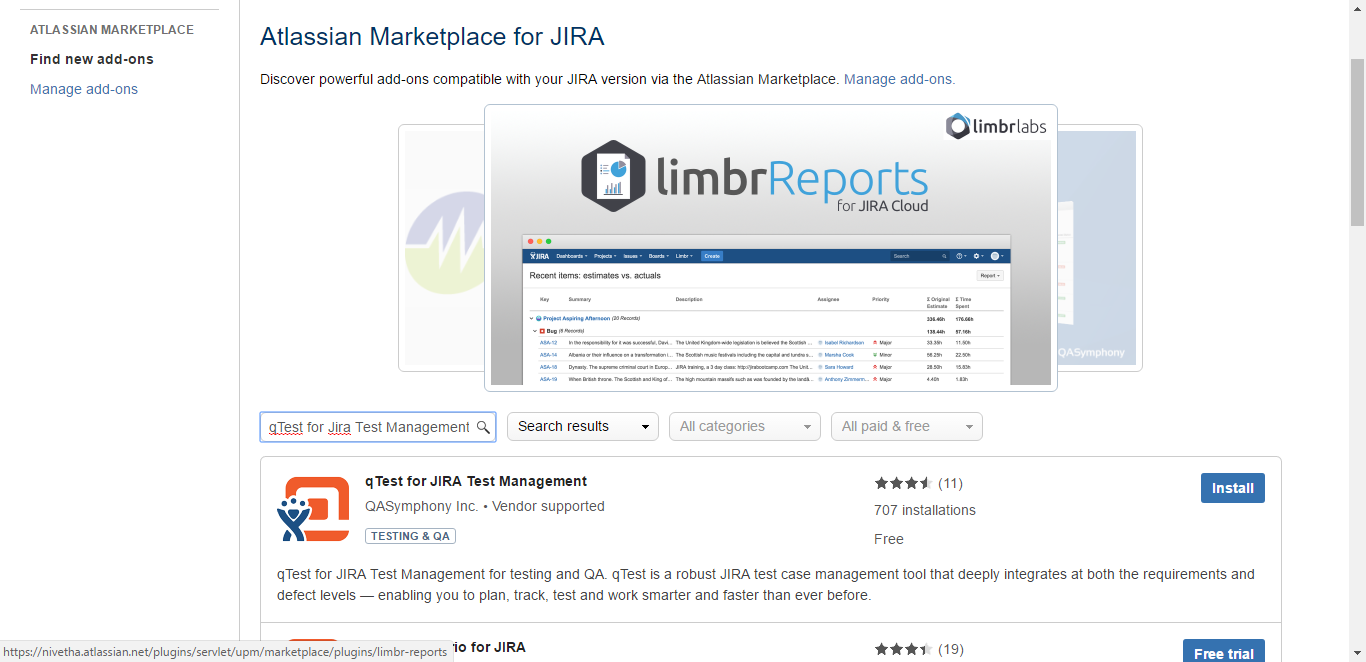
2. Install ‘qTest for Jira Test Management’ to either JIRA Cloud or Server Instance.
3. Once Installed, navigate to the qTest.
4. Click the Integration setting from the top of the navigation bar.
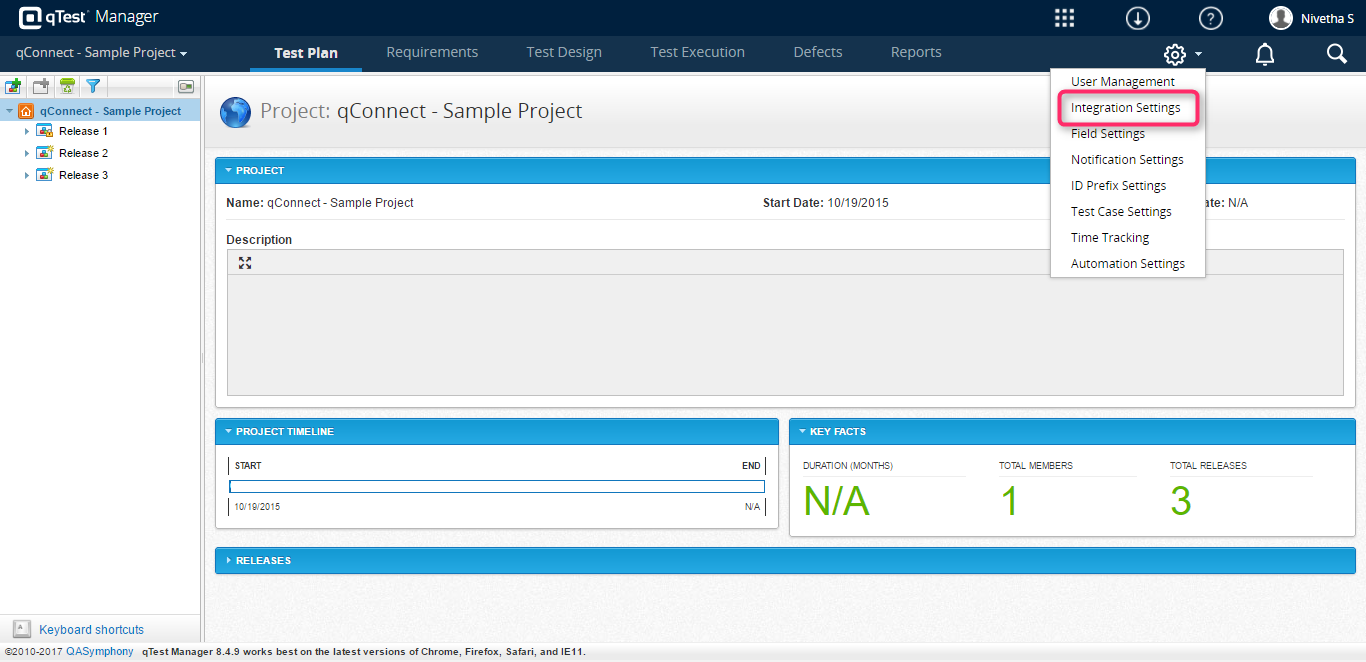 5. Select JIRA 6.0+
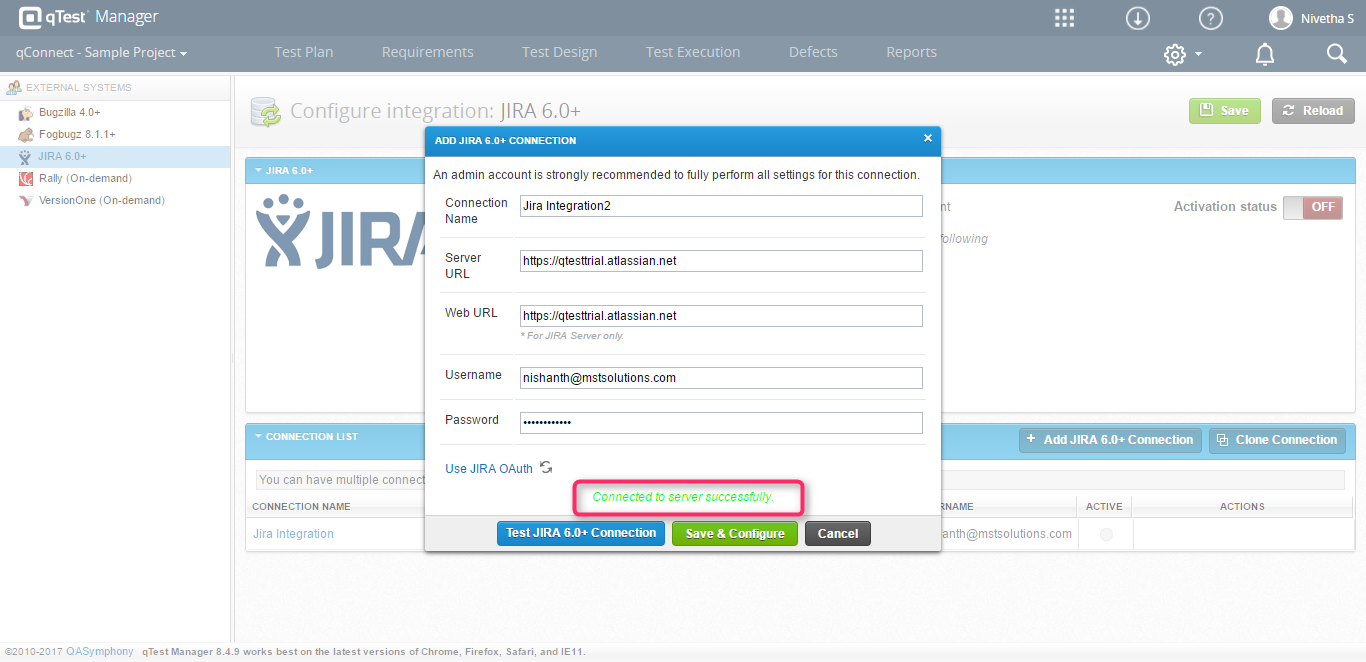
6. Click Add Connection button in the Connection List.
7. Enter the following information,
- Connection Name
- Server URL
- Web URL
- Username
- Password
8. Click Test JIRA 4.4+ Connection and verify whether it connected successfully.
9. Then click the Save button.
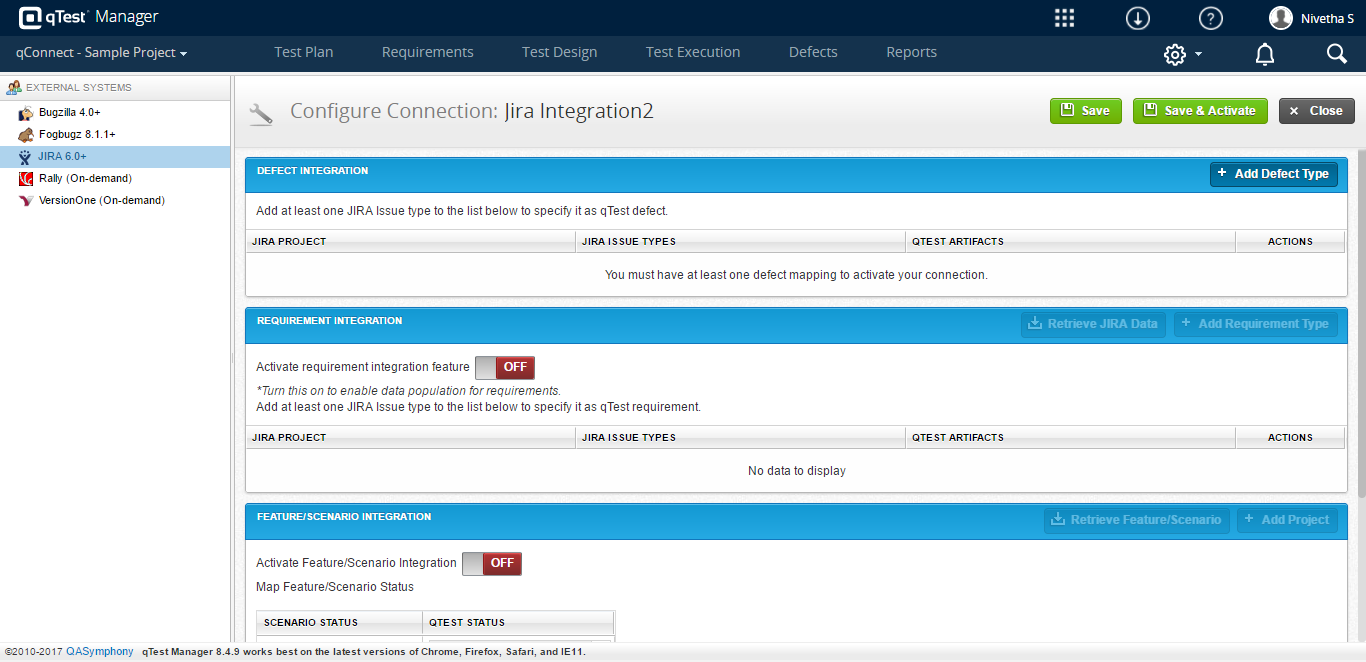
 10. After integrating the Jira with qTest, we should configure the connection.
Advantages:
- synchronizes the requirement with appropriate test cases.
- integrates with the external systems.
- creates custom fields.
- Saves our time by automatically recording the testing data on desktop, mobile and web-apps.
- Test cases can be import and export from Excel spreadsheets.
- Reuses the test cases and test suites across multiple projects.
- sends notifications if any updates or changes have been done.
Disadvantage:
- qTest being a cloud-based test management tool, we would face some loading issues if there are any internet issues.
Conclusion:
qTest is an impeccable solution for organizing and implementing the testing efforts in an efficient way. It helps users significantly enhance their productivity. As everything is done in one central place, the efforts become more centralized and result in improved collaboration.
