Introduction:
Sales Path is a visual assistant that guides reps through each of the stages required to complete a Sale to increase close rates.
Previously Sales Path was available only for opportunity for mobile user. Now it is also available for Desktop users for Opportunity and additionally Leads too.
Note: It is available only in Lightning Experience. Salesforce Classic doesn’t support this feature.
Configure:
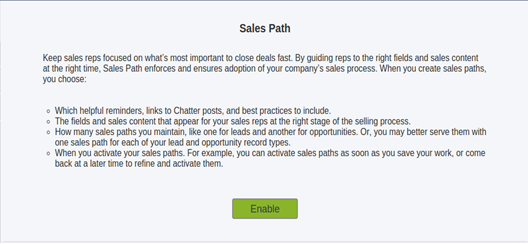
- From Setup, enter Sales Path in the Quick Find box, then select Sales Path setting
- Click Enable.

- To set up a sales path, click New Sales Path.
- Configure the Sales Path.
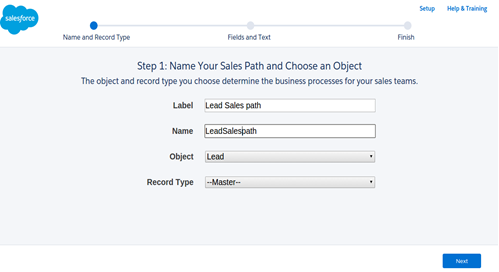
- Enter a name for this Sales path.
- Select either Lead or Opportunity.
- Select Record Type
*Note: If you are creating a new sales path and your organization has more than one record types, select which record type the sales path will be for. Each record type can have only one sales path.
- Click Next.

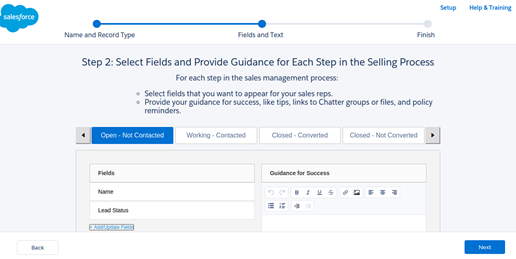
- Click add/update fields to show key fields for your sales reps.
- Add any guidance for success, like tips, links to Chatter groups or files, and policy reminders.

- Click next.
- If you are ready to publish, then select save and publish now. If not, select save and publish later.
- Finally click finish.

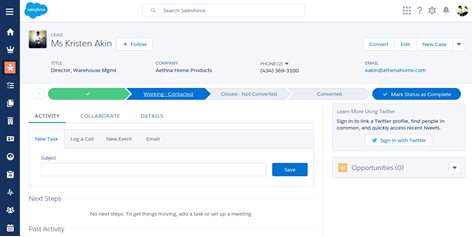
When the Status of lead or Stage in opportunity is complete, then the reps can Mark Stage as Complete to continue. The Lead and Opportunity progress to the next stage, displaying the key fields and information for the new stage.
Conclusion:
Previously Sales Path was only available for opportunity in Salesforce1, and wasn’t available in the desktop web version.
Now Sales Path available for Opportunity and Lead in Lightning Experience.
Reference:


