Salesforce Maps is a paid salesforce integration package that is available in both desktop and mobile. It has many functionalities that help the sales reps to understand the territories.
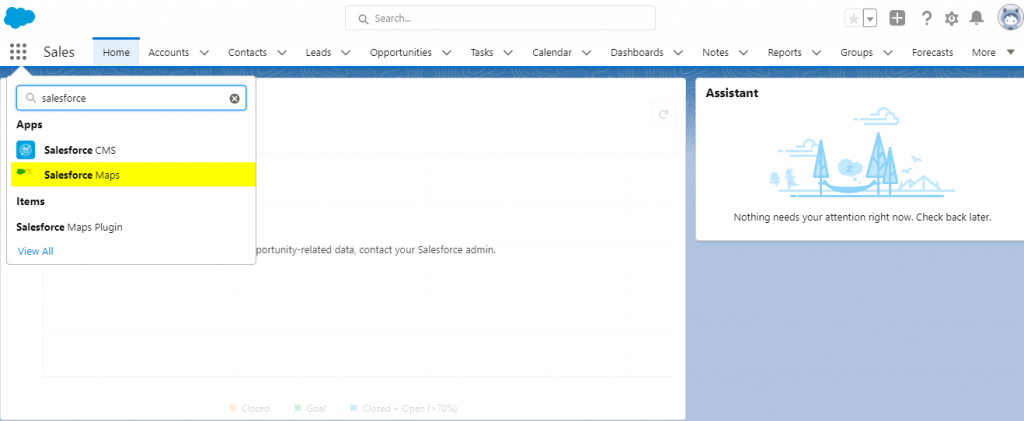
After the installation of Salesforce map, go to app launcher and type Salesforce maps application or Map tab. Then, you will be redirected to a screen that displays a map.
Map Screen
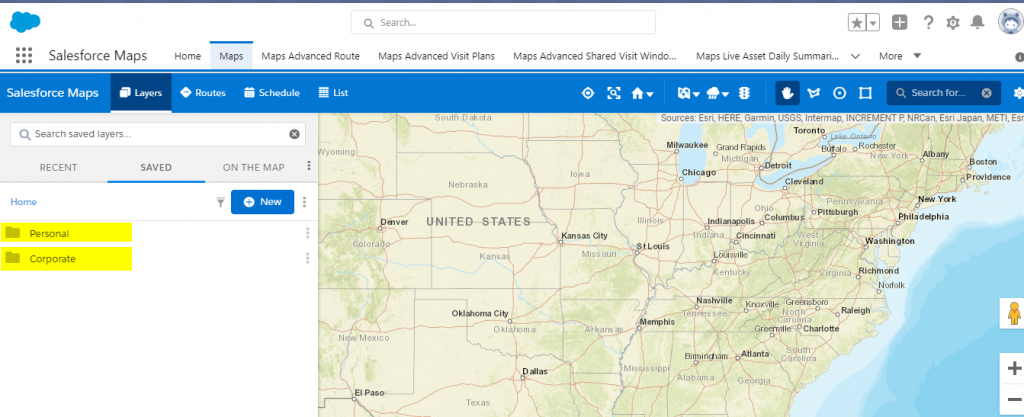
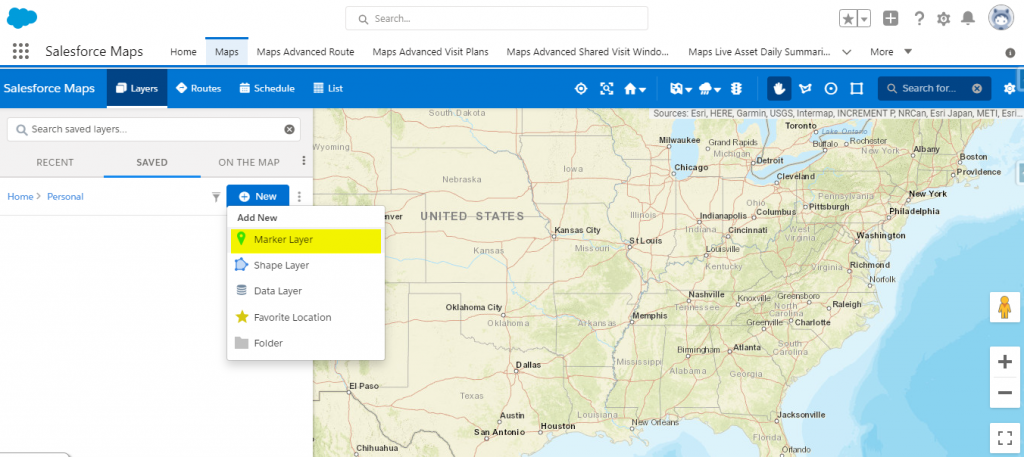
If we want to add a marker layer, we need to select an appropriate folder and create a marker layer and save it to the folder. We can also add multiple Marker layer at the same time

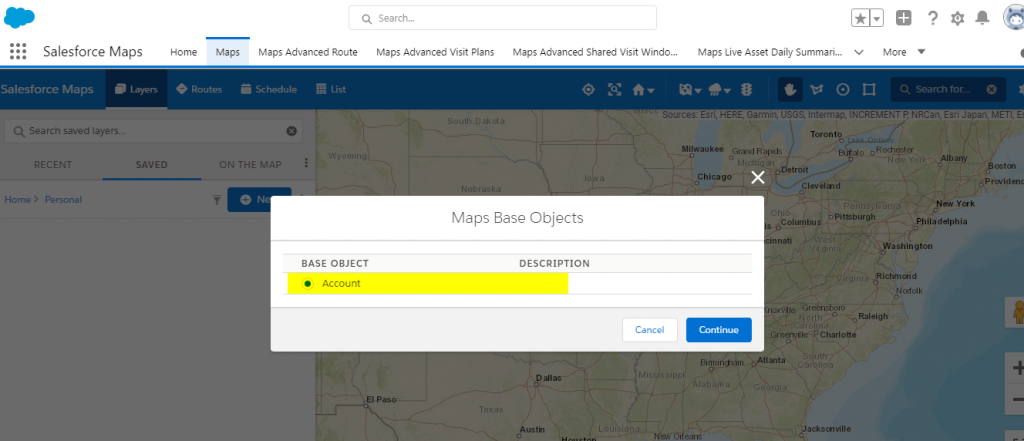
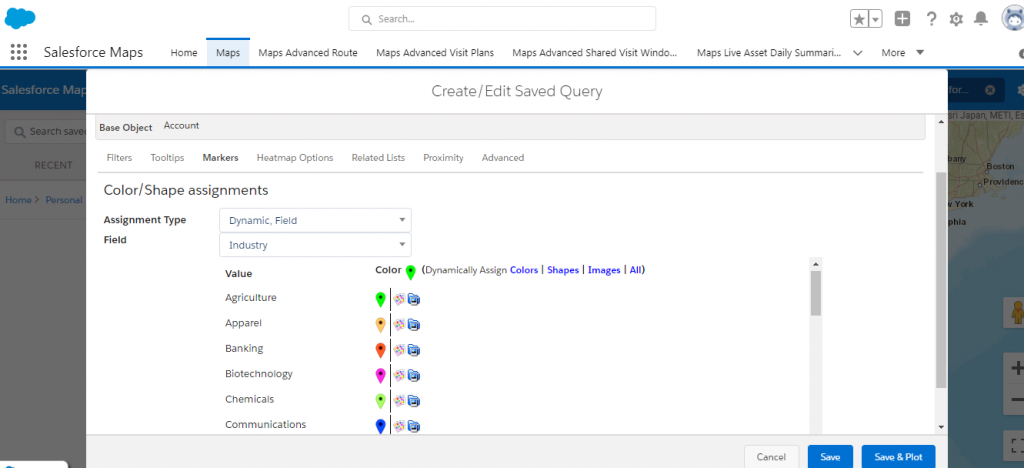
After that, we need to select base objects to create Marker Layer based on the Account Industry
Name the Marker and add filter condition if needed (e.g.: Account Name = MST) and click the tab Markers to differentiate the Account Industry with different Color Markers as shown below.

Shape Layer
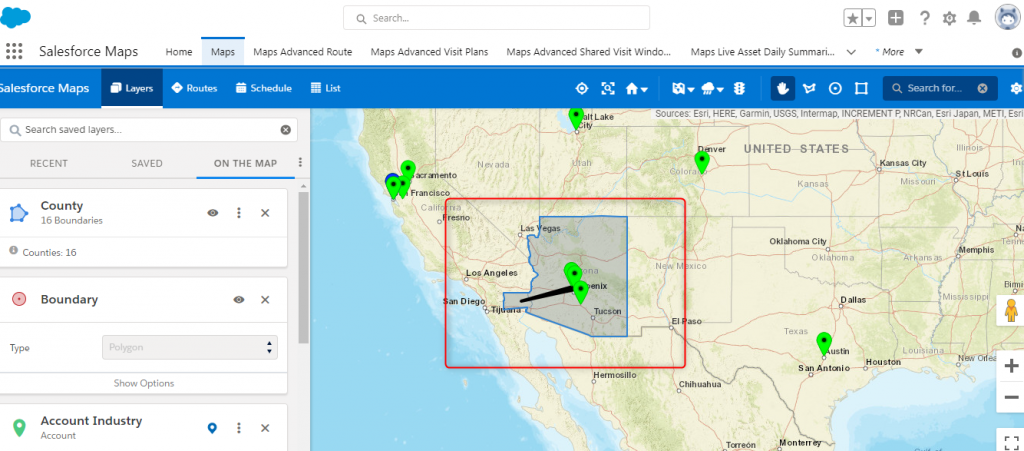
Shape layers allow us to find a particular territory. Suppose county lines define our sales region; in that case, the sales reps may want to create a shape layer that shows their county. It will help the reps and managers view how many active accounts are available using the marker in each defined shape layer.

Shape Layer screen
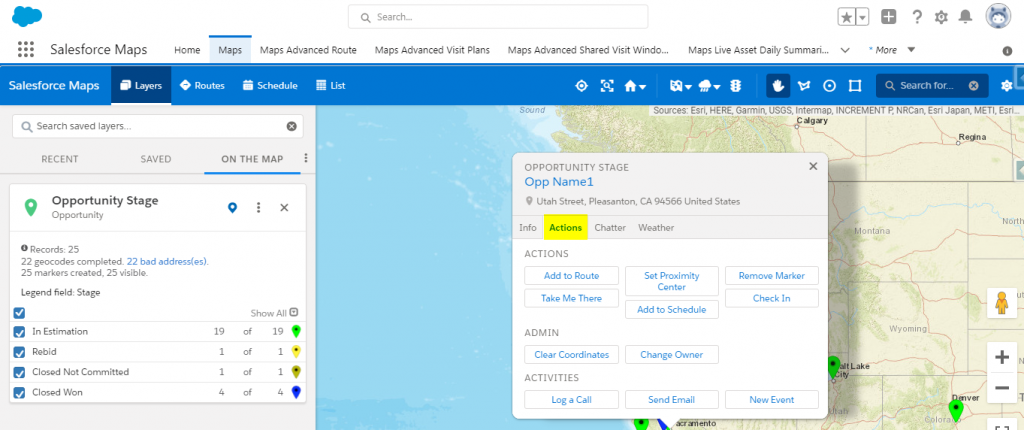
We can also define the record information when we click the marker layer on the map as shown below

Actions on Salesforce Maps
We can also add the action on the records by using the action tab on salesforce maps
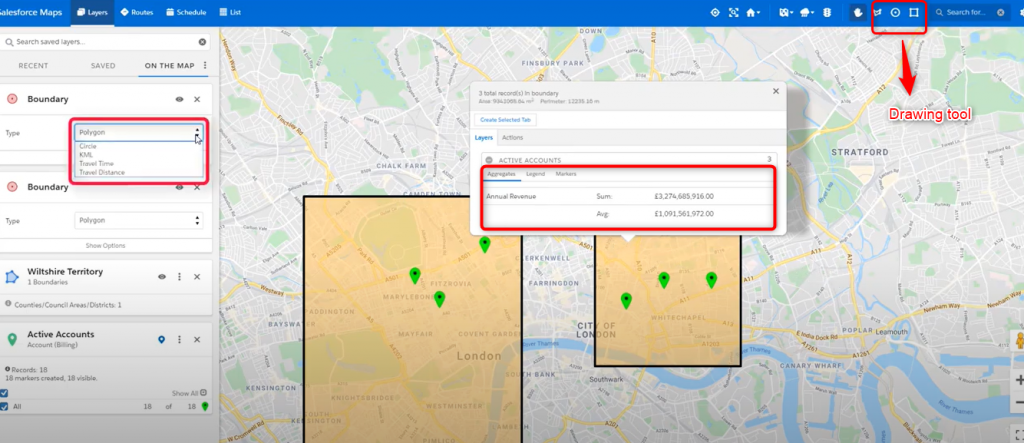
Drawing tool
Using a drawing tool, we can draw around the areas and we can compare, and aggregate data and we can find the travel time and distance.
Routes
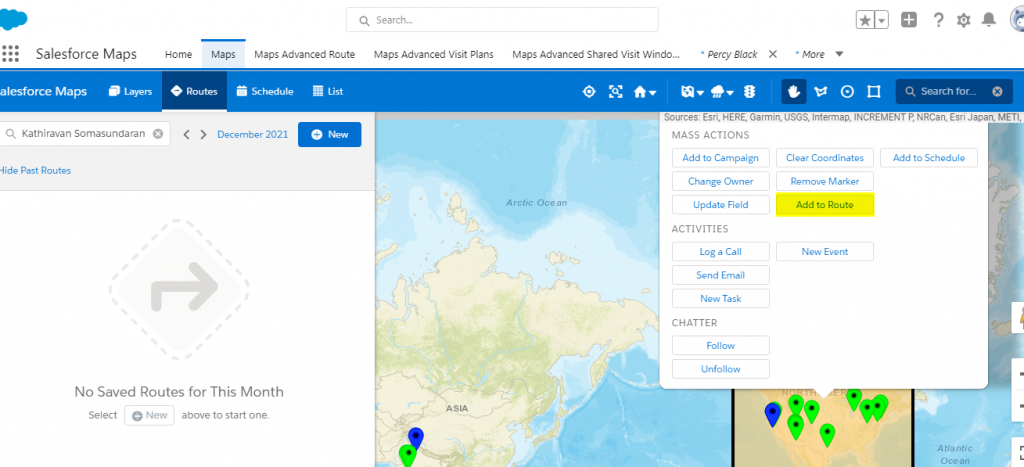
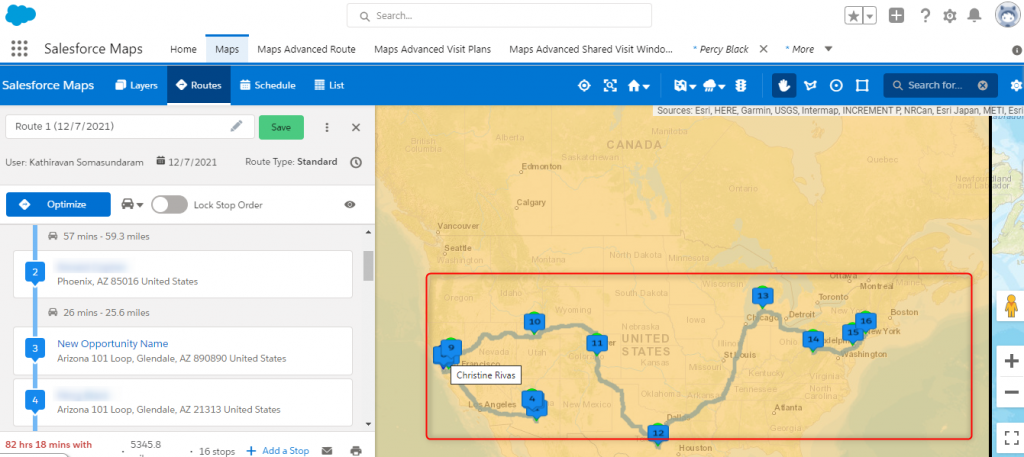
Using the routes tab, we can set the route information between the marker layer, and we can set the start and end point of the route. It gives the detailed information like travel distance and travel time between the marker layer as shown below. (By using drawing tool, draw the line between the marker layer and then click action and
add routes)
scheduling Functionality
It’s very similar to route functionality. We can set the travel plan.
Conclusion:
- Visualize and manage sales territories: Geographic sales territories can be managed by dividing them up by your Salesforce CRM data, such as geography, new or existing customers, product requirement, customer revenue, and sales type.
- Visualize sales data on a map-based interface: You can visualize revenue, rep activity, and other metrics based on the sales territories, which can be used to guide location-based decision-making.
- Create sales routes: Using the defined sales territories, you can create optimized sales routes to give your reps the fastest, most efficient way to visit specific customers and prospects.
- Find nearby accounts on the map: You will be able to fill in gaps with nearby accounts if needed by your sales reps as they travel around the region.
- Share and collaborate: You can access exchange-based calendars and maps on your desktop or mobile device to view schedules, routes, and territories.


