Single Sign-on:
Single Sign-On is a process that permits network users to access all authorized network resources without having to log in separately to each resource. It allows you to validate usernames and passwords against your database or other client application rather than having separate user passwords managed by Salesforce.
Salesforce provides the following ways to use single Sign-On:
Federated authentication
Federated authentication using Security Assertion Markup Language (SML). It allows to send an authentication and authorization data between the unrelated web services. This enables you to log into Salesforce via client application.
Delegated authentication
It enables you to integrate authentication with your LDAP, and it performs login by using token instead of a password. It can be managed at the permission level by allowing some users to use delegated authentication and some users to use Salesforce-managed passwords.
Benefits of Single Sign-on
Reduced Administrative Costs:
Using single sign-on, users only need to memorize single password for accessing all the network resources including Salesforce. Users are logged in seamlessly, without being prompted to enter a username or password
Leverage Existing Investment
As many companies are using LDAP as their database, removing a user from the network is very easy, by using the single sign-on methodology. Besides, there is no need to set up the user for each application.
Time Saving
Users need to log just into a central system to access the Salesforce and any network resources; so, there is no need to log into each application in the network. It really saves users’ time a lot.
Increased User Adoption:
Since users are not required not use multiple logins and passwords, users are more likely to use Salesforce on a regular basis.
Single Sign-on using LinkedIn
Step 1:
Under Administer section Navigate to Security Controls Auth. Providers and click New, and select Provider Type as LinkedIn, enter the name, URL Suffix, and click Save.
Step 2:
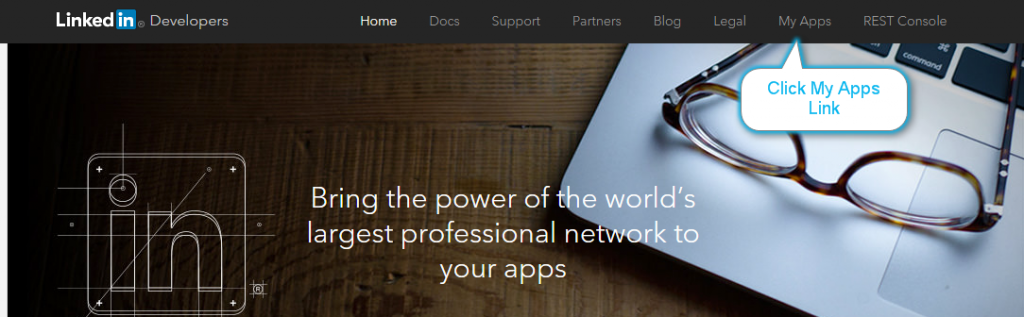
Go to https://developer.linkedin.com, and click My Apps Link from the Main Menu
Step 3: Enter your LinkedIn Credentials

Step 4: Click Add New Application Link

Step 5:
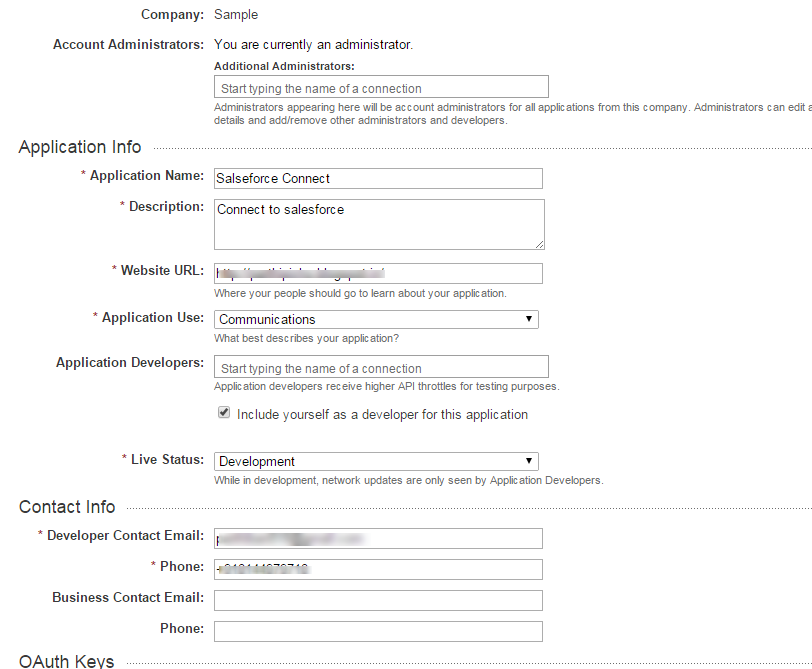
Enter the details for the following fields (Company, Application Name, Description, Website URL, Application Use, Live Status, Developer Contact Email and Phone)
In the Default Scope section, check the r_emailaddress check box, and click the Add Application button.
Step 6:
Click the Single Sign on link under your application created in the above steps

Step 7:
Scroll down to the OAuth Keys section and copy the API Key & secret Key
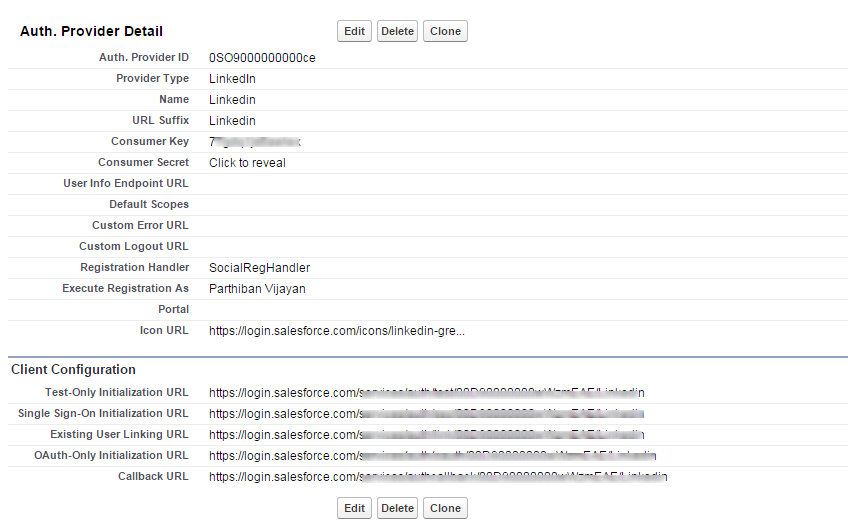
Step 8:
Go back to Salesforce and navigate to Security Controls Auth. Providers and open the Auth Provider record created before, and paste the API Key and Secret Key in the Consumer Key and Consumer Secret fields.

Step 9:
Copy and paste the Apex class from the below link
(https://raw.githubusercontent.com/parthiban019/social-signon-reghandler/master/SocialRegHandler.cls )
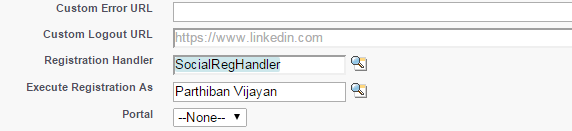
Select the saved Apex class for the Registration Handler field, and select the SF administrator user for the Execute Registration As field, and click save.
Step 10:
Copy the Callback URL in the Created Auth. Provider record
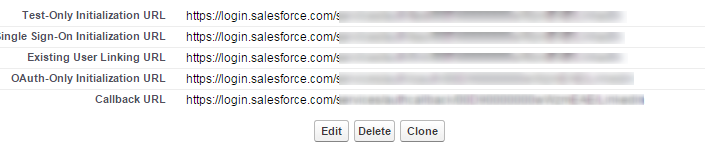
Step 11:
Open your Application in the LinkedIn and paste the Callback URL to the OAuth 2.0 Redirect URLs field, and click save.

Step 12:
Go to your Salesforce account; under Administer section, navigate to Domain Management My Domain; enter the desired domain name, and check for the availability. If the Domain name is available, click the Register Domain button.

Once the Domain is registered, click the Click here to login button and click Deploy to Usersbutton
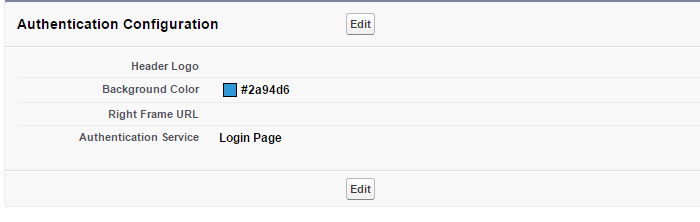
Step 13:
Then in the Authentication Configuration section click edit button.
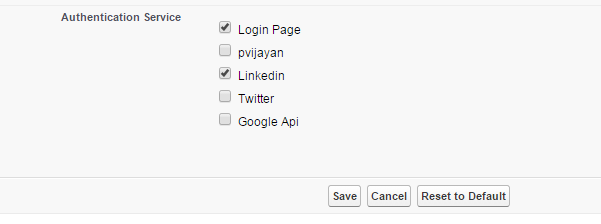
Step 14:
In the Authentication service section, check the Auth provider name (i.e. LinkedIn) and click save.
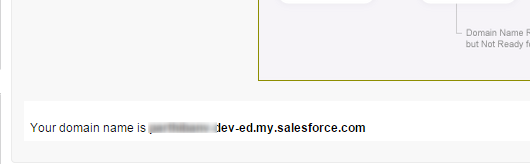
Step 15:
Now Under Administer Section, navigate to Domain Management My Domain and copy your custom domain name as shown in the image below, and log into the custom domain on a different browser window.
Step 16:
Now you can see the new button named LinkedIn is displayed in the login page and click that LinkedIn button.
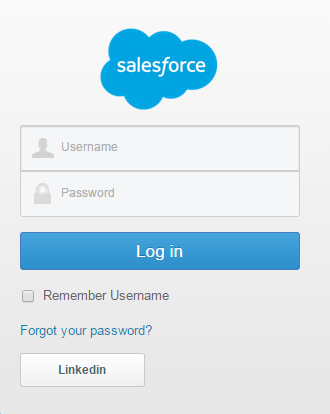
Step 17:
It navigates to the LinkedIn login page and enter your LinkedIn credentials enter your LinkedIn credentials and click Allow Access Button.
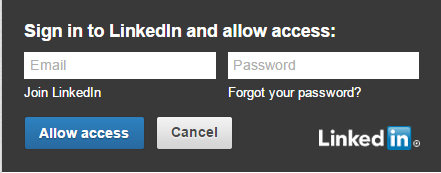
Step 18:
After you enter your credentials, it automatically create a user for you in Salesforce and lets you log into Salesforce automatically.
Conclusion:
The Single Sign-on feature in Salesforce is more convenient for your users, as they can log into Salesforce by using LinkedIn credentials, and ultimately it saves users’ time a lot.
Reference Link: