Jira is a project management and bug tracking tool. In this article, we can see how to use Jira as a test management tool.
TestFlo is a paid add-on which can be used in Jira. We can install the TestFlo add-on in Jira to write test cases. By installing this add-on, we can manage the test cases in Jira. In this article, we will explore the following topics in detail.
- TestFlo with Jira
- Steps Repository and Test Design
- Steps Execution
- Defects
- Reports
1.TestFlo with Jira
1.1. Installing TestFlo in Jira
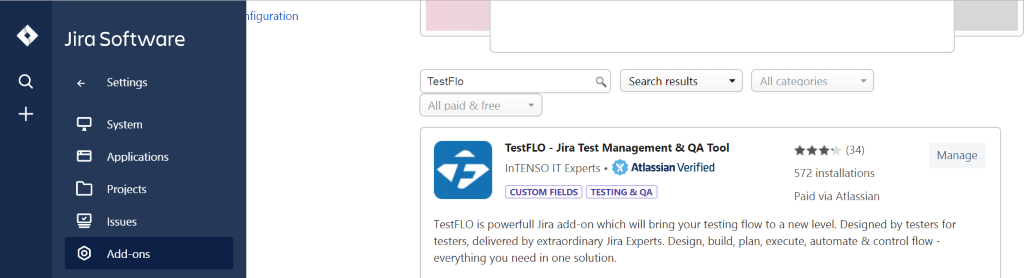
Click on Settings and install ‘TestFlo – Jira Test Management tool’ from ‘Add-ons’.
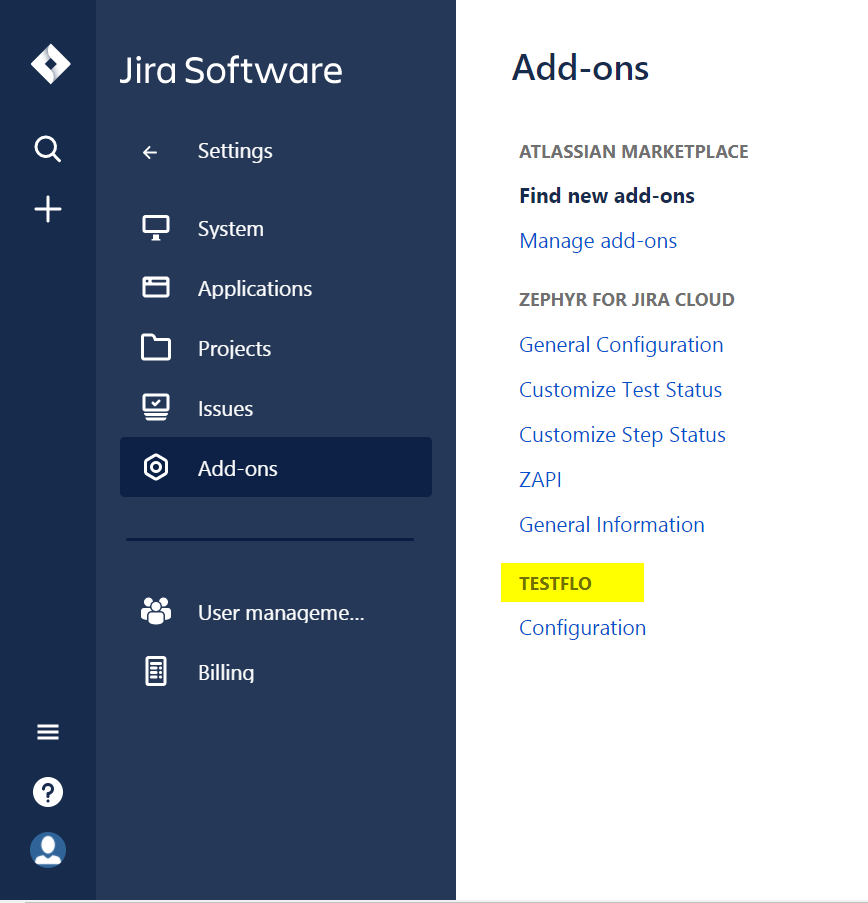
Following page with the ‘TestFlo’ will be displayed after installation.
1.2. Configurations of TestFlo
There are two types configuration such as Global configuration and Project configuration in TestFlo. The project will be accessible only after the global and project configuration is done.
1.2.1. Global Configuration:
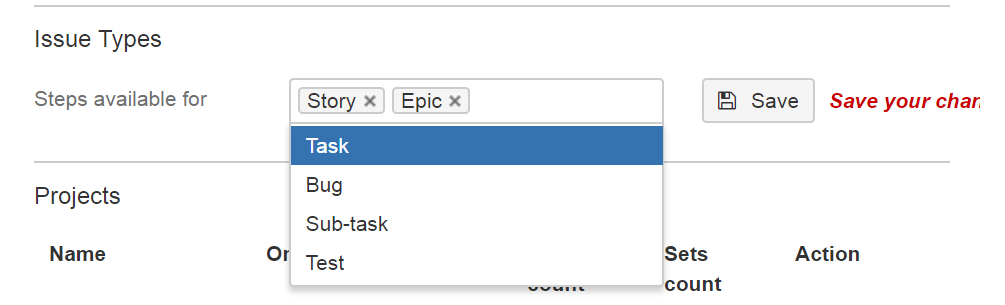
In Global configuration, we can select type of issues such as bugs, epic, task, story for which steps panel will be available.
We can set the Global Configuration by navigating into JIRA Administration -> Add-ons -> TESTFLO -> Configuration.

Issue types:
We can specify the issue types for creating steps or enabling the steps panel for those to every project by selecting that in ‘Steps available for’ field.
Projects:
Under the issues types, we can find information about every project such as,
- TestFLO activation (On/Off)
- Roles allowed to create and edit steps (Role)
- Number of issues with steps created in steps panel (Issue count)
- Number of step sets in Test Steps Repository (Sets count)
- Project configuration page for the corresponding project will be displayed after clicking the ‘Configuration’ links (Action)
1.2.2. Project Configuration
We must activate the ‘TestFLO availability’ slider if we want to add TestFLO in the selected project. So that, TestFLO will be added to the corresponding project.
We can use repository of steps from another project by selecting the corresponding project.
We can make change in issues types which was selected in Global configuration by using ‘Change in Global Configuration’ Link.
Permission settings:
We can restrict the test step creation and edit permission by assigning roles to the corresponding project in ‘Permission settings’.
Step View:
We can provide the custom names for each field present in the ‘Step View’ section. Fields with no values will not be displayed on the steps.
button is used to go back to the default configuration values.
2.Steps Repository and Test Design
2.1. Steps Repository
In Test step repository, we can define the common test steps such as Login details, which we frequently use while we are writing the test cases.
2.1.1. Manual Creation of Steps Repository
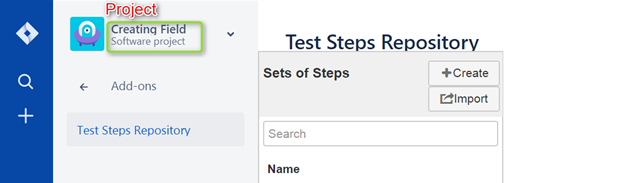
Select the project and choose Add-ons -> Test Steps Repository.
Click the ‘Create’ button to add new set of steps to the repository
Fill the set name and create the template with description
We can also edit the set name and description by clicking next to the name of Set Steps or delete the whole set using
button.
We can add the steps with Action, Input, Expected Result.
- For deleting the step, we can use delete icon as
- For copy pasting the step, we can use the icon as
icon is used to move to a next step from the current step
icon is used to move to a first step
If we have a bigger repository, it may get difficult to find the right template. So, we can use the search box to get the right set of steps.
2.1.2. Importing Steps repository
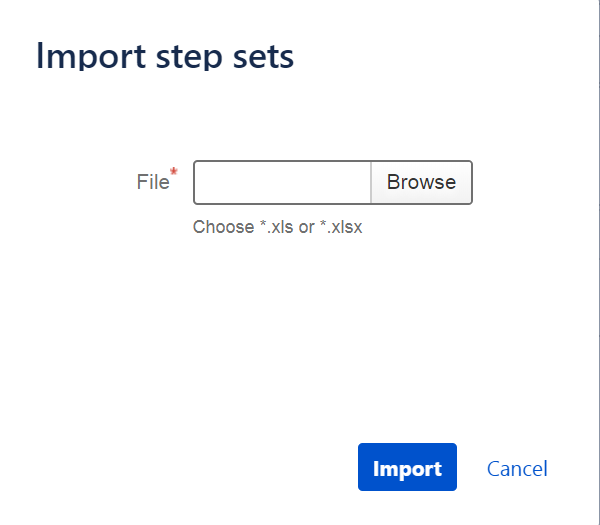
We can import the set of steps directly by clicking the ‘Import’ button and the imported steps will be displayed on ‘Set of Steps’.
Click ‘Browse’ button and choose the xls/xlsx file that contains the Steps to be imported.
Some column header should be added mandatory to import the file. They are as follows,
- SetName – Step name
- SetDescription – Step description
- StepId – ordinal number of Step row
- Input
- Expected result
2.2. Test Designs
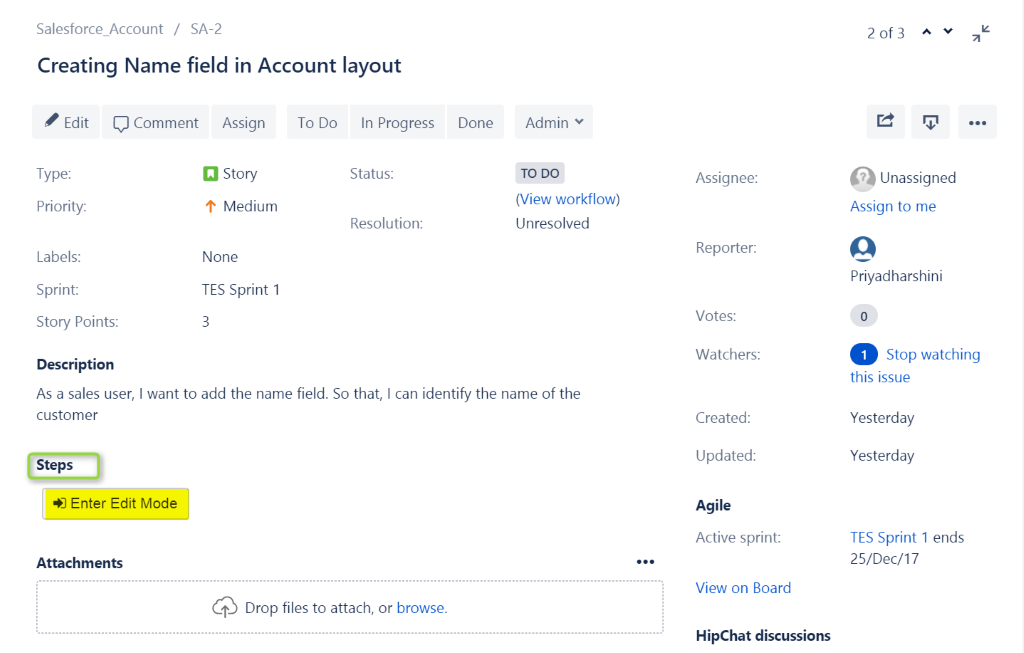
Test designs can be done under an issue(story) in Jira. Before creating the test designs, issue should be created. We can also include the Set of Steps created on the ‘Steps Repository’.
Click on ‘Enter Edit mode’ button present under the Steps
After clicking the button, and
will be displayed as shown below.
After clicking , test design creation panel will get displayed with Action, Input and Expected Result
We can also include the test steps from Steps repository by clicking .
We can select the steps which is shown from the list.
Note: Empty sets without having the steps will not be displayed.
We can add many steps one after another by using .
We can add a row over the first step by using .Empty row will appear at the top after clicking this button as shown below.
It will support all the weblink we are using in Action, Input and Expected Result
After clicking the steps will look like,
If we need to delete a step, we can delete it by using . We can also copy the given step by using
3.Test Execution
By using TestFlo, we can execute the testcases we have written it. After executing the test steps, we can also attach the documents, post the comments or create a defect.
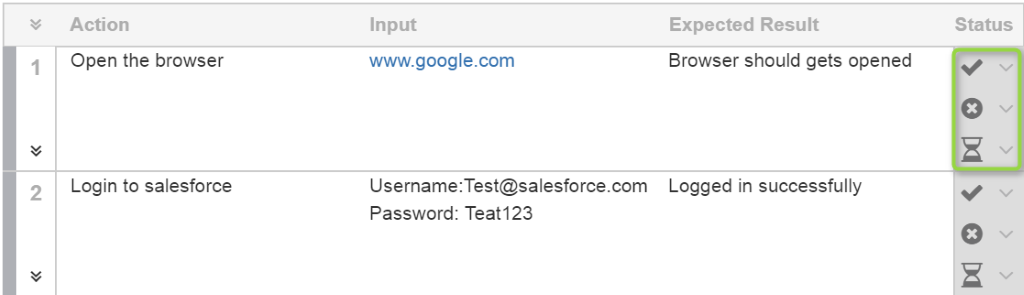
Each step contains three different buttons such as,
– Indicates “Pass”
– Indicates “Fail”
– Indicates “In-progress”
If we want to execute all the steps within a time instead of step by step execution, we can click button which changes all the status of steps respectively.
Test execution progress can be monitored at the top of the test cases. It displays the progress with percentage and gets automatically updated when we execute the test cases.
3.1. Posting the Comments
After clicking icon besides to Actions or corresponding steps number, it will display the comment section.
After clicking icon, the comment gets saved. If we click
icon, the comments get deleted. After adding comment,
icon will be displayed below the step number
3.2. Adding the Attachment
We can add attachment in all the steps same as comments we are adding over each step.
Click icon to add the attachment. We can download the attachment by using
icon and can delete by using
.
After adding attachment, icon will be displayed below the step number.
4.Defects
We can add a defect with the specific step in the test case. We can create new defect or we can link the existing defect.
4.1 Creating defects
Defect can be created by clicking icon or by clicking
icon. After entering the defects details and screenshot, click the ‘create’ button.
Defect will be created and linked under the test step.
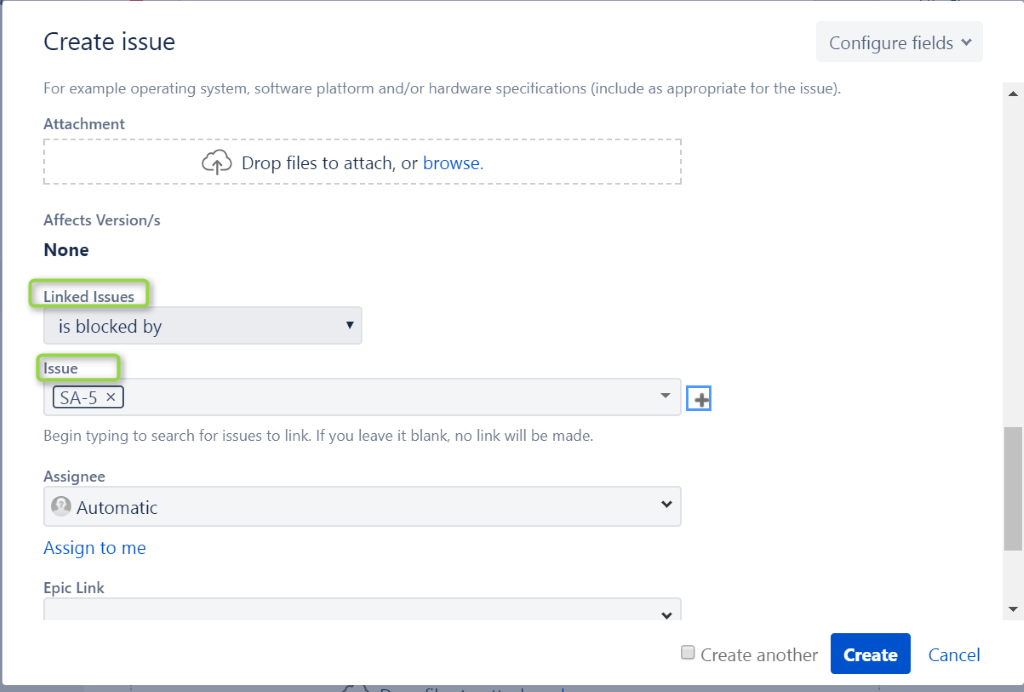
4.2. Linking existing defects
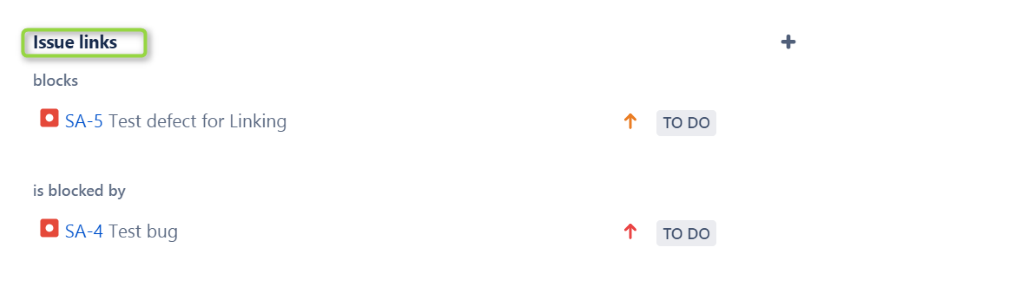
We can also link the existing defects with the requirement.
Click on the ‘+’ symbol besides to the Issue links.
Issue creation page will be displayed. By using the + icon, we can link the issues. Linked issues has many option as shown below.
After linking the issues to the requirements, the defects will be displayed under ‘Issue Links’ as shown below.
5.Reports
Click on Projects -> Reports-> Select the report from the list of reports

Sample view of Reports:
Sprint Report
Thus, we can make use of TestFlo add-on in JIRA for creating test designs rather than maintaining a separate test case document or a separate test management tool.
